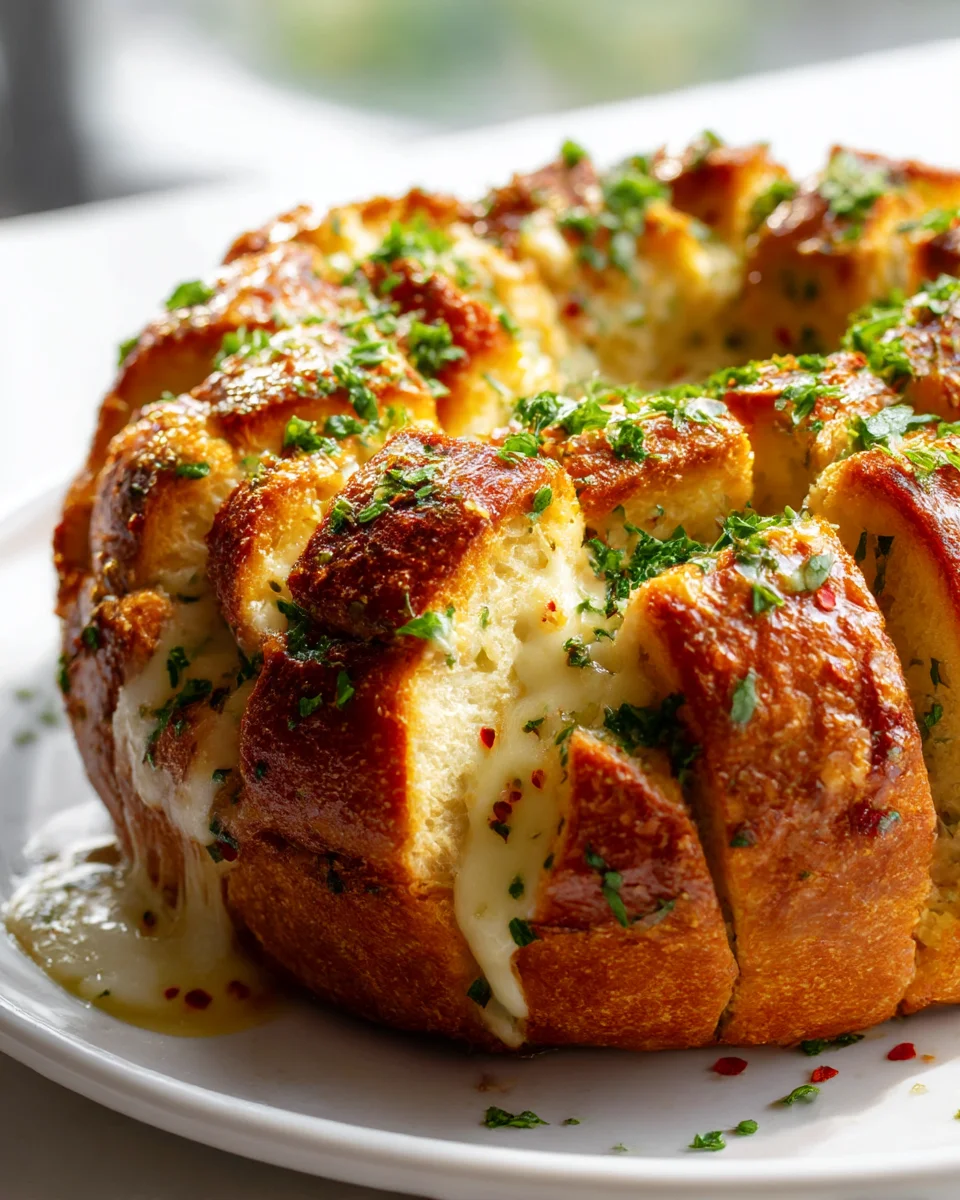
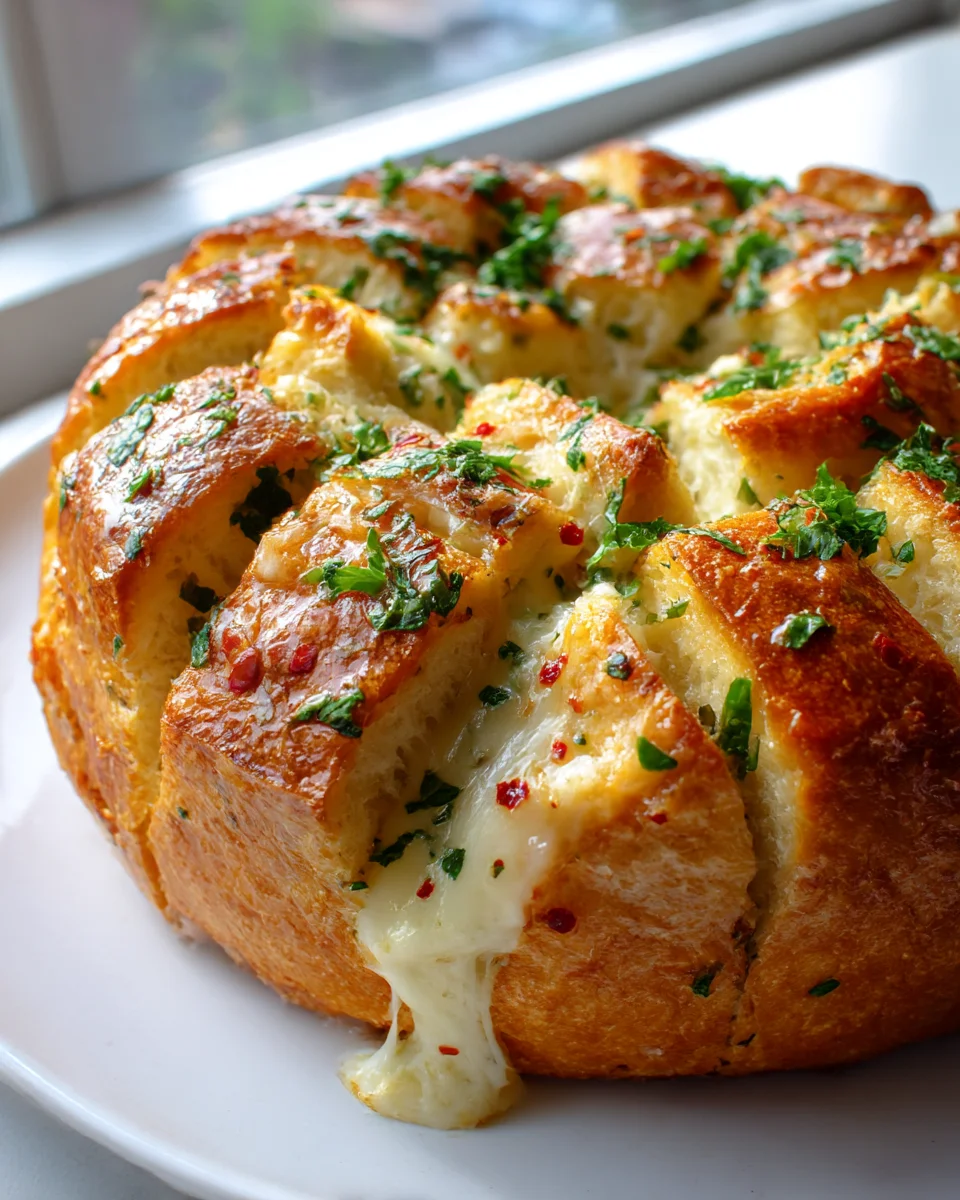
Mozzarella Garlic Bread Pull Apart Loaf
Oh, prepare yourselves for a true masterpiece of comfort food! Today, I’m absolutely thrilled to share the recipe for the Mozzarella Garlic Bread Pull Apart Loaf. This isn’t just any garlic bread; it’s a glorious, golden-brown loaf brimming with buttery garlic goodness and generous pockets of gooey, stretchy mozzarella cheese, all designed for ultimate shareability.
What makes this particular recipe so incredibly special, you ask? Well, it’s the ingenious pull-apart design! Instead of serving individual slices, we’re taking a beautiful loaf of bread, slicing it almost all the way through, and then stuffing every single crevice with an irresistible mix of aromatic garlic butter and copious amounts of melting mozzarella. Then, it bakes up into a warm, inviting masterpiece where each piece is easily torn away, creating an interactive and deliciously messy experience that everyone adores.
You, my dear reader, are going to absolutely adore making and, more importantly, devouring this! It’s the ultimate crowd-pleaser for any gathering, from a casual family dinner to a lively party, or even just a cozy night in. There’s something undeniably satisfying about pulling apart a warm, cheesy, garlicky slice straight from the loaf. It’s comfort food at its finest, promising that delightful burst of flavor and gooey texture with every single bite. Get ready to experience garlic bread like never before – full of cheesy stretches and garlicky bliss!
Ingredient Notes
There’s nothing quite like a warm, cheesy, garlic-infused loaf of bread, and my Mozzarella Garlic Bread Pull Apart Loaf is truly a showstopper! To achieve that perfect balance of crispy exterior, soft interior, and gooey, flavorful cheese, the ingredients you choose make all the difference. Here’s a breakdown of what I recommend and some handy substitutions.
The Bread Loaf
- What I use: A good quality, crusty loaf is non-negotiable for this recipe. I typically reach for an Italian loaf, French bread, or even a sturdy sourdough. The key is a loaf that has a decent crust and isn’t too soft, as it needs to hold its shape and absorb all that delicious garlic butter without falling apart. A long, narrow shape works best for the ‘pull apart’ effect.
- Substitutions: If you can’t find a dedicated Italian or French loaf, a ciabatta or even a rustic artisan bread can work beautifully. Just make sure it’s not overly dense, which might make it hard to cut and stuff. A day-old loaf can sometimes be even better as it holds up well to the moisture from the butter and cheese.
Mozzarella Cheese
- What I use: For the ultimate melt and stretch, I always go for low-moisture, part-skim mozzarella. Shredding your own from a block is my top tip because pre-shredded cheeses often contain anti-caking agents that can hinder that lovely, gooey melt we’re after. The mozzarella is the star here, providing that creamy, salty contrast to the sharp garlic.
- Substitutions: While mozzarella is traditional, you can certainly experiment! Provolone offers a sharper, tangier flavor, while Monterey Jack will give you an incredibly smooth melt. A blend of mozzarella and parmesan is also fantastic, adding an extra layer of savory depth. For a dairy-free option, there are many excellent plant-based mozzarella shreds available today that melt quite well.
Garlic and Butter
- What I use: Fresh garlic is paramount. I’m talking about several cloves, finely minced or pressed, because the aroma and flavor of fresh garlic are simply unmatched. Paired with unsalted butter, it creates the most aromatic and irresistible garlic butter. Using unsalted butter allows me to control the salt content in the dish.
- Substitutions: While fresh is best, if you’re in a pinch, pre-minced garlic from a jar can work, but reduce the quantity slightly as it can be more potent. Garlic powder is a last resort, but it won’t give you the same fresh zing. For a dairy-free alternative, plant-based butter sticks are a fantastic swap and melt just as beautifully.
Herbs and Seasonings
- What I use: Fresh parsley, finely chopped, adds a burst of color and a fresh, peppery note that brightens up the rich flavors. A touch of dried oregano or Italian seasoning also complements the garlic and cheese beautifully. A pinch of red pepper flakes can be a wonderful addition if you enjoy a little heat.
- Substitutions: If fresh parsley isn’t available, dried parsley will work, but use about a third of the amount as it’s more concentrated. Fresh basil is another delightful herb to include, especially if you’re serving this alongside a tomato-based dish.
Step-by-Step Instructions
Getting this magnificent loaf onto your table is surprisingly simple, yet the results are incredibly impressive. Follow these steps, and you’ll have a warm, fragrant, and utterly delicious pull-apart garlic bread ready in no time!
- Preheat & Prep Your Pan: First things first, preheat your oven to 375°F (190°C). Then, line a baking sheet with parchment paper or a silicone mat. This helps with easy cleanup and prevents any potential cheese drips from sticking.
- Prepare the Loaf: Take your chosen bread loaf and carefully slice it crosswise at about 1-inch intervals, but here’s the crucial part: do NOT slice all the way through the bottom crust. You want to create deep pockets, like an accordion, that remain connected at the base. Then, make similar cuts lengthwise down the center of the loaf, again, not cutting all the way through. This crosshatch pattern is what creates all those wonderful ‘pull apart’ sections.
- Make the Garlic Butter: In a small saucepan or microwave-safe bowl, melt about 1/2 cup (1 stick) of unsalted butter. Once melted, stir in 4-5 cloves of finely minced fresh garlic, 2 tablespoons of freshly chopped parsley, and 1/2 teaspoon of dried oregano (if using). If you like a little kick, add a pinch of red pepper flakes. Season with a tiny pinch of salt and black pepper to taste.
- Stuff with Flavor: Gently open up the cuts in your bread loaf. Using a pastry brush or a spoon, generously brush the garlic butter mixture into all the crevices, making sure to get it deep into the cuts. Don’t be shy – this is where all that amazing flavor comes from!
- Layer in the Cheese: Now for the best part: the mozzarella! Take about 2 cups of shredded low-moisture mozzarella and carefully stuff it into all the buttered crevices. Really get that cheese down into every nook and cranny. I love to make sure there’s plenty peeking out for that beautiful golden crust.
- Wrap it Up: Once stuffed, carefully wrap the entire loaf tightly in aluminum foil. This initial wrap helps to steam the bread, melt the cheese evenly, and prevent the crust from burning too quickly.
- Bake (First Round): Place the foil-wrapped loaf on your prepared baking sheet. Bake for 20 minutes in the preheated oven.
- Unwrap & Finish Baking: After 20 minutes, carefully remove the foil. The cheese should be mostly melted, and the bread warmed through. Return the unwrapped loaf to the oven for another 10-15 minutes, or until the cheese is bubbly, golden brown, and slightly crispy around the edges, and the top of the bread is nicely toasted.
- Serve Immediately: This loaf is best enjoyed hot out of the oven. Transfer it to a serving board and let everyone pull apart their own cheesy, garlicky sections. Be warned, it disappears fast!
Tips & Suggestions
Making this Mozzarella Garlic Bread Pull Apart Loaf is already fantastic, but with a few extra tips, you can elevate it from great to absolutely unforgettable. Here are some of my go-to suggestions:
- Choose Your Loaf Wisely: As I mentioned, a good, sturdy loaf is key. Avoid anything too soft or flimsy, as it won’t hold up to the stuffing and pulling. A day-old crusty loaf can sometimes be easier to cut and less likely to tear.
- Don’t Be Afraid of the Garlic: I always say, you can never have too much garlic! Roasting your garlic cloves beforehand will mellow their pungency and give them a sweeter, nuttier flavor. Just wrap unpeeled cloves in foil with a drizzle of olive oil, and roast in the oven alongside something else for 20-30 minutes, then mash and add to your butter.
- Shred Your Own Cheese: This is a game-changer for meltability. Pre-shredded cheeses often contain cellulose or starches to prevent clumping, which can lead to a less gooey and smooth melt. A block of low-moisture mozzarella and a grater are your best friends here.
- Customize Your Filling: This recipe is a fantastic base for experimentation!
- Extra Flavor: A sprinkle of grated Parmesan or Pecorino Romano cheese adds a salty, umami kick.
- Spice It Up: Add more red pepper flakes for a spicier version, or even a dash of cayenne pepper.
- Add Veggies: Finely chopped sun-dried tomatoes, roasted red peppers, or even a few spoonfuls of pesto can be layered in with the cheese for extra flavor and color.
- Savory Meats: For a heartier loaf, you could add cooked, crumbled beef bacon or tiny cubes of cooked pepperoni to the mix. Just make sure they’re not too large to fit in the crevices.
- The Foil Trick is Crucial: Don’t skip the initial foil wrap! It helps to create a steamy environment that melts the cheese thoroughly and warms the bread through without drying it out or burning the crust. Removing it towards the end gives you that beautiful golden-brown, slightly crispy top.
- Serving Suggestions: This pull-apart loaf is incredibly versatile. It makes an amazing appetizer for parties, a delicious side dish for pasta dinners, or a comforting accompaniment to a hearty soup or chili. I sometimes even serve it with marinara sauce for dipping!
Storage
While this Mozzarella Garlic Bread Pull Apart Loaf is truly at its best when served fresh, hot, and gooey right out of the oven, I understand that sometimes, there are leftovers (though it’s rare in my house!). Here’s how I handle storing and reheating:
- Cool Completely: If you do have any glorious remnants, let them cool down completely to room temperature before storing. This prevents condensation, which can make the bread soggy.
- Airtight Storage: Once cooled, I recommend wrapping the leftover loaf tightly in aluminum foil, or placing it in an airtight container or a resealable plastic bag. This will help to keep the bread from drying out.
- Refrigeration: Store the wrapped or contained loaf in the refrigerator for up to 2-3 days. Because of the cheese and butter, it’s best not to leave it at room temperature for too long.
- Reheating for Best Results:
- Oven Method (Recommended): This is my preferred method for reheating, as it helps to restore some of that crispy crust and gooey cheese. Preheat your oven to 350°F (175°C). Place the leftover loaf (you can wrap it loosely in foil again to prevent excessive browning if you wish, or leave it unwrapped for a crispier result) directly on a baking sheet. Heat for about 10-15 minutes, or until the cheese is melted and bubbly again, and the bread is warmed through.
- Air Fryer Method: If you have an air fryer, this can also work wonderfully for smaller portions. Place a few pieces in the air fryer basket at 325°F (160°C) for 3-5 minutes, checking frequently to avoid burning, until hot and crispy.
- Microwave (Use with Caution): While technically possible, I generally try to avoid the microwave for reheating this garlic bread. It tends to make the bread soft and chewy rather than crispy, and the cheese can become rubbery. If you must use it, heat in short bursts (20-30 seconds) until just warmed through.
- Freezing: I don’t typically recommend freezing the fully baked loaf, as the texture of the bread and cheese can suffer upon thawing and reheating. However, if you wanted to prepare ahead, you could assemble the loaf (steps 1-5), wrap it very tightly in several layers of plastic wrap and then foil, and freeze for up to 1 month. When ready to bake, thaw in the refrigerator overnight, then proceed with the baking instructions, potentially adding an extra 5-10 minutes to the initial covered bake time.
Final Thoughts
And there you have it! What’s not to love about the Mozzarella Garlic Bread Pull Apart Loaf? This isn’t just any bread; it’s a symphony of warm, garlicky aroma, gooey melted mozzarella, and tender bread, all designed for pure, unadulterated enjoyment. I truly believe the experience of pulling apart each cheesy, flavorful bite is what makes the Mozzarella Garlic Bread Pull Apart Loaf an absolute winner for any gathering, a cozy night in, or as the star side dish. It’s incredibly satisfying to share (or not!) and always brings smiles. Go on, give this fantastic recipe a try – I promise you, it’s a culinary hug you won’t want to miss!

Irresistible Mozzarella Garlic Bread Pull Apart Loaf
- Total Time: 45 minutes
- Yield: 4 servings 1x
Description
This Mozzarella Garlic Bread Pull Apart Loaf is a glorious, golden-brown masterpiece brimming with buttery garlic goodness and gooey mozzarella cheese. Perfect for sharing, it promises a delightful burst of flavor and texture with every cheesy, garlicky pull.
Ingredients
- 1 good quality crusty loaf (Italian, French, or sourdough)
- 2 cups shredded low-moisture part-skim mozzarella cheese
- 1/2 cup (1 stick) unsalted butter
- 4–5 cloves fresh garlic, finely minced
- 2 tablespoons fresh parsley, finely chopped
- 1/2 teaspoon dried oregano
- Pinch of red pepper flakes (optional)
- Salt and black pepper to taste
Instructions
- Preheat your oven to 375°F (190°C) and line a baking sheet with parchment paper or a silicone mat.
- Carefully slice the bread loaf crosswise at about 1-inch intervals, without cutting all the way through the bottom crust. Make similar cuts lengthwise down the center of the loaf, again not cutting all the way through.
- In a small saucepan or microwave-safe bowl, melt the unsalted butter. Stir in the minced garlic, chopped parsley, dried oregano, and red pepper flakes. Season with a pinch of salt and black pepper to taste.
- Gently open up the cuts in the bread loaf and brush the garlic butter mixture into all the crevices.
- Stuff the shredded mozzarella into all the buttered crevices, ensuring plenty is peeking out.
- Wrap the entire loaf tightly in aluminum foil.
- Place the foil-wrapped loaf on the prepared baking sheet and bake for 20 minutes.
- After 20 minutes, carefully remove the foil and return the unwrapped loaf to the oven for another 10-15 minutes, until the cheese is bubbly and golden brown.
- Serve immediately, allowing everyone to pull apart their own cheesy sections.
- Prep Time: 15 mins
- Cook Time: 30 mins
- Category: Appetizer
- Method: Baking
- Cuisine: Italian
Nutrition
- Serving Size: 1 piece
- Calories: 300
- Sugar: 1 g
- Sodium: 400 mg
- Fat: 20 g
- Saturated Fat: 10 g
- Unsaturated Fat: 8 g
- Trans Fat: 0 g
- Carbohydrates: 25 g
- Fiber: 1 g
- Protein: 10 g
- Cholesterol: 30 mg
Keywords: For the best results, use a sturdy loaf and shred your own cheese for optimal meltability. Feel free to customize the filling with additional cheeses, spices, or even vegetables.


Leave a Comment