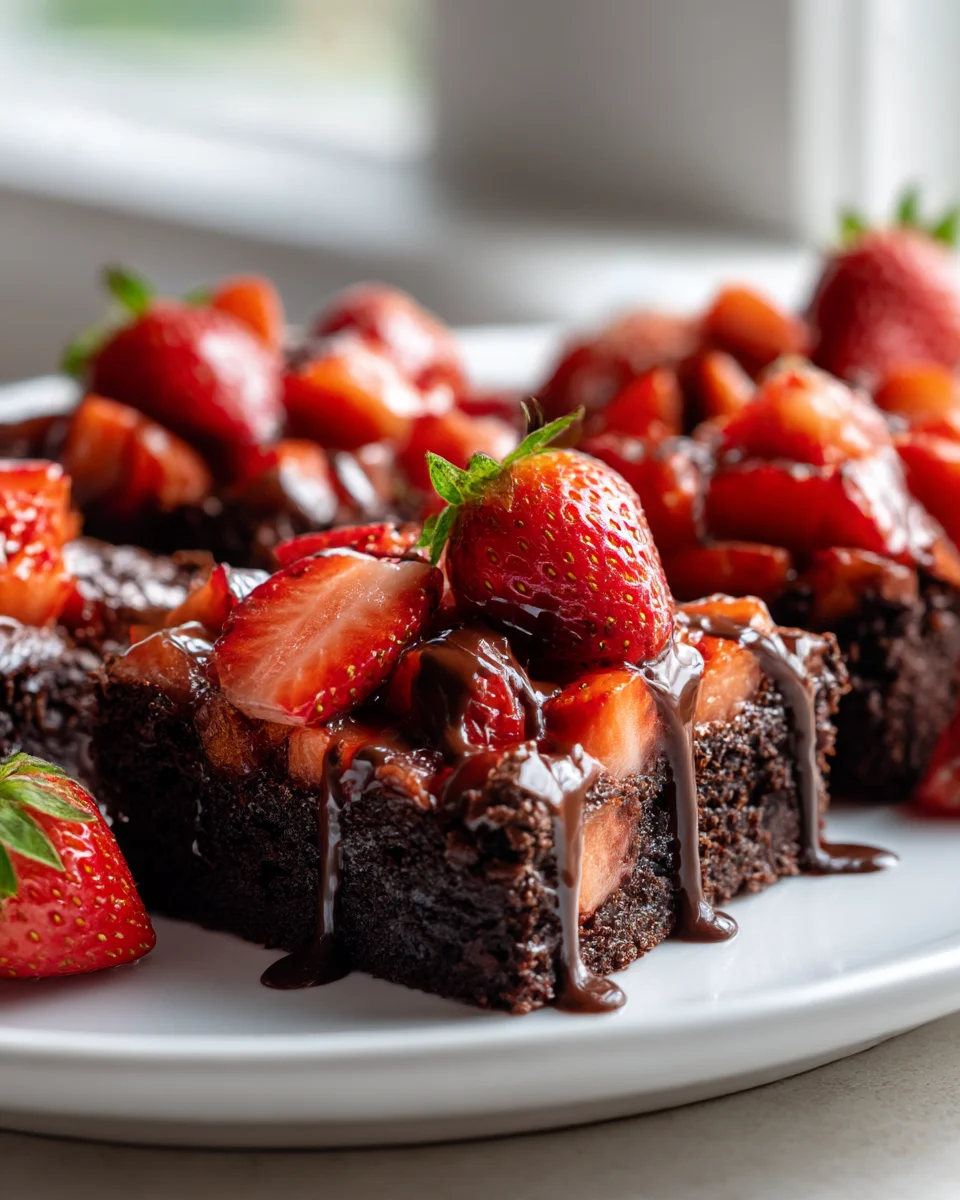
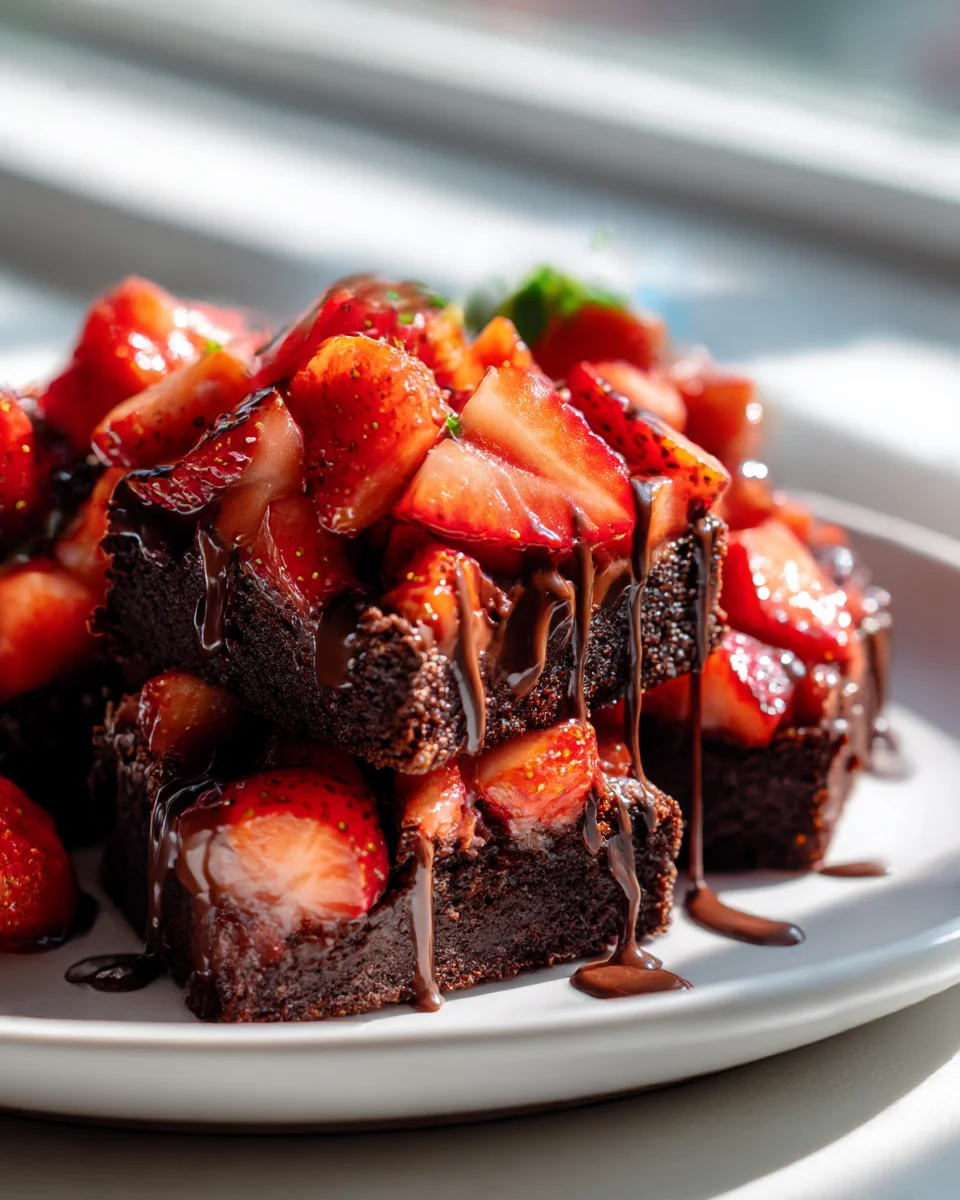
Chocolate Covered Strawberry Brownies
Oh my goodness, when I first dreamt up the idea for Chocolate Covered Strawberry Brownies, I knew it had to be something truly special. And let me tell you, I think I’ve absolutely nailed it! What makes this recipe a total showstopper, you ask? It’s the ultimate marriage of three dessert titans: rich, fudgy brownies, bright, juicy strawberries, and that irresistible snap of decadent chocolate. This isn’t just a brownie with some fruit tossed in; we’re talking about capturing the elegant essence of a classic chocolate-covered strawberry and baking it right into a deeply satisfying brownie.
You are going to absolutely fall head over heels for these because they deliver on every single level. Imagine sinking your teeth into a dense, intensely chocolatey brownie that’s generously studded with bursts of fresh, sweet-tart strawberries, all crowned with a luscious, glossy chocolate ganache that truly brings home that “chocolate-covered” magic. It’s comforting yet sophisticated, playful yet elegant, and frankly, just plain delicious. Perfect for a special occasion, a thoughtful gift, or simply treating yourself to something extraordinary, these Chocolate Covered Strawberry Brownies are designed to be an unforgettable indulgence that tastes as amazing as it looks.
Ingredient Notes
Crafting the perfect Chocolate Covered Strawberry Brownies starts with understanding the star ingredients. My goal for this recipe is to achieve a fudgy, rich brownie base that perfectly complements the fresh, vibrant sweetness of chocolate-dipped strawberries. Here’s a look at what you’ll need and some crucial details:
For the Fudgy Brownie Base:
- Unsweetened Cocoa Powder: This is where your brownie’s deep chocolate flavor comes from! I always recommend using a good quality unsweetened cocoa powder, like Dutch-processed, for a darker color and milder chocolate flavor. If you only have natural cocoa powder, that’s absolutely fine, but the brownies might be slightly lighter in color and have a bit more acidic bite.
- All-Purpose Flour: Just enough to bind everything together without making the brownies cakey. Measuring by weight (grams) is always best for accuracy, but if using cups, level it carefully.
- Granulated Sugar & Light Brown Sugar: The combination gives you the best of both worlds – the crisp top from granulated sugar and the moist, chewy texture from brown sugar. Don’t skip the brown sugar; it makes a real difference in chewiness!
- Unsalted Butter: Melting butter is key to that fudgy texture. Unsalted allows you to control the salt content precisely. If you only have salted butter, omit the added salt from the recipe.
- Large Eggs: These provide structure and richness. Make sure they’re at room temperature for better emulsion with the melted butter and sugar, resulting in a smoother batter.
- Vanilla Extract: A crucial flavor enhancer for chocolate. Don’t skimp on good quality vanilla!
- Salt: A pinch of salt balances the sweetness and intensifies the chocolate flavor. It’s essential!
- Chocolate Chips or Chunks: Semi-sweet or dark chocolate chips folded into the batter add extra pockets of melted chocolate goodness. You can use milk chocolate if you prefer a sweeter brownie.
- Substitutions: For a gluten-free option, a 1:1 gluten-free all-purpose flour blend can often be substituted successfully. For a dairy-free brownie, use a plant-based butter alternative and dairy-free chocolate chips.
For the Chocolate Covered Strawberries:
- Fresh Strawberries: Choose ripe, firm, and medium-sized strawberries. They should have bright red color and fresh green caps. Avoid any that are bruised or overly soft, as they won’t hold up well to dipping. Make sure to wash and dry them completely before dipping – any moisture will make the chocolate seize or not adhere properly.
- Chocolate for Dipping: This is another area where quality shines. I love using good quality melting wafers (like Ghirardelli or Callebaut callets) or a finely chopped chocolate bar (semi-sweet or dark chocolate, around 60-70% cocoa for a balanced flavor). These melt smoothly and set beautifully. Chocolate chips can be used, but they sometimes require a bit of shortening or coconut oil to achieve a perfect dipping consistency.
- Optional Drizzle: White chocolate (or even milk chocolate) is fantastic for drizzling over the dipped strawberries to add visual appeal and an extra layer of sweetness.
Step-by-Step Instructions
Let’s get baking! These Chocolate Covered Strawberry Brownies are a labor of love, but each step is straightforward and rewarding. Follow along for the perfect fudgy treats topped with beautiful berries.
Part 1: Baking the Fudgy Brownies
- Prepare Your Pan: Preheat your oven to 350°F (175°C). Line an 8×8 or 9×9-inch square baking pan with parchment paper, leaving an overhang on two sides to easily lift the brownies out later. Lightly grease the exposed sides of the pan.
- Melt Butter and Chocolate: In a large, microwave-safe bowl (or over a double boiler), melt the unsalted butter. Once melted, stir in the unsweetened cocoa powder until smooth. This creates a rich base.
- Add Sugars: Whisk in the granulated sugar and light brown sugar into the butter-cocoa mixture until well combined. The mixture should look glossy.
- Incorporate Eggs and Vanilla: Add the room temperature eggs one at a time, whisking vigorously after each addition until fully incorporated and the mixture is smooth and slightly lighter in color. Stir in the vanilla extract.
- Combine Dry Ingredients: In a separate medium bowl, whisk together the all-purpose flour and salt.
- Fold in Dry to Wet: Gradually add the dry ingredients to the wet ingredients, mixing with a spatula until just combined. Be careful not to overmix, as this can lead to tough brownies. A few streaks of flour are okay.
- Stir in Chocolate Chips: Gently fold in your chosen chocolate chips or chunks.
- Bake: Pour the brownie batter into your prepared pan and spread evenly. Bake for 25-30 minutes, or until a toothpick inserted into the center comes out with moist crumbs attached (not wet batter). You want them fudgy, not cakey!
- Cool Completely: This is critical! Let the brownies cool completely in the pan on a wire rack. They will continue to set as they cool. Once cool, use the parchment paper overhang to lift them out of the pan.
Part 2: Preparing the Chocolate Covered Strawberries
- Wash and Dry Strawberries: Gently wash your fresh strawberries and pat them completely dry with paper towels. Any moisture will prevent the chocolate from adhering. Leave the green caps on for a beautiful presentation and a handle for dipping.
- Melt Chocolate for Dipping: Place your chosen dipping chocolate (wafers, chopped bar) in a microwave-safe bowl. Microwave on 50% power in 30-second intervals, stirring well after each, until smooth and fully melted. Alternatively, use a double boiler for a more controlled melt. Be careful not to overheat the chocolate, as it can seize.
- Dip Strawberries: Hold a strawberry by its green cap and dip it into the melted chocolate, twirling it gently to coat about two-thirds of the berry. Lift it out, letting any excess chocolate drip off.
- Set the Chocolate: Place the dipped strawberries onto a baking sheet lined with parchment paper or a silicone mat. Repeat with remaining strawberries.
- Chill to Set: Transfer the baking sheet to the refrigerator and chill for about 15-20 minutes, or until the chocolate is fully set and firm.
- Optional Drizzle: If desired, melt a small amount of white chocolate (or another contrasting chocolate) and drizzle it decoratively over the set chocolate-covered strawberries using a spoon or a piping bag with a very small hole. Return to the fridge briefly to set the drizzle.
Part 3: Assembling Your Masterpiece
- Cut Brownies: Once the brownies are completely cool, use a sharp knife (wiped clean after each cut for neatness) to cut them into your desired squares or rectangles.
- Arrange Strawberries: Carefully place one chocolate-covered strawberry on top of each brownie square. For the best presentation and freshness, I like to do this just before serving.
Tips & Suggestions
Making these Chocolate Covered Strawberry Brownies is an enjoyable experience, and I’ve picked up a few tricks along the way to make them truly spectacular. Here are my top tips and suggestions to ensure your brownies are a showstopper:
- Don’t Overbake the Brownies: This is perhaps the most crucial tip for fudgy brownies. If a toothpick inserted into the center comes out clean, they’re already overbaked. You want moist crumbs, not wet batter, but definitely not dry. Slightly underbaking ensures that coveted fudgy interior.
- Cool Brownies Completely: I know it’s tempting, but resist cutting into warm brownies! Warm brownies are delicate and crumbly. Cooling them completely, ideally for several hours or even overnight, allows them to set properly, resulting in clean, perfect squares.
- Completely Dry Strawberries are a Must: Seriously, I cannot stress this enough! Any water on the strawberries will cause your melted chocolate to seize and become clumpy. Wash them well in advance and let them air dry on paper towels, or meticulously pat them dry.
- Quality Chocolate Matters: For both the brownies and the dipped strawberries, using good quality chocolate makes a noticeable difference in flavor and melt. Spend a little extra on a brand you love.
- Deep, Narrow Dipping Container: When melting your chocolate for the strawberries, use a deep, narrow bowl or even a mug. This allows you to dip the strawberries deeply without needing a huge amount of melted chocolate, which cools quickly.
- Room Temperature Eggs: For the brownie batter, room temperature eggs emulsify better with the melted butter and sugar, leading to a smoother, more uniform batter and a better final texture.
- Slightly Chilled Strawberries for Dipping: While you need them dry, slightly chilled strawberries actually help the chocolate set faster, preventing excess dripping.
- Add a Pinch of Salt to Dipping Chocolate: For an extra layer of flavor, stir a tiny pinch of flaky sea salt (like Maldon) into your melted dipping chocolate. It subtly enhances the chocolate’s richness.
- Garnish for Extra Flair: Before the chocolate on the strawberries fully sets, you can sprinkle them with finely chopped nuts (pistachios or almonds are lovely), toasted coconut, or even edible glitter for extra sparkle.
- Consider a Ganache Drizzle: Instead of simple melted chocolate for a drizzle, consider making a quick ganache (equal parts heavy cream and chocolate) for a richer, glossier finish over the brownies before adding the strawberries.
Storage
Once you’ve assembled these beautiful Chocolate Covered Strawberry Brownies, proper storage is key to keeping them fresh and delicious. Because they feature fresh fruit and chocolate, their shelf life and optimal storage method are a little different than plain brownies.
- Short-Term Storage (Assembled): Since fresh strawberries are perishable and can release moisture, these brownies are best enjoyed the same day they are assembled. If you have leftovers, place them in a single layer in an airtight container and store them in the refrigerator. They will last for 1-2 days. The strawberries may start to soften and release some liquid over time, which can make the brownie underneath slightly soggy.
- Short-Term Storage (Unassembled): If you want to prepare ahead, bake the brownies and store them in an airtight container at room temperature for up to 3-4 days. You can also prepare the chocolate-covered strawberries and store them in an airtight container in the refrigerator for up to 2-3 days. Then, assemble the brownies with the strawberries just before serving for the freshest look and taste.
- Long-Term Storage (Brownies Only): The plain brownie base freezes exceptionally well! Once completely cooled, wrap the uncut slab tightly in plastic wrap, then again in aluminum foil. Store in the freezer for up to 3 months. When ready to enjoy, thaw overnight in the refrigerator, then bring to room temperature before cutting and adding freshly made chocolate-covered strawberries.
- Avoid Freezing Assembled Brownies: I do not recommend freezing the brownies with the chocolate-covered strawberries already on them. The freezing and thawing process will cause the strawberries to become mushy and watery, ruining their texture and potentially seeping into the brownie.
- Protect from Odors: When storing in the refrigerator, ensure your container is truly airtight to prevent the brownies and strawberries from absorbing any refrigerator odors.
- Serving Temperature: While stored in the fridge, I find these brownies are best enjoyed at or just below room temperature. Take them out of the refrigerator 15-20 minutes before serving to allow the brownie to soften slightly and the chocolate on the strawberries to lose its chill.
Final Thoughts
And there you have it! I truly hope you’re as excited as I am about these incredible Chocolate Covered Strawberry Brownies. This isn’t just a regular brownie; it’s an experience, bringing together the rich, fudgy goodness of a classic brownie with the vibrant freshness of a ripe strawberry, all encased in a delightful chocolate shell. It’s the perfect marriage of flavors and textures that makes this recipe a true showstopper.
Trust me, once you take that first bite, you’ll understand why these Chocolate Covered Strawberry Brownies are an absolute must-try. They’re impressive enough for a special occasion, yet comforting enough for an everyday treat. I can’t wait for you to make them and discover your new favorite dessert!

Best Chocolate Covered Strawberry Brownies Ever! Easy Recipe
- Total Time: 1 hour
- Yield: 16 servings
Description
Indulge in the ultimate dessert experience with these Chocolate Covered Strawberry Brownies, featuring rich, fudgy brownies topped with fresh strawberries and decadent chocolate. Perfect for any occasion, these treats are sure to impress!
Ingredients
- Unsweetened Cocoa Powder
- All-Purpose Flour
- Granulated Sugar
- Light Brown Sugar
- Unsalted Butter
- Large Eggs
- Vanilla Extract
- Salt
- Chocolate Chips or Chunks
- Fresh Strawberries
- Chocolate for Dipping
- Optional Drizzle: White chocolate or milk chocolate
Instructions
- Prepare Your Pan: Preheat your oven to 350°F (175°C). Line an 8×8 or 9×9-inch square baking pan with parchment paper, leaving an overhang on two sides to easily lift the brownies out later. Lightly grease the exposed sides of the pan.
- Melt Butter and Chocolate: In a large, microwave-safe bowl (or over a double boiler), melt the unsalted butter. Once melted, stir in the unsweetened cocoa powder until smooth. This creates a rich base.
- Add Sugars: Whisk in the granulated sugar and light brown sugar into the butter-cocoa mixture until well combined. The mixture should look glossy.
- Incorporate Eggs and Vanilla: Add the room temperature eggs one at a time, whisking vigorously after each addition until fully incorporated and the mixture is smooth and slightly lighter in color. Stir in the vanilla extract.
- Combine Dry Ingredients: In a separate medium bowl, whisk together the all-purpose flour and salt.
- Fold in Dry to Wet: Gradually add the dry ingredients to the wet ingredients, mixing with a spatula until just combined. Be careful not to overmix, as this can lead to tough brownies. A few streaks of flour are okay.
- Stir in Chocolate Chips: Gently fold in your chosen chocolate chips or chunks.
- Bake: Pour the brownie batter into your prepared pan and spread evenly. Bake for 25-30 minutes, or until a toothpick inserted into the center comes out with moist crumbs attached (not wet batter). You want them fudgy, not cakey!
- Cool Completely: This is critical! Let the brownies cool completely in the pan on a wire rack. They will continue to set as they cool. Once cool, use the parchment paper overhang to lift them out of the pan.
- Wash and Dry Strawberries: Gently wash your fresh strawberries and pat them completely dry with paper towels. Any moisture will prevent the chocolate from adhering. Leave the green caps on for a beautiful presentation and a handle for dipping.
- Melt Chocolate for Dipping: Place your chosen dipping chocolate (wafers, chopped bar) in a microwave-safe bowl. Microwave on 50% power in 30-second intervals, stirring well after each, until smooth and fully melted. Alternatively, use a double boiler for a more controlled melt. Be careful not to overheat the chocolate, as it can seize.
- Dip Strawberries: Hold a strawberry by its green cap and dip it into the melted chocolate, twirling it gently to coat about two-thirds of the berry. Lift it out, letting any excess chocolate drip off.
- Set the Chocolate: Place the dipped strawberries onto a baking sheet lined with parchment paper or a silicone mat. Repeat with remaining strawberries.
- Chill to Set: Transfer the baking sheet to the refrigerator and chill for about 15-20 minutes, or until the chocolate is fully set and firm.
- Optional Drizzle: If desired, melt a small amount of white chocolate (or another contrasting chocolate) and drizzle it decoratively over the set chocolate-covered strawberries using a spoon or a piping bag with a very small hole. Return to the fridge briefly to set the drizzle.
- Cut Brownies: Once the brownies are completely cool, use a sharp knife (wiped clean after each cut for neatness) to cut them into your desired squares or rectangles.
- Arrange Strawberries: Carefully place one chocolate-covered strawberry on top of each brownie square. For the best presentation and freshness, I like to do this just before serving.
- Prep Time: 30 mins
- Cook Time: 30 mins
- Category: Dessert
- Method: Baking
- Cuisine: American
Nutrition
- Serving Size: 1 brownie with strawberry
- Calories: 250
- Sugar: 20 g
- Sodium: 150 mg
- Fat: 12 g
- Saturated Fat: 7 g
- Unsaturated Fat: 4 g
- Trans Fat: 0 g
- Carbohydrates: 35 g
- Fiber: 2 g
- Protein: 3 g
- Cholesterol: 50 mg
Keywords: Don't overbake the brownies for a fudgy texture. Ensure strawberries are completely dry before dipping to prevent chocolate from seizing. Use quality chocolate for the best flavor.
Leave a Comment