Garlic Knots
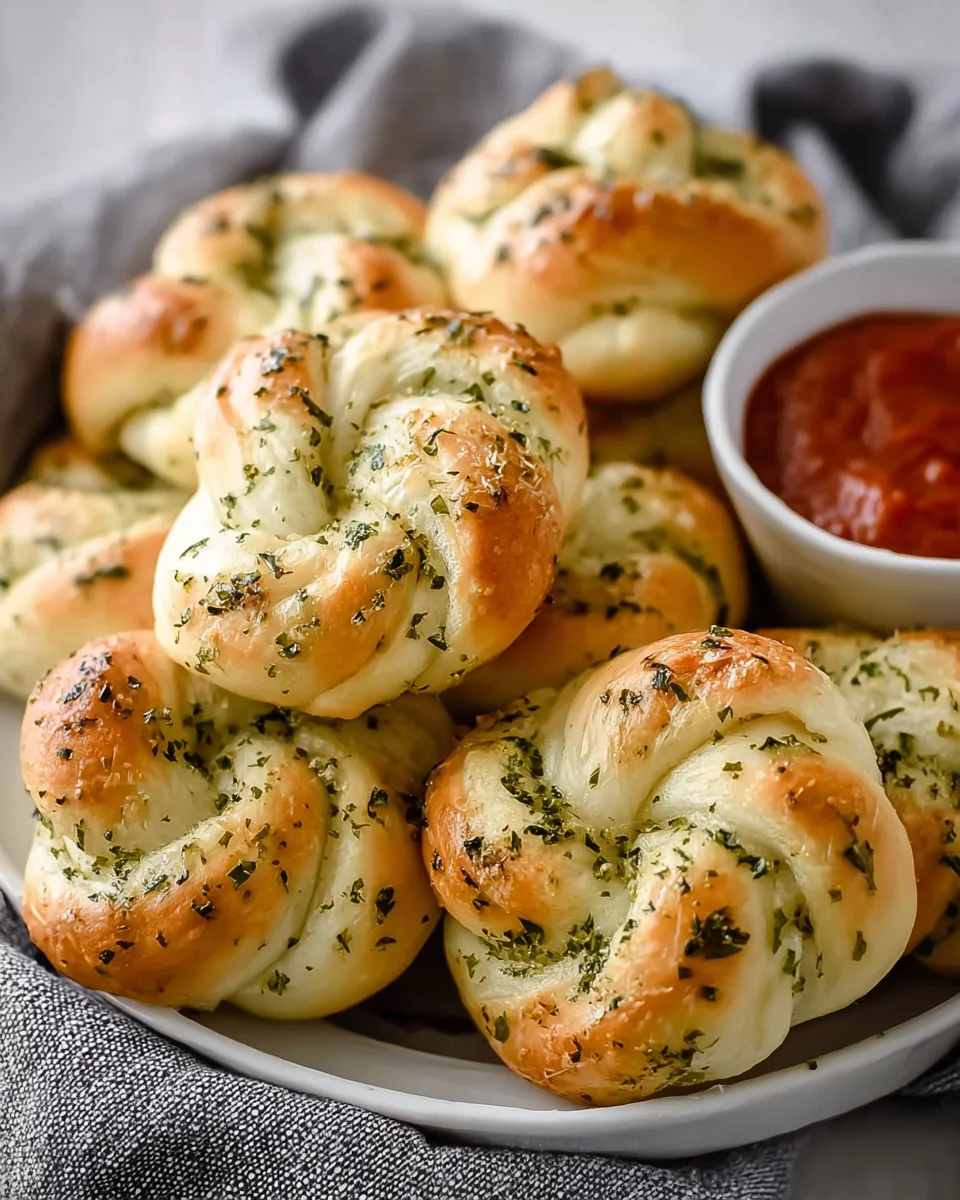
Oh, my goodness, if there’s one thing that can instantly transport me to a cozy Italian-American restaurant, it’s the sheer joy of a perfect basket of Garlic Knots! These aren’t just any bread; they’re small, humble pieces of pizza dough lovingly tied into a knot, baked until they’re golden and delightfully chewy, and then, while still warm, generously tossed in an aromatic concoction of melted butter (or a rich olive oil for a dairy-free option), minced fresh garlic, and vibrant parsley. It’s this final, fragrant drenching that transforms them into those irresistible, soft, garlicky pillows we all adore. The aroma alone is enough to make your mouth water, and trust me, that’s just the beginning of what makes them so special!
You are absolutely going to love making these. They’re surprisingly simple to create, but the payoff is huge – warm, fragrant, and utterly addictive morsels that are perfect for dipping into your favorite pasta sauce, accompanying a big salad, or simply enjoying on their own. Each knot is a testament to simple ingredients coming together to create something truly magical. So, get ready to tie some dough, bake it golden, and then toss it in that glorious garlicky bath. These little beauties are the ultimate crowd-pleaser, and I promise, they’ll disappear from your table faster than you can say “more garlic, please!”

Ingredient Notes
Creating truly irresistible garlic knots starts with understanding the core ingredients. While seemingly simple, each component plays a vital role in achieving that perfect chewiness and burst of garlicky flavor. I always say, good ingredients make good food, and this recipe is a testament to that!
Dough
The foundation of any great garlic knot is, of course, the dough. You have a couple of excellent options here. My absolute preference is to use a good quality store-bought pizza dough. It’s a fantastic time-saver and often yields consistent results. Look for fresh pizza dough in the refrigerated section of your grocery store; it typically comes in a plastic bag or container. Bring it to room temperature for about 30-60 minutes before you plan to work with it; this makes it much more pliable and easier to roll without it snapping back too much. If you’re feeling adventurous or have a go-to recipe, a homemade pizza dough or even a basic bread dough can be used. The key is a relatively soft, elastic dough that’s easy to stretch and knot. Avoid very dense, heavy doughs as they might result in tougher knots.
Garlic
This is where the magic truly happens! Fresh garlic is non-negotiable for authentic garlic knots. I recommend using about 6-8 cloves, or even more if you’re a garlic fiend like me! Mince it very finely or use a garlic press. The goal is to infuse the butter with as much pungent garlic flavor as possible. Pre-minced garlic from a jar can be used in a pinch, but it simply doesn’t compare to the vibrant taste of fresh garlic. It often has a milder, sometimes slightly acidic flavor that won’t give your knots that quintessential aromatic punch. If you must use jarred, consider adding a little extra.
Butter & Olive Oil
For that incredible glaze and richness, unsalted butter is my top choice. It melts beautifully and carries the garlic and herbs perfectly. If you only have salted butter, that’s fine, just be mindful when adding extra salt to the final seasoning. A good quality extra virgin olive oil is also essential. I use it to initially brush the knots before baking, which helps them achieve a lovely golden brown crust and adds a subtle depth of flavor. You could use all olive oil for the garlic sauce as well for a dairy-free option, but the butter truly enhances the overall richness and classic taste of garlic knots.
Fresh Parsley
Fresh herbs are key for brightness and visual appeal. Flat-leaf (Italian) parsley is my go-to. It offers a peppery, fresh flavor that complements the garlic beautifully without overpowering it. Finely chop it just before you’re ready to mix it into your garlic butter. If you don’t have fresh parsley, dried parsley flakes can be used, but you’ll need significantly less (about 1/3 of the fresh amount) and the flavor won’t be as vibrant. Alternatively, fresh basil or a mix of fresh oregano and parsley could offer a delightful twist, but parsley remains the classic choice for a reason.
Salt & Optional Additions
A pinch of fine sea salt or kosher salt is crucial for seasoning the garlic butter and balancing the flavors. Freshly grated Parmesan or Pecorino Romano cheese is an excellent optional addition to the garlic butter, providing a salty, umami kick that takes these knots over the top. You can also sprinkle a little dried red pepper flakes into the garlic butter for a touch of heat, which is always a welcome surprise!
Step-by-Step Instructions
Making garlic knots is a fun and surprisingly straightforward process that yields incredibly rewarding results. Follow these steps, and you’ll be enjoying warm, garlicky goodness in no time!
Step 1: Prepare Your Dough
If you’re using store-bought fresh pizza dough, take it out of the refrigerator and let it sit at room temperature for at least 30-60 minutes. This makes the dough much more relaxed and easier to work with, preventing it from snapping back when you try to roll it. While the dough is resting, preheat your oven to 400°F (200°C). Line a large baking sheet with parchment paper to prevent sticking and make cleanup a breeze.
Step 2: Roll and Cut the Dough
Lightly flour your work surface, your hands, and your rolling pin. Take the softened pizza dough and, using your hands or a rolling pin, gently stretch and roll it into a large rectangle, roughly 12×16 inches, or as close as you can get. The exact size isn’t critical, but aim for a thickness of about ¼ to ⅓ inch. Next, using a sharp knife or a pizza cutter, cut the dough into long strips. I usually aim for strips about ½ to ¾ inch wide and 10-12 inches long. Don’t worry if they’re not perfectly uniform; rustic charm is part of the appeal of homemade knots!
Step 3: Form the Knots
Now for the fun part! Take one dough strip and gently stretch it out a little more if needed, ensuring it’s not too thick. Hold one end of the strip and tie it into a simple single knot, just like you would tie a shoelace (but only the first loop). The ends should stick out a bit. You can either leave them as they are or, for a neater look, tuck the ends underneath the knot. Arrange the formed garlic knots about 1 inch apart on your prepared baking sheet. It’s important not to overcrowd the pan, as they will expand during their second rise and baking.
Step 4: Second Rise (Optional but Recommended)
For extra fluffy and tender knots, cover the baking sheet loosely with a clean kitchen towel or plastic wrap. Let the knots rest in a warm spot for another 20-30 minutes. This second proofing allows the dough to relax further and rise, resulting in a lighter texture. While they’re rising, brush the tops of the knots lightly with about 1 tablespoon of extra virgin olive oil. This helps them achieve a beautiful golden-brown crust.
Step 5: Bake the Knots
Place the baking sheet in your preheated oven. Bake for 12-18 minutes, or until the garlic knots are puffed up, beautifully golden brown on top, and cooked through. Keep an eye on them towards the end of the baking time, as oven temperatures can vary. While the knots are baking, it’s the perfect time to prepare your luscious garlic butter topping!
Step 6: Prepare the Garlic Butter Topping
In a small saucepan or a microwave-safe bowl, melt 4 tablespoons of unsalted butter. Add your finely minced garlic, chopped fresh parsley, a pinch of salt, and any optional additions like grated Parmesan cheese or red pepper flakes. Gently heat the mixture over low heat for about 2-3 minutes, stirring occasionally. You want to infuse the butter with the garlic flavor without browning or burning the garlic. Just a gentle sizzle will do.
Step 7: Toss and Serve
As soon as the garlic knots come out of the oven, while they are still piping hot, transfer them to a large mixing bowl. Immediately pour the warm garlic butter mixture over the hot knots. Using a spatula or tongs, gently toss the knots to ensure every surface is thoroughly coated with that glorious garlicky, buttery goodness. Serve your homemade garlic knots immediately, while they’re warm and fragrant, ideally with a side of your favorite marinara sauce for dipping. Enjoy!
Tips & Suggestions
Making great garlic knots is all about attention to a few key details. Here are my favorite tips and suggestions to ensure your knots are always a resounding success and maybe even a few ideas to spice things up!
Dough Handling is Key
Don’t Rush the Dough: Patience is a virtue, especially with dough. Allowing store-bought pizza dough to come to room temperature is critical. Cold dough is stiff, hard to work with, and will resist being rolled and knotted, making your job frustrating. A relaxed dough will stretch easily and produce a more tender knot.
Light Flour, Light Hand: When rolling out your dough, use just enough flour to prevent sticking. Too much flour can make the dough tough and dry. Similarly, handle the dough gently; overworking it can develop too much gluten, resulting in dense, chewy knots instead of light and airy ones.
The Second Rise Matters: While you can technically skip the second rise, I highly recommend it. It gives the yeast a chance to produce more gas, leading to a lighter, softer, and more tender crumb. If your kitchen is cool, find a warm spot, like near a sunny window or on top of a warm oven, to help them proof.
Perfecting the Garlic Butter
Fresh Garlic is a Must: I cannot stress this enough – use fresh garlic! Its pungent, vibrant flavor is what makes these knots truly shine. Pre-minced garlic lacks the same punch and aroma. Finely mince or crush your garlic to maximize flavor distribution.
Infuse, Don’t Burn: When heating the garlic in the butter, keep the heat low and cook it gently for just a couple of minutes. You want to infuse the butter with the garlic’s aroma and flavor without browning or burning it, which can make it bitter. The goal is fragrant, not fried.
Don’t Be Shy with the Topping: The garlic butter is the soul of these knots. After baking, transfer them to a bowl and pour ALL the garlic butter over them. Toss generously to ensure every nook and cranny is coated. This creates that irresistible glossy finish and ensures maximum flavor in every bite.
Flavor Variations & Serving
Cheesy Knots: For an extra layer of flavor, you can add some grated Parmesan or Pecorino Romano cheese directly into the garlic butter mixture. Or, for a visual treat, sprinkle a little cheese on top of the knots during the last few minutes of baking.
Spice It Up: A pinch of red pepper flakes mixed into the garlic butter adds a wonderful, subtle warmth without being overly spicy. Adjust to your preference!
Herb Swaps: While parsley is classic, feel free to experiment with other fresh herbs. A little finely chopped fresh oregano, chives, or even rosemary could add a different aromatic dimension. Just be mindful not to overpower the garlic.
Dipping Delight: Garlic knots are practically begging for a good dipping sauce. My go-to is warm marinara, but a good quality olive oil mixed with balsamic vinegar and a pinch of herbs is also fantastic. They also make a perfect accompaniment to pasta dishes, soups, or a fresh salad.
Make Ahead: You can form the knots and let them do their second rise, then lightly brush with olive oil and refrigerate them on the baking sheet for a few hours before baking. Just bring them back to room temperature for about 15-20 minutes before popping them in the oven.
Storage
Garlic knots are always best enjoyed fresh and warm, straight out of the oven and tossed in that glorious garlic butter. However, it’s not always possible to devour an entire batch in one sitting (though I’ve certainly tried!). Here’s how to properly store any leftovers and keep them delicious for another time.
Short-Term Storage (Room Temperature)
If you anticipate finishing the garlic knots within a day, you can store them at room temperature. Place the cooled knots in an airtight container or a large zip-top bag. This will prevent them from drying out and keep them relatively fresh. They will retain a decent texture for about 12-24 hours. Beyond that, they tend to become a bit stale and lose their appeal.
Medium-Term Storage (Refrigerator)
For storage beyond one day, or if your kitchen is particularly warm, the refrigerator is your best bet. Once the garlic knots have fully cooled, transfer them to an airtight container or a heavy-duty zip-top bag. Stored this way, they will stay fresh for up to 3-4 days. The texture will soften slightly, and they won’t be as crispy as when fresh, but a good reheat will perk them right back up.
Long-Term Storage (Freezer)
Freezing is an excellent option if you want to make a large batch or have leftovers you won’t get to within a few days. You can freeze garlic knots both baked and unbaked.
- Freezing Baked Knots: Allow the baked and buttered garlic knots to cool completely. Arrange them in a single layer on a baking sheet and flash freeze them for about 1-2 hours, or until solid. This prevents them from sticking together. Once frozen, transfer the solid knots to a freezer-safe airtight container or a heavy-duty freezer bag. They will keep well for up to 2-3 months.
- Freezing Unbaked Knots: If you want fresh-baked knots on demand, you can freeze them unbaked! After forming the knots (Step 3), arrange them on a parchment-lined baking sheet and flash freeze until solid. Then, transfer the frozen knots to a freezer bag. When you’re ready to bake, place the frozen knots on a baking sheet, let them thaw and rise in a warm spot for about 1-2 hours (they’ll take longer to rise from frozen), then proceed with baking as per the instructions, adding a few extra minutes to the baking time.
Reheating Garlic Knots
Reheating is crucial for bringing those stored knots back to life and closer to their original glory:
- Oven (Recommended): This is by far the best method for restoring texture. Preheat your oven to 350°F (175°C). Arrange the garlic knots (thawed if frozen) on a baking sheet. Reheat for 5-10 minutes, or until warmed through and the crust has crispied up again.
- Toaster Oven: A toaster oven works wonderfully for just a few knots, offering similar results to a full-sized oven.
- Microwave: While quick, the microwave tends to make the knots soft and sometimes a bit chewy, lacking that desirable crisp exterior. If using, reheat in 15-20 second intervals until warm. This is best for a very quick reheat if texture isn’t your primary concern.
No matter how you store them, a quick refresh in the oven will always be your best friend for enjoying those garlicky delights again!
Final Thoughts
And there you have it! I truly hope you’re as excited as I am about these incredible Garlic Knots. There’s just something magical about taking simple ingredients and transforming them into these tender, garlicky delights. This recipe, specifically, gives you that perfect balance of chewy dough, golden-brown exterior, and a punchy garlic-herb butter that soaks into every crevice.
Making your own Garlic Knots isn’t just about baking; it’s about creating an experience. The aroma alone will have everyone gathering in the kitchen, eager for a taste. Forget store-bought versions – once you try these homemade beauties, you’ll understand why they’re an absolute game-changer for any meal, snack, or party spread.
So, go ahead, roll up your sleeves and give these amazing Garlic Knots a try. I promise you, the joy and satisfaction of pulling a warm, buttery knot apart are simply unparalleled. Get ready to impress your taste buds and everyone around you!

Easy Homemade Garlic Knots: Soft, Garlicky & Delicious
- Total Time: 48 minutes
- Yield: 4 servings 1x
Description
These Easy Homemade Garlic Knots are soft, garlicky, and utterly addictive, perfect for any occasion. Enjoy them warm, tossed in a fragrant garlic butter mixture that elevates their flavor to irresistible heights.
Ingredients
- 1 package of store-bought pizza dough
- 6–8 cloves of fresh garlic, minced
- 4 tablespoons of unsalted butter
- 1 tablespoon of extra virgin olive oil
- Fresh flat-leaf (Italian) parsley, finely chopped
- A pinch of fine sea salt or kosher salt
- Optional: Freshly grated Parmesan or Pecorino Romano cheese
- Optional: Dried red pepper flakes
Instructions
- If you're using store-bought fresh pizza dough, take it out of the refrigerator and let it sit at room temperature for at least 30-60 minutes.
- Preheat your oven to 400°F (200°C) and line a large baking sheet with parchment paper.
- Lightly flour your work surface, your hands, and your rolling pin. Stretch and roll the pizza dough into a large rectangle, roughly 12×16 inches, with a thickness of about ¼ to ⅓ inch.
- Cut the dough into long strips, about ½ to ¾ inch wide and 10-12 inches long.
- Take one dough strip and tie it into a simple single knot. Arrange the formed garlic knots about 1 inch apart on the prepared baking sheet.
- For extra fluffy knots, cover the baking sheet loosely and let the knots rest in a warm spot for another 20-30 minutes.
- Brush the tops of the knots lightly with about 1 tablespoon of extra virgin olive oil.
- Bake for 12-18 minutes, or until the knots are puffed up and golden brown.
- In a small saucepan, melt 4 tablespoons of unsalted butter. Add minced garlic, chopped parsley, and a pinch of salt. Heat gently over low heat for 2-3 minutes.
- As soon as the garlic knots come out of the oven, transfer them to a large mixing bowl and pour the warm garlic butter mixture over them. Toss gently to coat.
- Serve immediately, ideally with a side of marinara sauce for dipping.
- Prep Time: 30 mins
- Cook Time: 18 mins
- Category: Appetizer
- Method: Baking
- Cuisine: Italian
Nutrition
- Serving Size: 1 knot
- Calories: 150
- Sugar: 0 g
- Sodium: 200 mg
- Fat: 7 g
- Saturated Fat: 4 g
- Unsaturated Fat: 2 g
- Trans Fat: 0 g
- Carbohydrates: 18 g
- Fiber: 1 g
- Protein: 3 g
- Cholesterol: 15 mg
Keywords: Use fresh garlic for the best flavor. Allow the dough to come to room temperature for easier handling, and consider a second rise for fluffier knots.

Leave a Comment