Homemade Apple Crisp Shortbread Bars
Homemade Apple Crisp Shortbread Bars. Oh, my friends, get ready for a dessert that marries two of the most comforting classics into one unbelievably delicious, handheld treat! I’ve always been a huge fan of both the cozy, spiced goodness of apple crisp and the melt-in-your-mouth buttery crumb of shortbread. So, I thought, why not bring them together in a way that’s easy to bake, easy to serve, and even easier to devour?
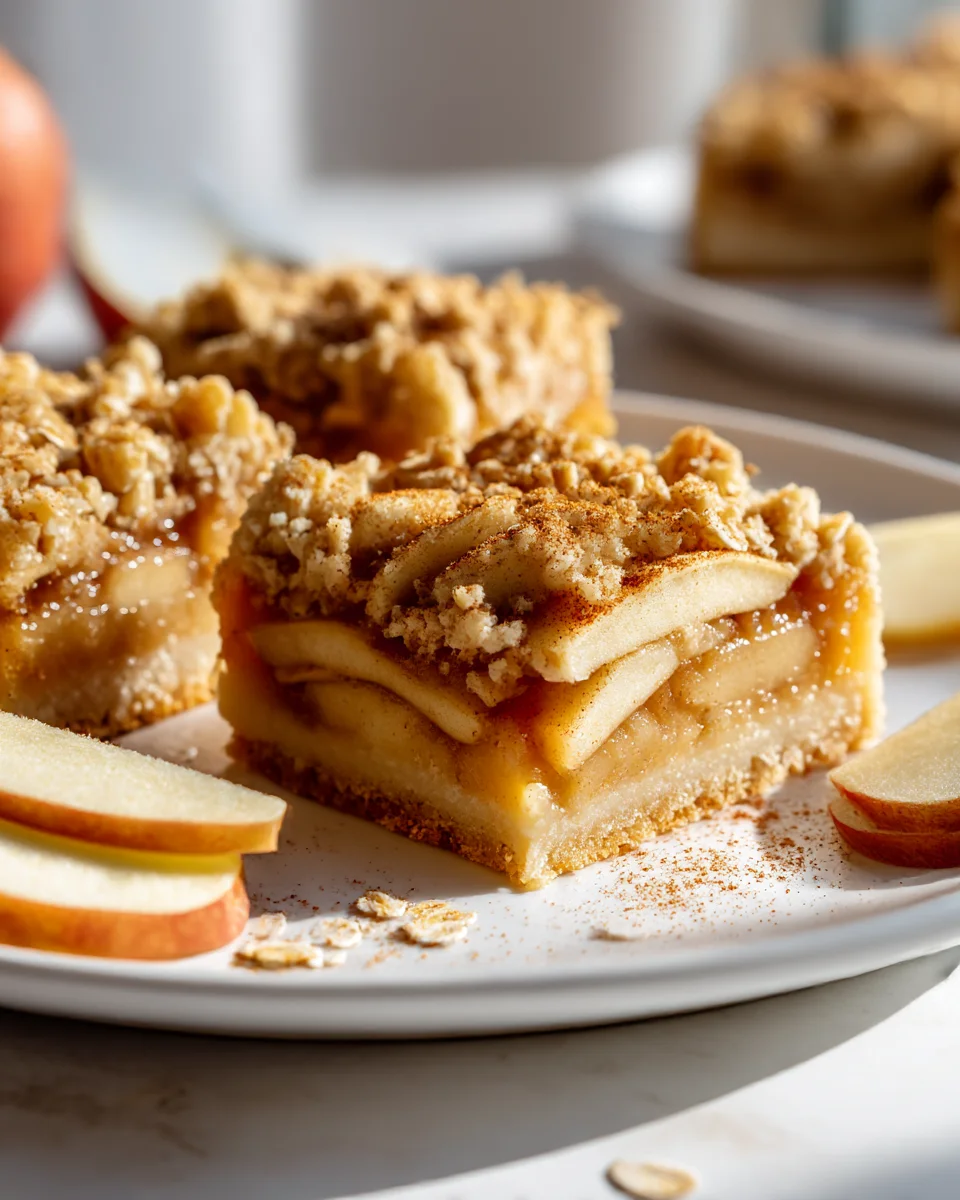
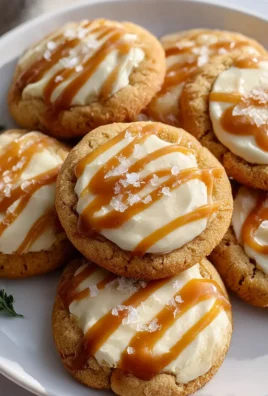
What makes these bars truly special is how they perfectly balance those distinct textures and flavors. You get a firm yet tender, buttery shortbread base, a juicy layer of warm, cinnamon-spiced apples, all crowned with a delightful, crumbly oat topping. It’s like getting a slice of autumn pie and a perfect cookie all in one bite! You’ll love them because they capture all the nostalgic warmth of a traditional apple crisp but in a much more convenient, mess-free bar form. They’re ideal for sharing at a gathering, packing in a lunchbox, or simply enjoying with a cup of coffee. Trust me, these aren’t just a dessert; they’re a hug in bar form, and they’re about to become your new favorite way to enjoy apples!
Ingredient Notes
Crafting delicious Homemade Apple Crisp Shortbread Bars starts with understanding the role each ingredient plays. I’ve carefully selected these to ensure a perfect balance of buttery shortbread, tender spiced apples, and a crumbly, oat-filled crisp topping. Here are the key ingredients you’ll need and some helpful substitutions if you’re looking to adapt the recipe.
For the Shortbread Base:
- All-Purpose Flour: This forms the structure of our wonderfully crumbly shortbread. I find standard all-purpose flour works best, but if you need a gluten-free option, a 1:1 gluten-free baking blend designed for cookies and pastries can often be substituted successfully.
- Unsalted Butter: Cold and cubed, this is the star of the shortbread! Using unsalted butter allows us to control the salt content, and keeping it cold ensures a tender, melt-in-your-mouth texture. For a dairy-free alternative, a good quality plant-based butter substitute (in stick form, not spread) will work well.
- Granulated Sugar: For just the right amount of sweetness and a delicate crispness in the shortbread. Powdered sugar can also be used for an even more tender crumb.
- Salt: A crucial ingredient that balances the sweetness and enhances all the other flavors. Don’t skip it!
- Vanilla Extract: I love the warmth and aroma vanilla brings to the shortbread. You can also experiment with a tiny pinch of almond extract for a different flavor profile.
For the Apple Filling:
- Baking Apples: My favorites are a mix of Granny Smith (for tartness and firm texture), Honeycrisp (for sweetness and crispness), and Fuji (for sweetness and flavor). You’ll want about 6-7 medium apples. Pears can make a lovely alternative, offering a slightly different, softer texture and flavor.
- Granulated Sugar & Brown Sugar: A combination provides balanced sweetness and a lovely caramel note. Brown sugar adds moisture and depth. Feel free to adjust the amount based on the sweetness of your apples and your personal preference.
- All-Purpose Flour or Cornstarch: This acts as a thickener for the apple juices, preventing a watery filling. Cornstarch will result in a slightly clearer filling.
- Spices: Ground cinnamon and nutmeg are essential for that classic apple pie flavor. A pinch of ground cloves or allspice can add extra warmth if you like.
- Lemon Juice: A splash brightens the apple flavor and prevents the apples from browning too quickly.
- Unsalted Butter: A few pats of butter tossed with the apples add richness and help create a luscious, syrupy filling.
For the Crisp Topping:
- Old-Fashioned Rolled Oats: These are key for that characteristic chewy, textural crisp. Quick-cooking oats can be used in a pinch, but they will yield a less robust texture. Steel-cut oats are not suitable here.
- All-Purpose Flour: Helps bind the topping together and creates a sturdy crumble.
- Brown Sugar: Adds a wonderful molasses flavor and moisture to the topping, helping it clump and caramelize.
- Ground Cinnamon: To echo the spices in the apple filling and add more warmth.
- Unsalted Butter: Cold and cubed, just like for the shortbread. Cutting it into the dry ingredients helps create those irresistible crumbly bits. Again, a quality plant-based butter alternative works well here for dairy-free needs.
- Optional: Chopped Nuts: Pecans or walnuts can be a delightful addition for extra crunch and flavor in the crisp topping.
Step-by-Step Instructions
Making these Homemade Apple Crisp Shortbread Bars is a straightforward process, broken down into three main components: the shortbread base, the apple filling, and the crisp topping. Follow these steps carefully for the best results!
1. Prepare for Baking:
- Preheat your oven to 375°F (190°C).
- Line a 9×13-inch baking pan with parchment paper, leaving an overhang on the sides. This will make lifting the bars out much easier later. Lightly grease the parchment paper for extra insurance.
2. Make the Shortbread Base:
- In a large bowl, whisk together the all-purpose flour, granulated sugar, and salt for the shortbread base.
- Add the cold, cubed unsalted butter to the dry ingredients. Using your fingertips, a pastry blender, or a food processor, cut the butter into the flour mixture until it resembles coarse crumbs with some pea-sized pieces of butter remaining.
- Stir in the vanilla extract. The mixture will still be crumbly.
- Press the shortbread mixture evenly into the bottom of the prepared 9×13-inch baking pan. Use the bottom of a flat glass or your hands to get a firm, even layer.
- Bake the shortbread base for 15-20 minutes, or until it’s lightly golden around the edges. This partial bake (blind baking) helps ensure a crisp base that won’t get soggy under the apples.
- Remove from the oven and set aside while you prepare the filling. Reduce oven temperature to 350°F (175°C).
3. Prepare the Apple Filling:
- While the shortbread bakes, peel, core, and slice your apples into roughly 1/4-inch thick pieces. I aim for about 6-8 cups of sliced apples.
- In a large bowl, combine the sliced apples, granulated sugar, brown sugar, all-purpose flour (or cornstarch), ground cinnamon, ground nutmeg, and lemon juice. Toss gently until the apples are evenly coated.
- Dot the apple mixture with the small pieces of unsalted butter.
4. Prepare the Crisp Topping:
- In a separate medium bowl, combine the old-fashioned rolled oats, all-purpose flour, brown sugar, and ground cinnamon for the topping.
- Add the cold, cubed unsalted butter to the dry ingredients. Using your fingertips or a pastry blender, cut the butter into the mixture until coarse crumbs form. You want a mix of small and larger clumps for the best texture. If desired, mix in chopped nuts at this stage.
5. Assemble and Bake the Bars:
- Pour the prepared apple filling evenly over the partially baked shortbread base in the pan. Spread it out with a spoon.
- Generously sprinkle the crisp topping evenly over the apple filling. Don’t press it down; you want it light and crumbly.
- Return the pan to the oven and bake at 350°F (175°C) for 45-60 minutes, or until the apples are tender when pierced with a knife, the crisp topping is golden brown and bubbly, and the shortbread base is fully cooked. If the topping browns too quickly, you can loosely tent it with foil.
6. Cool Completely:
- This step is absolutely critical for perfectly formed bars! Once baked, remove the pan from the oven and place it on a wire rack to cool completely. This can take at least 2-3 hours at room temperature, or you can speed it up by chilling it in the refrigerator for an hour or two once it’s mostly cooled. Cooling allows the shortbread to firm up and the apple filling to set, making clean cuts possible.
- Once fully cooled, use the parchment paper overhang to lift the entire slab of bars out of the pan. Place it on a cutting board and slice into squares or bars of your desired size.
Tips & Suggestions
I want you to have the best possible experience making these Homemade Apple Crisp Shortbread Bars! Here are a few of my favorite tips and suggestions to ensure your bars turn out perfectly every time, along with some ideas for customization.
- Mix Your Apples: For the most complex flavor and interesting texture, I always recommend using a combination of apples. A tart variety like Granny Smith paired with a sweeter, firmer apple like Honeycrisp or Fuji gives you that wonderful balance of sweet, tart, and tender-crisp.
- Don’t Overwork the Shortbread: When making the shortbread base, handle the dough as little as possible once the butter is incorporated. Overworking can develop the gluten, leading to a tough rather than tender shortbread. Keep that butter cold!
- Blind Bake the Base: Don’t skip the initial bake for the shortbread base. This pre-baking step creates a barrier that helps prevent the apple juices from making your shortbread soggy, ensuring a perfectly crisp and buttery foundation.
- Even Apple Layer: Try to arrange your apple slices in a relatively even layer. This helps them cook uniformly and ensures each bar has a good amount of fruit. Don’t pile them too high, or they might not cook through.
- Clumpy Crisp Topping: For extra crunchy bits in your crisp topping, don’t be afraid to squeeze some of the butter-oat mixture with your hands to create larger clumps. These will get wonderfully golden and crispy in the oven.
- Patience with Cooling: I know it’s hard, but seriously, resist the urge to cut into these bars warm. The shortbread needs to firm up and the apple filling needs to set completely. Cutting them too soon will result in a messy, crumbly experience. If you’re in a hurry, pop them in the fridge or freezer for a bit after they’ve cooled mostly at room temperature.
- Serving Suggestions: While these bars are absolutely divine on their own, a warm bar served with a scoop of vanilla bean ice cream or a dollop of fresh whipped cream is pure heaven. A light dusting of powdered sugar just before serving adds an elegant touch.
- Flavor Boosts: To take the apple flavor up a notch, consider adding a tiny amount of orange zest to your apple filling. A pinch of cardamom can also be a delightful addition to the spices.
- Adjust Pan Size: If you use a different sized pan, be mindful that baking times will vary. A smaller pan will result in thicker bars that need more time to bake through, while a larger pan will mean thinner bars that cook faster.
Storage
Once you’ve gone to the effort of baking these incredible Homemade Apple Crisp Shortbread Bars, you’ll want to make sure you store them properly to maintain their freshness and delicious texture. Here’s how I recommend keeping them:
At Room Temperature:
- After the bars have completely cooled, place them in an airtight container.
- They will stay fresh and delicious at room temperature for up to 2-3 days.
- I usually separate layers of bars with parchment paper if stacking to prevent sticking.
- While they’re fine at room temp, sometimes the crisp topping can soften slightly over time due to the moisture from the apple filling.
In the Refrigerator:
- For longer freshness, especially if your kitchen is warm, store the cooled bars in an airtight container in the refrigerator.
- Refrigerating them will help maintain the crispness of the topping and the firmness of the shortbread base.
- They will keep well in the fridge for up to 5-7 days.
- Bringing them to room temperature for about 15-20 minutes before serving can enhance their flavor, or you can gently reheat them.
Freezing for Longer Storage:
- Apple Crisp Shortbread Bars freeze beautifully! This is a great option if you’ve made a large batch or want to enjoy them over an extended period.
- To Freeze Whole: Once completely cooled, you can freeze the entire slab of bars (before cutting) in the pan by wrapping it tightly in plastic wrap, then a layer of aluminum foil.
- To Freeze Individual Bars: For convenience, I prefer to cut the bars into individual portions first. Place the cut bars on a baking sheet lined with parchment paper and freeze for about an hour, or until solid. This “flash freezing” prevents them from sticking together.
- Once solid, transfer the frozen bars to a freezer-safe airtight container or heavy-duty freezer bags. Remove as much air as possible to prevent freezer burn.
- They can be stored in the freezer for up to 2-3 months.
Reheating Frozen Bars:
- When you’re ready to enjoy a frozen bar, you can thaw it at room temperature for a few hours.
- For a warm treat, you can reheat thawed or even directly frozen bars in a preheated oven at 300°F (150°C) for about 10-15 minutes (longer if frozen) until warmed through and the topping is crisp again.
- A quick zap in the microwave for 20-30 seconds (for a single bar) also works, but the topping might lose some of its crispness.
Final Thoughts
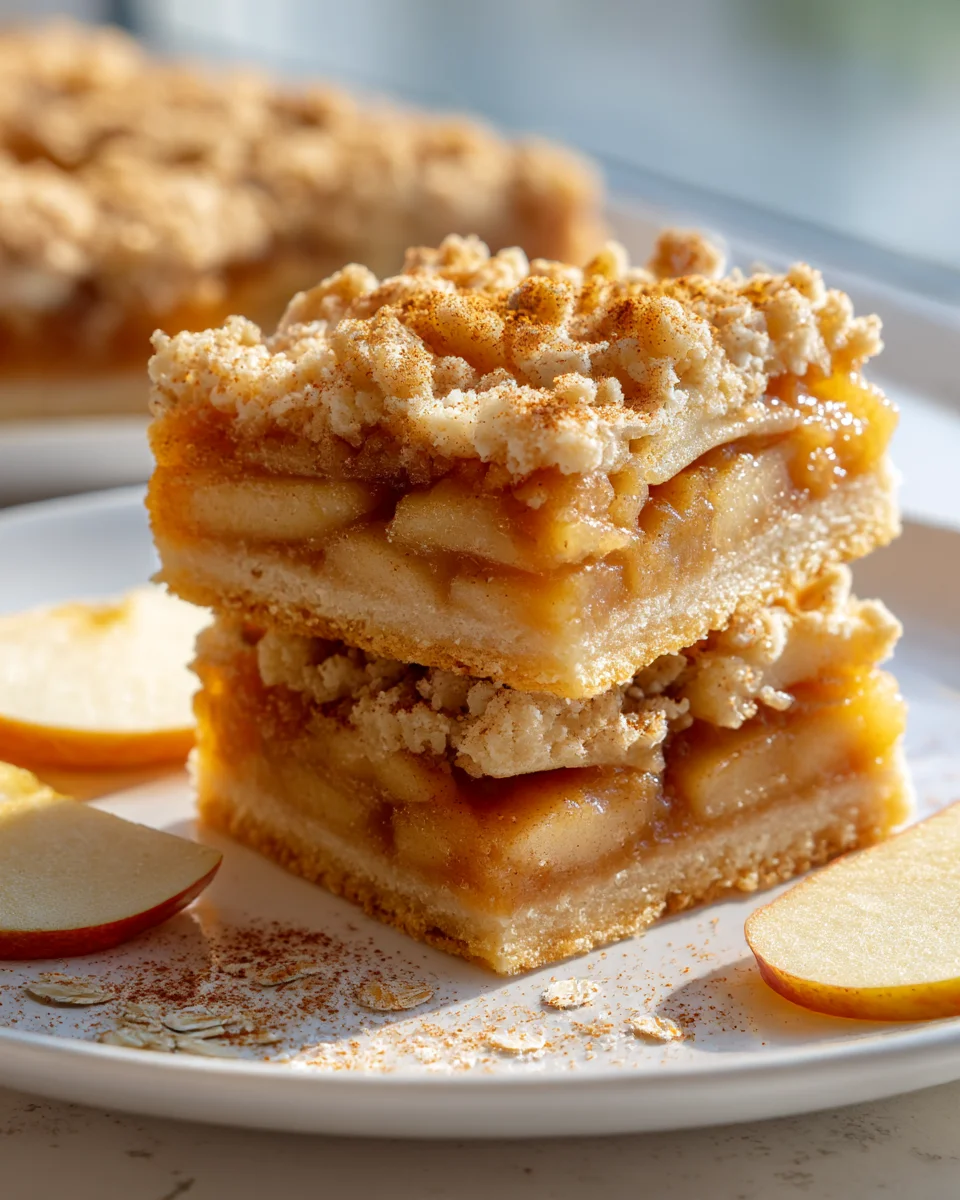
There’s something truly magical about a dessert that marries comfort with convenience, and I genuinely believe that my Homemade Apple Crisp Shortbread Bars achieve just that. I promise you, the moment you bite into one, you’ll understand why this recipe is an absolute must-try. The buttery, tender shortbread crust provides the perfect foundation, crumbling delicately as it gives way to that warm, spiced apple filling, all crowned with an irresistible crispy oat topping. It’s an explosion of textures and flavors that feels both familiar and incredibly special, a true testament to the joy of homemade baking.
Whether you’re looking for a delightful treat for your family, a thoughtful dish to bring to a gathering, or simply a cozy indulgence for yourself, these Homemade Apple Crisp Shortbread Bars deliver every single time. They embody everything wonderful about baking – warmth, incredible flavor, and a touch of love in every square. Don’t hesitate to whisk these up; I know they’ll quickly become a cherished favorite in your kitchen, just as they have in mine!

Irresistible Apple Crisp Shortbread Bars – Easy Homemade!
- Total Time: 1 hour 30 minutes
- Yield: 12 servings
Description
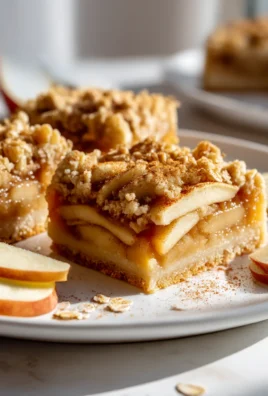
These Homemade Apple Crisp Shortbread Bars combine the cozy flavors of apple crisp with the buttery texture of shortbread, creating a delightful handheld treat. Perfect for sharing or enjoying with coffee, they capture the essence of autumn in every bite.
Ingredients
- All-Purpose Flour
- Unsalted Butter, cold and cubed
- Granulated Sugar
- Salt
- Vanilla Extract
- Baking Apples (Granny Smith, Honeycrisp, Fuji), about 6-7 medium
- Granulated Sugar
- Brown Sugar
- All-Purpose Flour or Cornstarch
- Ground Cinnamon
- Ground Nutmeg
- Lemon Juice
- Unsalted Butter, for apple filling
- Old-Fashioned Rolled Oats
- All-Purpose Flour, for crisp topping
- Brown Sugar, for crisp topping
- Ground Cinnamon, for crisp topping
- Unsalted Butter, cold and cubed, for crisp topping
- Optional: Chopped Nuts (Pecans or Walnuts)
Instructions
- Preheat your oven to 375°F (190°C).
- Line a 9×13-inch baking pan with parchment paper, leaving an overhang on the sides. Lightly grease the parchment paper.
- In a large bowl, whisk together the all-purpose flour, granulated sugar, and salt for the shortbread base.
- Add the cold, cubed unsalted butter to the dry ingredients. Using your fingertips, a pastry blender, or a food processor, cut the butter into the flour mixture until it resembles coarse crumbs with some pea-sized pieces of butter remaining.
- Stir in the vanilla extract. The mixture will still be crumbly.
- Press the shortbread mixture evenly into the bottom of the prepared 9×13-inch baking pan. Use the bottom of a flat glass or your hands to get a firm, even layer.
- Bake the shortbread base for 15-20 minutes, or until it's lightly golden around the edges. Remove from the oven and set aside while you prepare the filling. Reduce oven temperature to 350°F (175°C).
- While the shortbread bakes, peel, core, and slice your apples into roughly 1/4-inch thick pieces, aiming for about 6-8 cups of sliced apples.
- In a large bowl, combine the sliced apples, granulated sugar, brown sugar, all-purpose flour (or cornstarch), ground cinnamon, ground nutmeg, and lemon juice. Toss gently until the apples are evenly coated.
- Dot the apple mixture with small pieces of unsalted butter.
- In a separate medium bowl, combine the old-fashioned rolled oats, all-purpose flour, brown sugar, and ground cinnamon for the topping.
- Add the cold, cubed unsalted butter to the dry ingredients. Using your fingertips or a pastry blender, cut the butter into the mixture until coarse crumbs form.
- Pour the prepared apple filling evenly over the partially baked shortbread base in the pan. Spread it out with a spoon.
- Generously sprinkle the crisp topping evenly over the apple filling. Don't press it down.
- Return the pan to the oven and bake at 350°F (175°C) for 45-60 minutes, or until the apples are tender when pierced with a knife and the topping is golden brown.
- Once baked, remove the pan from the oven and place it on a wire rack to cool completely. This can take at least 2-3 hours at room temperature.
- Once fully cooled, use the parchment paper overhang to lift the entire slab of bars out of the pan. Place it on a cutting board and slice into squares or bars of your desired size.
- Prep Time: 30 mins
- Cook Time: 1 hour
- Category: Dessert
- Method: Baking
- Cuisine: American
Nutrition
- Serving Size: 1 bar
- Calories: 250
- Sugar: 15 g
- Sodium: 150 mg
- Fat: 12 g
- Saturated Fat: 7 g
- Unsaturated Fat: 3 g
- Trans Fat: 0 g
- Carbohydrates: 35 g
- Fiber: 2 g
- Protein: 3 g
- Cholesterol: 30 mg
Keywords: For the best results, mix different apple varieties for a complex flavor. Avoid overworking the shortbread dough to keep it tender, and be patient while cooling to ensure clean cuts.
Leave a Comment