Dump And Bake Meatball Casserole Recipe
Oh my goodness, do I have a game-changer for your dinner table! The Dump And Bake Meatball Casserole Recipe is about to become your new weeknight superhero. As someone who loves a delicious home-cooked meal but doesn’t always have hours to spend in the kitchen (or cleaning up after!), I created this recipe with ultimate convenience and flavor in mind. What makes this dish so incredibly special is right there in the name: you literally “dump” everything into a baking dish, and your oven does all the hard work. No pre-boiling pasta, no separate sauce pots, no endless stirring – just pure, effortless magic. You’re going to love it because it delivers a hearty, comforting meal with minimal fuss, making it perfect for busy evenings or when you just want a satisfying dinner without the stress.
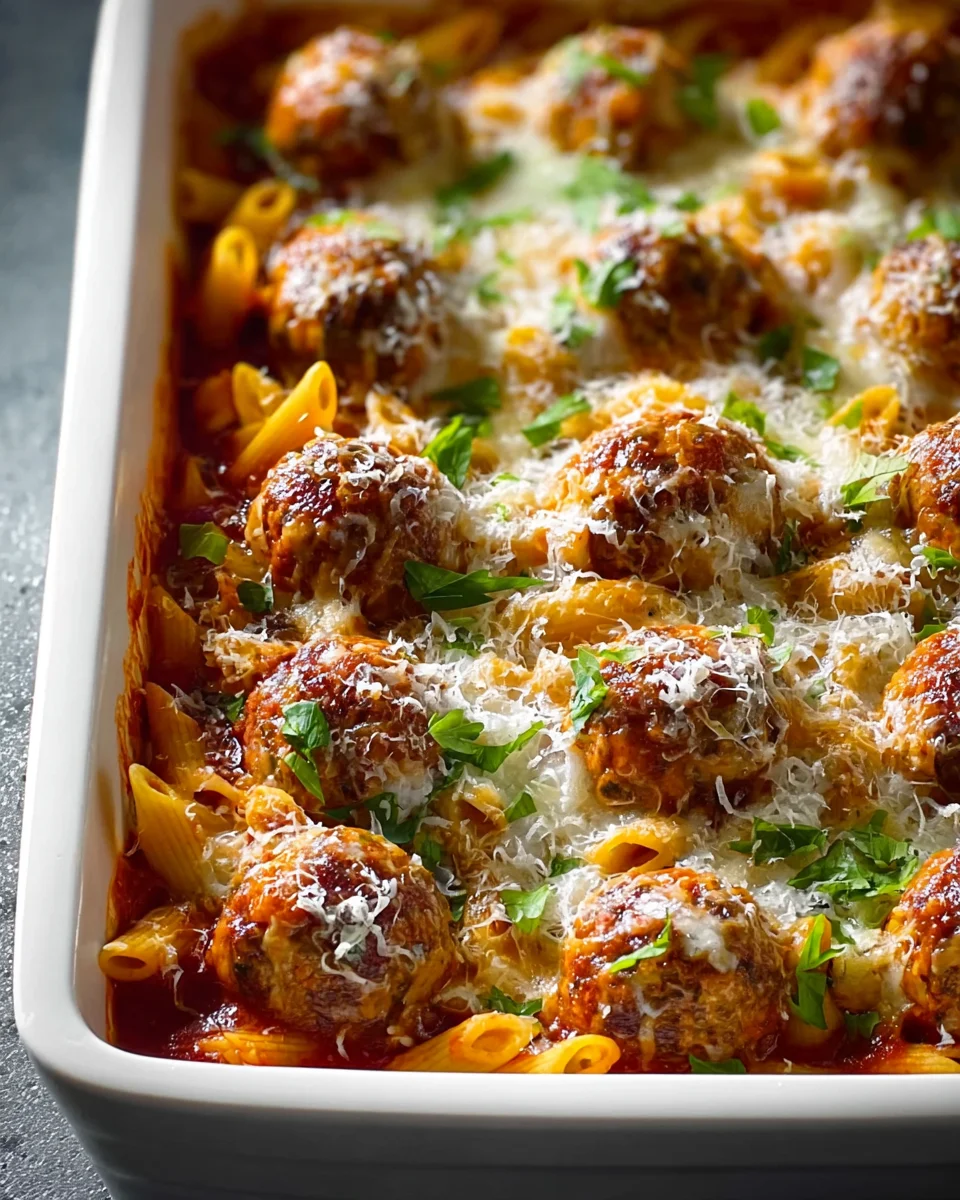
So, what exactly is this marvelously easy dish? Picture this: tender, savory beef meatballs snuggled amongst your favorite pasta, all bathed in a rich, non-alcoholic tomato sauce, and crowned with a generous layer of bubbly, golden-brown cheese. Everything bakes together in one single dish, allowing the flavors to meld beautifully and the pasta to cook perfectly in the sauce. The result is a warm, deeply satisfying, and wonderfully cheesy casserole that feels like you spent hours on it, but only took minutes to assemble. It’s the ultimate comfort food solution for anyone seeking big flavor with tiny effort, and trust me, your family will be asking for seconds!

Ingredient Notes
One of the beautiful things about my Dump And Bake Meatball Casserole is how forgiving and versatile it is, especially when it comes to the ingredients. The “dump and bake” concept means we’re looking for efficiency and minimal fuss, so pre-cooked or frozen ingredients are often your best friends here. Let’s dive into the core components and some fantastic ways you can tweak them to your liking.
Meatballs: This is obviously the star of our show! I typically reach for a bag of good quality frozen, pre-cooked meatballs. Look for ones made with beef for a hearty flavor, but feel free to explore. If you prefer, turkey or chicken meatballs work wonderfully too, offering a lighter alternative without sacrificing the comforting appeal. For a plant-based option, vegetarian or vegan meatballs are an excellent substitution and hold up beautifully during baking. If you have homemade meatballs on hand, fantastic! Just make sure they are fully cooked before adding them to the casserole to ensure they heat through properly with the rest of the ingredients.
Pasta: Short pasta shapes are ideal for casseroles like this because they cook evenly and are easy to scoop. My go-to choices are penne, ziti, or rotini. They have enough surface area to cling to the sauce and meatballs. You could also use medium shells or elbow macaroni. Avoid very thin pastas like angel hair or vermicelli, as they tend to get mushy in the oven. For a gluten-free version, simply swap in your favorite gluten-free short pasta; just be aware that baking times might vary slightly as gluten-free pasta can sometimes cook faster or absorb more liquid.
Marinara Sauce: A good quality jarred marinara sauce is the backbone of the flavor profile for this casserole. Choose your favorite brand – chunky, smooth, with basil, or garlic – whatever you love! If you’re feeling ambitious, a homemade marinara would, of course, be incredible. You can also experiment with other tomato-based sauces like arrabbiata for a spicy kick, or even a rosé sauce for a creamier finish. The key is to have enough sauce to really coat everything and contribute to the liquid needed for the pasta to cook.
Broth (or water): This is crucial for cooking the uncooked pasta right in the casserole dish. I usually opt for beef broth to complement the meatballs, but vegetable broth is an excellent alternative and keeps the dish more flexible for different dietary preferences. If you’re really in a pinch, water will work, though it won’t add quite the same depth of flavor. If you want a richer flavor profile without adding alcohol, a splash of non-alcoholic red wine substitute or even a tablespoon of balsamic vinegar can deepen the tomato notes in your sauce.
Cheese: Mozzarella is a classic for a reason – it melts beautifully and creates that irresistible gooey, cheesy topping we all crave. I recommend using shredded low-moisture, part-skim mozzarella. For extra flavor, a sprinkle of grated Parmesan or Pecorino Romano mixed in or on top adds a salty, nutty bite. Feel free to use a blend of Italian cheeses or even provolone for a different texture and taste. If you need a dairy-free option, many plant-based shredded cheeses now melt quite well.
Seasonings: Beyond the sauce, a little extra seasoning can really elevate the dish. I like to add a pinch of dried Italian seasoning, garlic powder, and onion powder to ensure every bite is bursting with flavor. Red pepper flakes are optional but highly recommended if you enjoy a touch of heat!
Optional Add-ins: Don’t be shy about adding some vegetables! Fresh spinach can be stirred in raw before baking – it will wilt beautifully into the casserole. Diced bell peppers, onions, or mushrooms can also be added, though I recommend sautéing them lightly beforehand to ensure they cook through evenly and aren’t too crunchy in the final dish.
Step-by-Step Instructions
You’re about to experience the sheer joy of a truly “dump and bake” meal. There’s no pre-boiling pasta, no separate sautéing (unless you’re adding raw veggies, but even then, it’s minimal!), just combine and bake. It’s perfect for busy weeknights or when you simply want maximum flavor for minimal effort. Let’s get cooking!
- Preheat Your Oven and Prepare Your Dish: First things first, get your oven preheated to 375°F (190°C). While it’s heating up, grab a large 9×13 inch baking dish. I like to give mine a quick spray with non-stick cooking spray, just to be on the safe side, though with all that sauce, it usually doesn’t stick too much.
- Combine the Dry Ingredients: In your prepared baking dish, pour in the uncooked short pasta of your choice. I usually go for about 12-16 ounces. Then, evenly distribute your frozen (or pre-cooked homemade) beef meatballs over the pasta. No need to thaw them first; they’ll cook right in the sauce!
- Add the Liquids and Seasonings: Next, pour in your favorite jarred marinara sauce. I typically use two 24-ounce jars to ensure there’s plenty of liquid for the pasta to absorb. Then, carefully pour in 1 to 1.5 cups of beef or vegetable broth. This is super important – it’s the liquid that will cook your pasta! Sprinkle in your dried Italian seasoning, garlic powder, onion powder, and any red pepper flakes if you’re feeling spicy. Give everything a gentle stir with a spoon or spatula. You want to make sure the pasta is as submerged as possible in the liquid. If you’re adding fresh spinach, now’s the time to stir it in; it’ll wilt down beautifully.
- Cover and Bake (First Round): Once everything is combined and the pasta is mostly submerged, tightly cover your baking dish with aluminum foil. This traps the steam, which is essential for cooking the pasta evenly. Place the covered dish into your preheated oven and bake for 30 minutes.
- Uncover, Stir, and Bake Again: After 30 minutes, carefully remove the foil (watch out for steam!) and give the casserole a good stir. This helps distribute the heat and ensures the pasta cooks evenly, preventing any clumps. If the casserole looks a little dry, you can add another splash of broth or water, but typically it should be fine. Re-cover the dish with the foil and return it to the oven for another 15-20 minutes, or until the pasta is al dente (tender but still has a slight bite).
- Add the Cheese and Final Bake: Now for the best part! Carefully remove the foil once more. Sprinkle the shredded mozzarella cheese generously over the entire casserole. If you’re using Parmesan, sprinkle that on top too. Return the uncovered dish to the oven and bake for another 10-15 minutes, or until the cheese is completely melted, bubbly, and beautifully golden brown. If you like a darker, more caramelized cheese crust, you can even switch the oven to broil for a minute or two at the very end, but keep a very close eye on it to prevent burning!
- Rest and Serve: Once out of the oven, I know it’s tempting to dig right in, but please resist for a few minutes! Let the casserole rest for about 5-10 minutes. This allows the sauce to settle, thickens it slightly, and makes it much easier to serve without everything falling apart. Garnish with fresh basil or parsley if you like, and serve hot with a side salad and some crusty bread for dipping. Enjoy your delicious, effortlessly made Dump And Bake Meatball Casserole!
Tips & Suggestions
Making a Dump And Bake Meatball Casserole is pretty straightforward, but I’ve picked up a few tricks over time that really make a difference. These tips will help ensure your casserole comes out perfectly every time, full of flavor and with perfectly cooked pasta.
- Ensure Pasta Submersion: This is arguably the most crucial tip for any dump and bake pasta dish. The uncooked pasta must be mostly submerged in the liquid (sauce and broth) to cook properly. If some pieces are sticking out too much, they’ll end up hard and uncooked. After stirring, if you notice a lot of dry pasta, add another splash of broth or even water until most of it is covered. Don’t drown it, but make sure it has enough to absorb.
- Don’t Skimp on the Sauce: While the broth helps with liquid, a generous amount of marinara sauce is key for both flavor and moisture. Using enough sauce prevents the casserole from becoming dry and ensures every bite is rich and saucy. If your meatballs are particularly large or numerous, you might need a little extra sauce to coat everything.
- Choose the Right Baking Dish: A 9×13 inch baking dish is ideal for this recipe. It’s large enough to comfortably hold all the ingredients without overflowing. Using a dish that’s too small might lead to a messy oven, and one that’s too large might cause the liquid to evaporate too quickly, leaving you with undercooked pasta.
- Adjust Baking Time for Pasta: Not all pasta is created equal, and oven temperatures can vary. The suggested baking times are a guideline. After the initial covered bake, check the pasta for doneness. If it’s still too firm, add a bit more liquid (if needed) and continue baking, covered, for another 5-10 minutes. You’re looking for al dente, not mushy.
- Customize Your Flavor Profile: This casserole is a fantastic canvas! Love garlic? Add a teaspoon of minced fresh garlic along with the dried seasonings. Want more herbs? Fresh basil or oregano stirred in before the final bake adds a bright, aromatic touch. A pinch of red pepper flakes adds a lovely warmth, while a sprinkle of fennel seeds can give a subtle Italian sausage-like flavor.
- Broil for a Crispier Top: If you adore a deeply golden, slightly crispy cheese topping, after your cheese has melted and is bubbly, you can switch your oven to broil for 1-3 minutes. Keep a very close eye on it, as cheese can go from perfect to burnt in a flash!
- Let it Rest: I know, I know, it’s hard to wait when it smells so good! But allowing the casserole to rest for 5-10 minutes after it comes out of the oven is crucial. This helps the sauce to thicken slightly and settle, making it much easier to scoop and preventing it from being too soupy. It also helps the flavors meld even further.
- Add Veggies Smartly: If you want to add heartier vegetables like diced onions, bell peppers, or mushrooms, I recommend sautéing them lightly in a pan for 5-7 minutes before adding them to the casserole dish. This ensures they soften and cook through properly in the oven, as they won’t have as much time to cook as the pasta. For softer vegetables like spinach, you can stir them in raw – they’ll wilt beautifully during baking.
Storage
One of the many reasons I love making a big Dump And Bake Meatball Casserole is how wonderfully it stores. It’s truly a gift that keeps on giving, making it perfect for meal prep or enjoying delicious leftovers throughout the week.
Refrigeration:
Once your casserole has cooled completely to room temperature, you can store any leftovers in an airtight container in the refrigerator. It will stay fresh and delicious for 3-4 days. I often find that the flavors deepen and meld even more the next day, making the leftovers arguably even better than the first serving!
- To Reheat (Individual Servings): For single portions, simply scoop the desired amount into a microwave-safe dish and heat on high for 1-2 minutes, or until warmed through. Stir halfway for even heating.
- To Reheat (Larger Portions/Whole Casserole): If reheating a larger portion or the entire casserole, you can place it back into a baking dish, cover it loosely with foil, and bake in a preheated oven at 300-325°F (150-160°C) for 20-30 minutes, or until heated through. Adding a tablespoon or two of water or broth to the dish before reheating can help keep it from drying out.
Freezing:
This casserole freezes exceptionally well, making it an excellent candidate for future meals. It’s perfect for a quick dinner when you don’t have time to cook from scratch.
- To Freeze (Whole Casserole):
- Allow the baked casserole to cool completely. This is critical to prevent ice crystals from forming.
- Once cool, you can either wrap the entire baking dish tightly with several layers of plastic wrap, followed by aluminum foil. Or, for easier portioning later, you can transfer the casserole into a freezer-safe aluminum baking dish (if you didn’t bake it in one initially) and cover it tightly.
- Label the package with the date and contents. It can be stored in the freezer for up to 2-3 months.
- To Freeze (Individual Portions):
- Once the casserole is cool, scoop individual portions into freezer-safe containers or heavy-duty freezer bags.
- Remove as much air as possible from the bags to prevent freezer burn.
- Label with the date and contents. These individual portions are great for grab-and-go lunches or quick dinners and will last for 2-3 months.
- To Reheat from Frozen:
- For Individual Portions: Transfer a frozen portion to a microwave-safe dish. Heat on 50-75% power for 5-7 minutes, stirring occasionally, until hot and bubbly. Or, thaw overnight in the refrigerator and then reheat as you would refrigerated leftovers.
- For a Whole Casserole: If reheating from frozen, it’s best to let the casserole thaw in the refrigerator overnight. Once thawed, cover it loosely with foil and bake in a preheated oven at 350°F (175°C) for 30-45 minutes, or until heated through. If baking from completely frozen, you’ll need to bake it covered at a lower temperature (around 325°F or 160°C) for 1-1.5 hours, then uncover and bake for another 15-20 minutes, or until bubbly and hot in the center. Again, adding a splash of broth before reheating can help maintain moisture.
No matter how you store it, this Dump And Bake Meatball Casserole is a fantastic make-ahead option that tastes just as good the second (or third!) time around.
Final Thoughts
And there you have it! I truly believe this Dump And Bake Meatball Casserole Recipe is going to become an instant favorite in your home. It’s the ultimate answer for those busy weeknights when you crave something hearty, flavorful, and incredibly comforting, but simply don’t have the time or energy for a complicated dish.
The true magic of this recipe lies in its name – ‘dump and bake’. Minimal prep, no fuss, and maximum payoff are what you can expect. You’re rewarded with tender, savory meatballs enveloped in a rich, non-alcoholic sauce, perfectly baked with your favorite pasta and gooey, melted cheese, all with barely any effort. It’s a complete meal featuring satisfying beef meatballs that delivers on taste and convenience every single time. I hope you enjoy the delicious simplicity and pure satisfaction that comes with making and sharing this incredible Dump And Bake Meatball Casserole Recipe. Happy cooking!

Dump & Bake Meatball Casserole: Easy Weeknight Meal!
- Total Time: 5 minute
- Yield: 6 servings 1x
Description
This Dump And Bake Meatball Casserole is the ultimate weeknight dinner solution, combining hearty meatballs, pasta, and cheese into one delicious dish. Effortlessly prepared, it offers big flavor with minimal fuss, making it perfect for busy evenings.
Ingredients
- 12–16 ounces uncooked short pasta (penne, ziti, or rotini)
- Frozen pre-cooked beef meatballs
- 2 (24-ounce) jars marinara sauce
- 1 to 1.5 cups beef or vegetable broth
- Dried Italian seasoning
- Garlic powder
- Onion powder
- Red pepper flakes (optional)
- Shredded low-moisture, part-skim mozzarella cheese
- Grated Parmesan or Pecorino Romano cheese (optional)
- Fresh spinach (optional)
- Diced bell peppers, onions, or mushrooms (optional, sautéed beforehand)
Instructions
- Preheat your oven to 375°F (190°C) and prepare a large 9×13 inch baking dish with non-stick cooking spray.
- In the baking dish, pour in the uncooked short pasta and evenly distribute the frozen meatballs over the pasta.
- Pour in the marinara sauce and broth, then sprinkle in the dried Italian seasoning, garlic powder, onion powder, and red pepper flakes. Stir gently to ensure the pasta is submerged in the liquid.
- Cover the baking dish tightly with aluminum foil and bake for 30 minutes.
- After 30 minutes, remove the foil, stir the casserole, and re-cover it. Bake for another 15-20 minutes, or until the pasta is al dente.
- Remove the foil and sprinkle mozzarella cheese over the casserole. If using, add Parmesan cheese as well. Return to the oven and bake for another 10-15 minutes until the cheese is melted and bubbly.
- Let the casserole rest for 5-10 minutes before serving. Garnish with fresh basil or parsley if desired.
- Prep Time: 10 mins
- Cook Time: 1 hr
- Category: Dinner
- Method: Baking
- Cuisine: Italian
Nutrition
- Serving Size: 1 bowl
- Calories: 450
- Sugar: 6 g
- Sodium: 800 mg
- Fat: 20 g
- Saturated Fat: 10 g
- Unsaturated Fat: 8 g
- Trans Fat: 0 g
- Carbohydrates: 45 g
- Fiber: 3 g
- Protein: 25 g
- Cholesterol: 60 mg
Keywords: Ensure the pasta is mostly submerged in the liquid for proper cooking. Use a generous amount of marinara sauce to keep the casserole moist. Customize with additional seasonings or vegetables as desired.


Leave a Comment