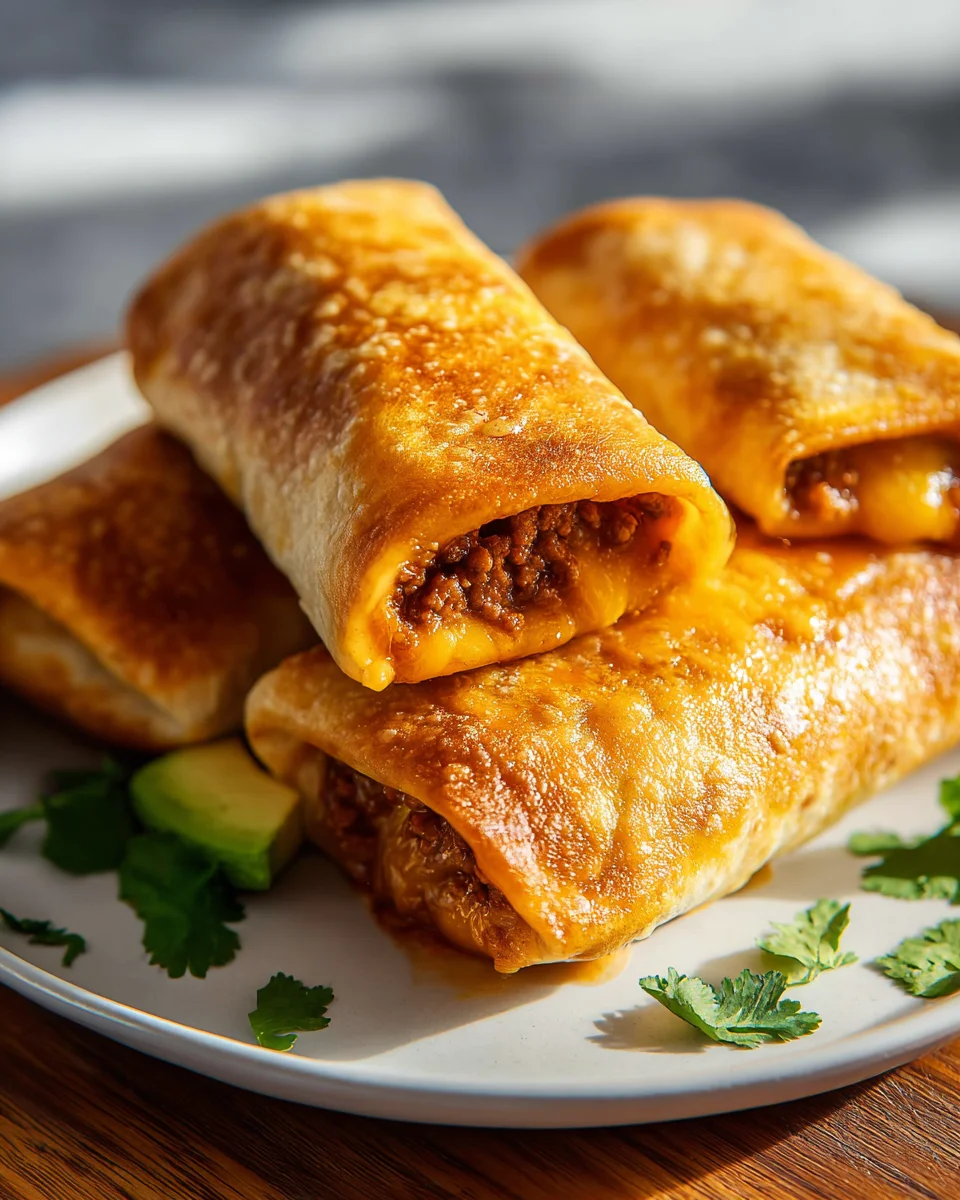
Beef And Cheese Chimichangas Recipe
Oh my goodness, get ready to experience a taste sensation because I’m so excited to share my Beef And Cheese Chimichangas Recipe with you! If you’ve never had the pleasure of biting into a perfectly crisp chimichanga, you are in for an absolute treat. What makes this particular chimichanga recipe so special, you ask? Well, it’s all about that incredible contrast: a golden, wonderfully crunchy exterior giving way to a warm, tender, and incredibly flavorful beef filling, all bound together with an irresistible amount of gooey, melted cheese. It’s truly a celebration of textures and tastes in every single bite!
I know you’re going to love making and devouring these. There’s something so satisfying about crafting these beauties at home, far surpassing anything you might get at a restaurant. This isn’t just a meal; it’s an experience. Imagine that first bite: the satisfying crunch, the savory, seasoned beef, and the luxurious, creamy cheese oozing out. It’s comforting, indulgent, and just plain delicious. Whether you’re looking for a show-stopping dinner for the family, an impressive dish for guests, or just want to treat yourself to some serious comfort food, my Beef And Cheese Chimichangas are absolutely perfect. Get ready to fall in love with your new favorite fried delight!
Ingredient Notes
Crafting delicious Beef And Cheese Chimichangas starts with understanding the stars of the show – our ingredients. I’ve found that using quality components truly elevates this dish from good to absolutely fantastic, and I’m excited to share my insights with you.
- The Beef: For the filling, I typically reach for a pound or a pound and a half of lean ground beef, around 85-90% lean. This gives us a hearty base without excessive grease. If you’re feeling adventurous or have more time, shredded beef from a slow-cooked chuck roast can make an incredibly rich and tender filling. Just season and simmer it until it’s fall-apart tender, then shred it with two forks.
- The Cheese: This is half the name, so it’s critical! I love a good blend of Monterey Jack and sharp cheddar for their meltability and fantastic flavor. Colby Jack is another excellent choice that offers a nice balance. The key is using a cheese that melts beautifully to create that gooey, irresistible center. Avoid pre-shredded cheeses if possible, as they often contain anti-caking agents that can hinder a smooth melt; fresh-grated is always my preference here.
- The Tortillas: You’ll want large, burrito-sized flour tortillas, typically 10-12 inches in diameter. These are essential for holding all that glorious filling without tearing when you fold and fry them. Corn tortillas won’t work for chimichangas; they’ll crack and fall apart when folded and fried.
- Aromatic Base: Onion and garlic are non-negotiable for building depth of flavor in our beef filling. I usually finely dice a yellow onion and mince several cloves of garlic to ensure they meld seamlessly into the mixture.
- Spices & Flavor Boosters: My go-to spices include chili powder, ground cumin, dried oregano, and a pinch of cayenne pepper if I’m craving a little heat. A touch of tomato paste adds a wonderful umami depth and richness to the beef, while a bit of beef broth helps to create a moist, flavorful filling that isn’t too dry.
- Frying Oil: For that signature crispy, golden exterior, you’ll need a neutral oil with a high smoke point. Vegetable oil, canola oil, or even peanut oil work perfectly. Make sure you have enough to submerge at least half of the chimichanga for even cooking.
- Garnishes: While not part of the chimichanga itself, these truly complete the experience! Think sour cream, a vibrant salsa (homemade or store-bought), fresh guacamole, shredded lettuce, and diced tomatoes.
Substitutions:
- Beef Variations: If you don’t have ground beef, ground turkey or even a plant-based ground substitute can be used, though the flavor profile will obviously shift. For shredded beef, you could use leftover pot roast.
- Cheese Swaps: A Mexican blend cheese (often a mix of Monterey Jack, cheddar, asadero, and queso blanco) is a convenient and tasty alternative to grating your own.
- Spice Customization: Feel free to adjust the spice levels to your family’s preference. Add more chili powder for a bolder flavor, or a dash of smoked paprika for an extra layer of smokiness. A non-alcoholic beer substitute can be used for extra depth in the beef mixture, if desired, to deglaze the pan and add a malty note, but beef broth works just as well.
- Oil Alternatives: While deep frying gives the best results, you can also bake or air-fry chimichangas for a lighter, though slightly different, texture. I’ll touch more on this in the tips section.
Step-by-Step Instructions
Alright, let’s get cooking! Making Beef And Cheese Chimichangas might seem like a project, but I promise you, breaking it down into these simple steps makes it incredibly manageable and fun. Follow along, and you’ll be enjoying crispy, cheesy perfection in no time.
- Prepare the Beef Filling:
- Heat a large skillet or Dutch oven over medium-high heat. Add your ground beef and cook, breaking it up with a spoon, until it’s fully browned. This usually takes about 5-7 minutes.
- Once browned, carefully drain off any excess fat. I like to tilt the pan and use a spoon to scoop out the fat, or place the beef in a colander.
- Return the beef to the pan. Reduce the heat to medium. Add the diced onion and cook until softened and translucent, about 5 minutes. Stir in the minced garlic and cook for another minute until fragrant.
- Now it’s time for the spices! Stir in the chili powder, cumin, oregano, and cayenne pepper (if using). Cook for 1 minute, allowing the spices to toast and become fragrant.
- Stir in the tomato paste, coating the beef mixture well. Pour in the beef broth. Bring the mixture to a gentle simmer, then reduce the heat to low and let it cook for 5-7 minutes, allowing the flavors to meld and the liquid to reduce slightly, creating a moist but not watery filling.
- Remove the pan from the heat. Stir in about half of your grated cheese until it’s melted and incorporated into the beef mixture. This helps bind the filling and adds incredible flavor inside. Set the filling aside to cool slightly while you prepare your workspace.
- Assemble the Chimichangas:
- Lightly warm your flour tortillas. You can do this by wrapping a stack in a damp paper towel and microwaving for 30-60 seconds, or by heating them briefly in a dry skillet for 10-15 seconds per side until pliable. This makes them easier to fold without cracking.
- Lay a warm tortilla flat on a clean surface. Spoon about 1/2 to 2/3 cup of the beef and cheese filling slightly below the center of the tortilla. Don’t overfill, or they’ll be hard to close!
- Sprinkle a little more of your remaining grated cheese over the filling.
- To fold, first fold the bottom edge of the tortilla up over the filling. Then, fold in the left and right sides tightly. Finally, roll the entire tortilla up from the bottom, creating a snug, compact package, similar to a burrito. If you like, you can secure the seam with a toothpick, though a tight roll usually holds well, especially once it starts frying. Repeat with the remaining tortillas and filling.
- Fry the Chimichangas:
- Pour enough vegetable, canola, or peanut oil into a deep, heavy-bottomed pot or Dutch oven to reach a depth of about 2-3 inches. Heat the oil over medium-high heat until it reaches 350-375°F (175-190°C). If you don’t have a thermometer, you can test it by dropping a tiny piece of tortilla in; it should sizzle immediately.
- Carefully place 1-2 chimichangas into the hot oil, seam-side down first, ensuring you don’t overcrowd the pot. Overcrowding will drop the oil temperature and lead to greasy chimichangas.
- Fry for 3-5 minutes, turning occasionally with tongs, until they are golden brown and crispy on all sides.
- Using tongs, carefully remove the cooked chimichangas from the oil and place them on a wire rack set over a baking sheet lined with paper towels to drain any excess oil.
- Repeat with the remaining chimichangas, allowing the oil to come back up to temperature between batches.
- Serve Immediately:
- Serve your hot, crispy Beef And Cheese Chimichangas immediately with your favorite toppings like sour cream, salsa, guacamole, and shredded lettuce. Enjoy!
Tips & Suggestions
Making Beef And Cheese Chimichangas is a truly rewarding experience, and over time, I’ve picked up a few tricks that make the process smoother and the results even more delicious. Here are my top tips and suggestions to ensure your chimichangas are a resounding success:
- Don’t Overfill: It’s tempting to load up those tortillas, but less is often more here. About 1/2 to 2/3 cup of filling per large tortilla is ideal. Overfilling makes them difficult to roll tightly and prone to bursting during frying, which is messy and heartbreaking.
- Warm Your Tortillas: This is a non-negotiable step! Cold tortillas will crack and tear when you try to fold them. A quick zap in the microwave (wrapped in a damp paper towel) or a few seconds in a dry skillet makes them pliable and easy to work with.
- The Filling Consistency is Key: You want a moist, flavorful beef filling, but not a watery one. Excess liquid will make your chimichangas soggy and can cause sputtering in the hot oil. If your filling seems too wet after simmering, let it reduce a bit longer, or drain off any extra liquid before adding the cheese.
- Seal Them Tight: A tightly rolled chimichanga is a happy chimichanga. Ensure the ends are tucked in securely and the final roll is firm. You can use a toothpick to secure the seam if you’re worried about it unraveling, just remember to remove it before serving!
- Oil Temperature Matters: Frying at the correct oil temperature (350-375°F or 175-190°C) is crucial for a perfectly crispy, non-greasy chimichanga. If the oil isn’t hot enough, they’ll absorb too much oil and be greasy. Too hot, and they’ll brown too quickly on the outside before the inside is thoroughly heated, potentially burning. An instant-read thermometer is your best friend here.
- Don’t Overcrowd the Pot: Fry your chimichangas in batches, usually 1-2 at a time, depending on the size of your pot. Crowding the oil will drop its temperature dramatically, leading to those undesirable greasy results.
- Alternative Cooking Methods (for a different texture):
- Baking: Preheat your oven to 400°F (200°C). Lightly brush the assembled chimichangas with oil on all sides. Place them seam-side down on a baking sheet. Bake for 20-25 minutes, flipping halfway through, until golden brown and crispy. They won’t have the same deep-fried crispness but will still be delicious.
- Air Frying: Preheat your air fryer to 375°F (190°C). Lightly spray or brush the chimichangas with oil. Place 1-2 in the air fryer basket, ensuring they don’t touch. Air fry for 10-15 minutes, flipping halfway, until golden and crisp.
- Make Ahead: You can assemble the chimichangas up to a day in advance. Arrange them in a single layer on a baking sheet, cover loosely with plastic wrap, and refrigerate. When ready to fry, let them come closer to room temperature for about 20-30 minutes before frying to ensure even cooking.
- Spice it Up (or Down): Taste your beef filling before assembling! Adjust the salt, pepper, and chili powder to your liking. A pinch of red pepper flakes can add a nice kick if you enjoy more heat.
Storage
While Beef And Cheese Chimichangas are undeniably at their absolute best when served fresh out of the fryer, I understand that sometimes you’ll have leftovers or want to prepare them in advance. Here’s how I typically handle storage to keep them as delicious as possible:
Cooked Chimichangas:
- Refrigeration: If you have leftover cooked chimichangas, let them cool completely to room temperature. Wrap each chimichanga individually in plastic wrap or aluminum foil, or store them in an airtight container. They will keep well in the refrigerator for up to 2-3 days.
- Reheating:
- Oven (Recommended for Crispness): Preheat your oven to 350°F (175°C). Place the chimichangas on a baking sheet and heat for about 15-20 minutes, or until thoroughly heated through and re-crisped. This method helps restore some of their original texture.
- Air Fryer: Preheat your air fryer to 350°F (175°C). Air fry for 5-8 minutes, flipping halfway, until hot and crispy. This is my preferred method for quick reheating.
- Microwave (Least Recommended for Texture): While you can microwave them, be aware that they will lose their crispness and become softer. Heat for 1-2 minutes, or until warm.
Unfried (Assembled) Chimichangas:
This is a great option for meal prepping!
- Refrigeration: You can assemble the chimichangas and store them unfried in the refrigerator for up to 24 hours. Place them in a single layer on a baking sheet lined with parchment paper, cover loosely with plastic wrap, and refrigerate. When ready to cook, proceed with frying or baking as directed, allowing them to sit at room temperature for about 20-30 minutes first.
- Freezing (Unfried): This is fantastic for future meals!
- Assemble the chimichangas as usual.
- Place them in a single layer on a baking sheet and freeze for 1-2 hours, or until solid. This prevents them from sticking together.
- Once frozen solid, transfer the chimichangas to a freezer-safe bag or airtight container. They will keep well for up to 2-3 months.
- To Cook from Frozen: You can deep-fry, bake, or air-fry them directly from frozen, but you’ll need to increase the cooking time. For deep frying, cook at a slightly lower temperature (around 325°F/160°C) for a longer period (8-12 minutes) to ensure the center heats through without burning the outside. For baking or air frying, add an extra 10-15 minutes to the cooking time.
Freezing the Beef Filling:
If you’ve made extra beef filling, it freezes beautifully on its own!
- Let the filling cool completely.
- Transfer it to a freezer-safe airtight container or heavy-duty freezer bag, removing as much air as possible.
- It can be frozen for up to 3 months.
- To Use: Thaw the filling overnight in the refrigerator, then reheat gently on the stovetop before assembling your fresh chimichangas.
Final Thoughts
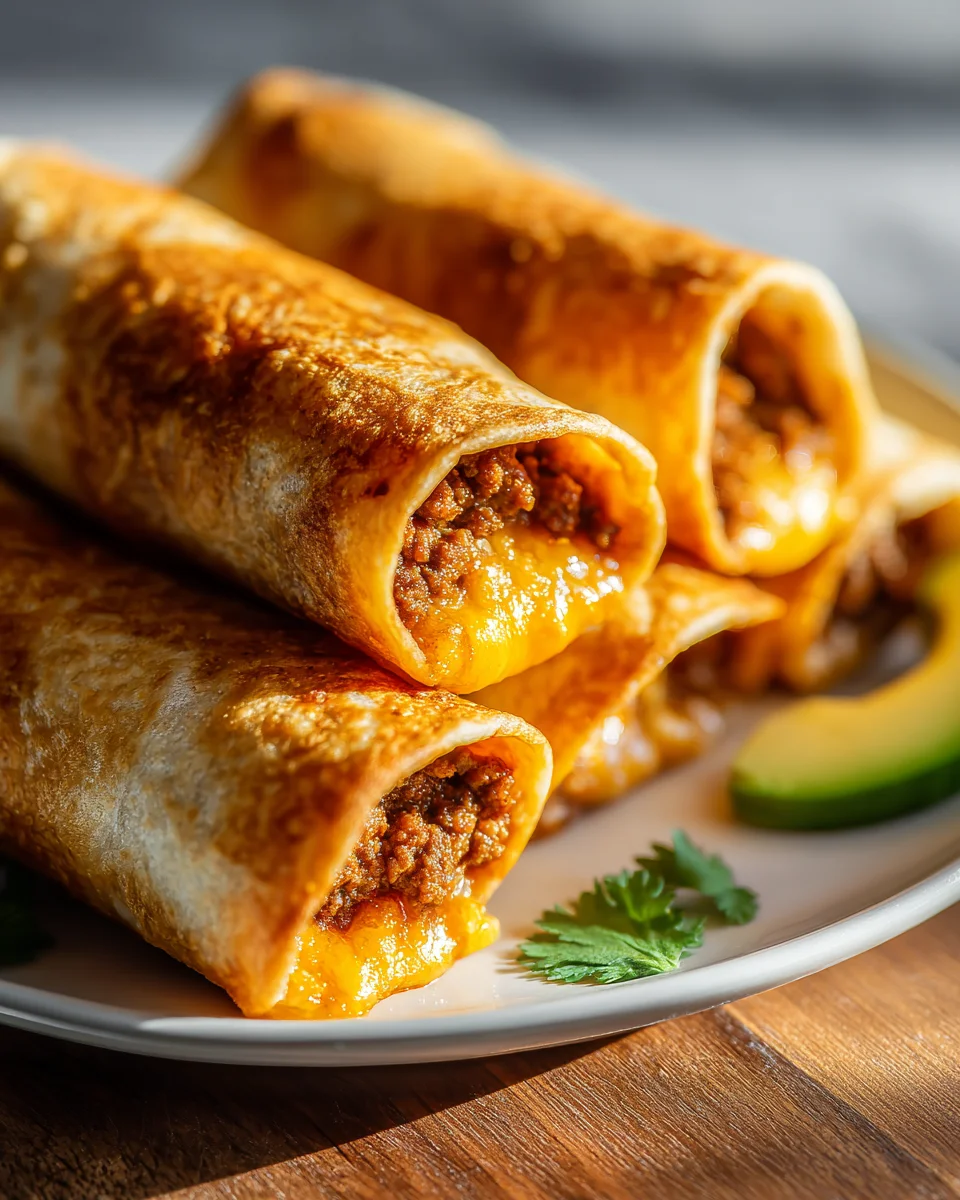
There you have it – the truly satisfying Beef And Cheese Chimichangas Recipe! I genuinely believe this dish is a must-try for anyone looking to add a burst of flavor and a touch of fun to their kitchen. The magic happens when that perfectly crispy, golden-brown tortilla gives way to a hearty, seasoned beef filling, all perfectly complemented by the gooey, melted cheese. It’s a combination that’s incredibly comforting and deeply delicious, making it an instant crowd-pleaser.
So, I wholeheartedly encourage you to dive into making this wonderful Beef And Cheese Chimichangas Recipe. Get ready to experience the joy of preparing and, more importantly, devouring these fantastic chimichangas. You won’t regret bringing this sensational dish to your table!

Crispy Beef & Cheese Chimichangas: Easy Homemade Recipe
- Total Time: 1 hour
- Yield: 4 servings 1x
Description
Experience the delightful crunch of homemade Beef And Cheese Chimichangas, filled with savory beef and gooey cheese. This recipe is perfect for a comforting dinner or a special treat for guests.
Ingredients
- 1 to 1.5 pounds of lean ground beef (85-90% lean)
- Monterey Jack cheese
- Sharp cheddar cheese
- Colby Jack cheese
- Large flour tortillas (10-12 inches in diameter)
- 1 yellow onion (finely diced)
- Several cloves of garlic (minced)
- Chili powder
- Ground cumin
- Dried oregano
- Cayenne pepper (optional)
- Tomato paste
- Beef broth
- Vegetable oil, canola oil, or peanut oil (for frying)
- Sour cream (for garnish)
- Salsa (for garnish)
- Guacamole (for garnish)
- Shredded lettuce (for garnish)
- Diced tomatoes (for garnish)
Instructions
- Prepare the Beef Filling: Heat a large skillet or Dutch oven over medium-high heat. Add your ground beef and cook, breaking it up with a spoon, until it's fully browned, about 5-7 minutes.
- Once browned, carefully drain off any excess fat. Return the beef to the pan and reduce the heat to medium. Add the diced onion and cook until softened and translucent, about 5 minutes. Stir in the minced garlic and cook for another minute until fragrant.
- Stir in the chili powder, cumin, oregano, and cayenne pepper (if using). Cook for 1 minute, allowing the spices to toast and become fragrant.
- Stir in the tomato paste, coating the beef mixture well. Pour in the beef broth. Bring the mixture to a gentle simmer, then reduce the heat to low and let it cook for 5-7 minutes.
- Remove the pan from the heat. Stir in about half of your grated cheese until it's melted and incorporated into the beef mixture. Set the filling aside to cool slightly.
- Assemble the Chimichangas: Lightly warm your flour tortillas. Lay a warm tortilla flat on a clean surface. Spoon about 1/2 to 2/3 cup of the beef and cheese filling slightly below the center of the tortilla. Sprinkle a little more of your remaining grated cheese over the filling.
- To fold, first fold the bottom edge of the tortilla up over the filling. Then, fold in the left and right sides tightly. Finally, roll the entire tortilla up from the bottom, creating a snug, compact package. Repeat with the remaining tortillas and filling.
- Fry the Chimichangas: Pour enough oil into a deep pot to reach a depth of about 2-3 inches. Heat the oil over medium-high heat until it reaches 350-375°F (175-190°C).
- Carefully place 1-2 chimichangas into the hot oil, seam-side down first. Fry for 3-5 minutes, turning occasionally with tongs, until they are golden brown and crispy on all sides.
- Using tongs, carefully remove the cooked chimichangas from the oil and place them on a wire rack set over a baking sheet lined with paper towels to drain any excess oil.
- Serve Immediately: Serve your hot, crispy Beef And Cheese Chimichangas immediately with your favorite toppings like sour cream, salsa, guacamole, and shredded lettuce.
- Prep Time: 30 mins
- Cook Time: 30 mins
- Category: Dinner
- Method: Frying
- Cuisine: Mexican
Nutrition
- Serving Size: 1 chimichanga
- Calories: 500
- Sugar: 2 g
- Sodium: 800 mg
- Fat: 30 g
- Saturated Fat: 10 g
- Unsaturated Fat: 15 g
- Trans Fat: 0 g
- Carbohydrates: 40 g
- Fiber: 3 g
- Protein: 25 g
- Cholesterol: 70 mg
Keywords: Don't overfill the tortillas to avoid bursting during frying. Warm tortillas make them easier to fold. Ensure the oil temperature is correct for crispy results.

Leave a Comment