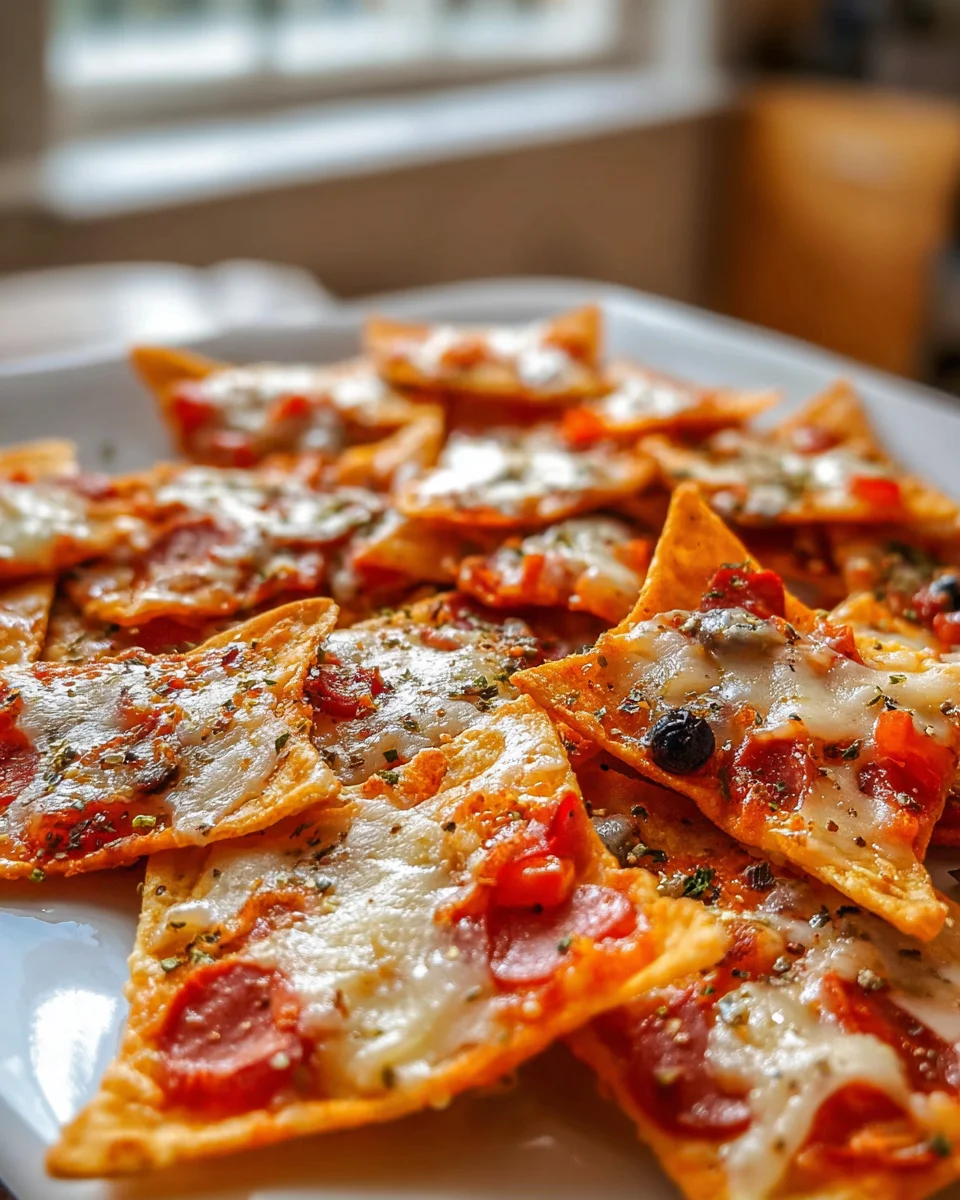
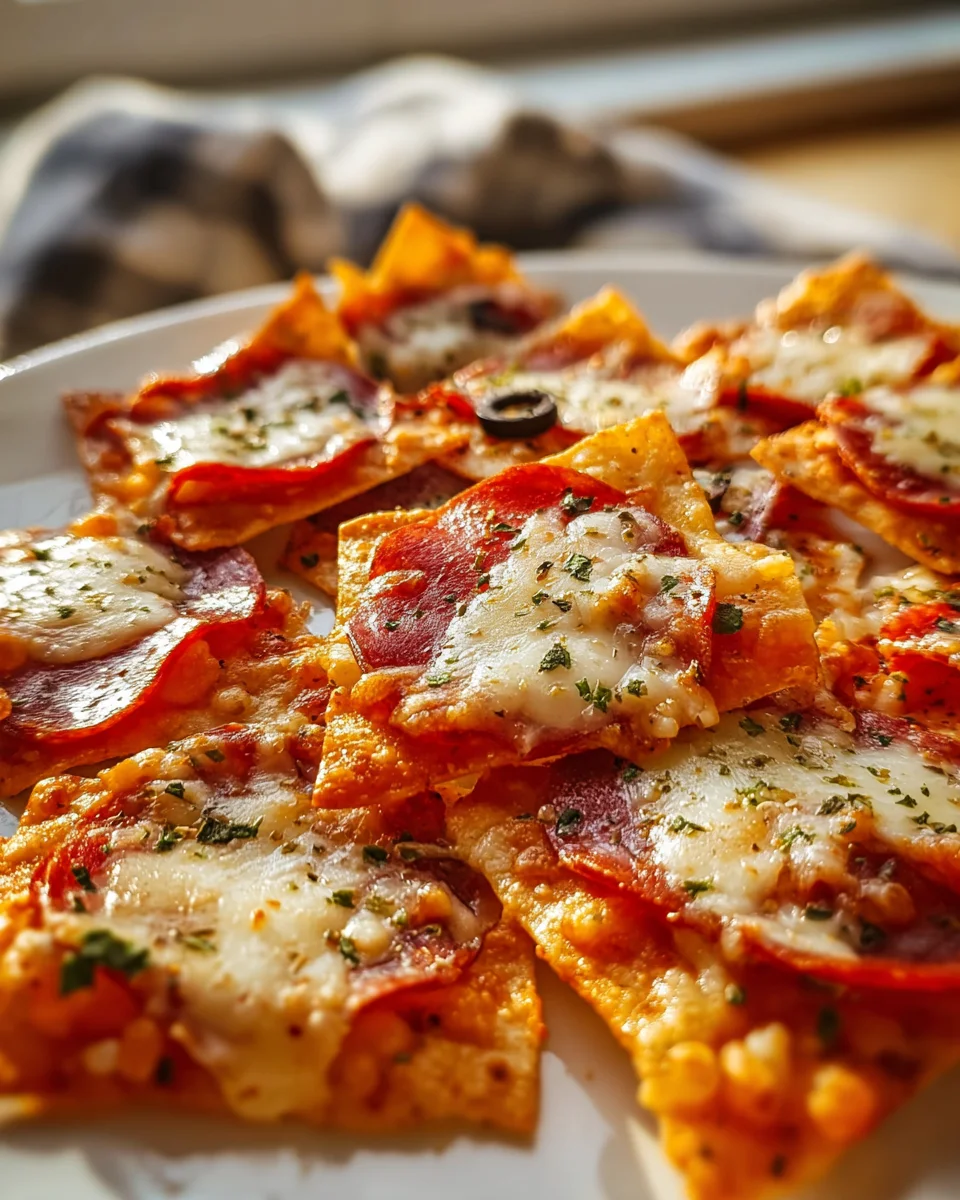
Crispy Pizza Chips
Oh my goodness, do I have a treat for you today! I’m so excited to share one of my absolute favorite snack innovations. Forget everything you thought you knew about pizza, because we’re taking all those beloved flavors and transforming them into something utterly addictive and totally new: Crispy Pizza Chips! This isn’t just a gimmick; it’s a game-changer. Imagine that incredible, savory taste of your favorite pizza, but in a light, crunchy, dippable chip form. It’s what happens when a crispy snack meets cheesy goodness, and trust me, you’ll wonder where this has been all your life.
I’ve discovered the perfect way to get that satisfying crunch along with all the classic pizza vibes. We’re talking about thinly prepared bases (think tortillas or pita bread, or even very thin pizza dough) baked or air-fried to golden perfection, then adorned with rich tomato sauce, melted gooey cheese, and your favorite miniature pizza toppings like tiny bits of beef pepperoni or diced bell peppers. Each bite is a symphony of crisp texture and familiar, comforting pizza flavor – perfect for snacking, sharing, or dipping into extra marinara. Get ready for your new go-to snack!
Hello there, fellow snack enthusiasts! If you’re anything like me, you sometimes crave the irresistible flavors of pizza but in a format that’s perfect for dipping, sharing, and munching without a fork and knife. That’s exactly where my Crispy Pizza Chips come in! Forget greasy delivery; these homemade beauties are quick, customizable, and unbelievably addictive. They’re perfect for game nights, movie marathons, or just a simple afternoon treat. Let’s dive into making these incredible little bites!
Ingredient Notes
-
Tortillas (Corn or Flour): I primarily use large flour tortillas for their excellent crisp texture and neutral flavor, which allows the pizza toppings to really shine. However, corn tortillas are a fantastic alternative, offering a slightly different, sturdy snap. The key is to choose thinner tortillas rather than thick ones, as they’ll achieve that desirable crispiness much more easily. Depending on their size, 8-12 large tortillas usually yield a good, generous batch of chips, ideal for sharing or having plenty for yourself.
-
Pizza Sauce: A high-quality pizza sauce is fundamental here. You can opt for your favorite store-bought brand or, if you’re feeling a bit more adventurous, a quick homemade marinara works wonderfully. I always lean towards a thicker sauce, as watery varieties can prevent the chips from crisping up properly. If your sauce seems a little thin, don’t hesitate to simmer it gently on the stovetop for a few minutes to reduce it slightly. Approximately 1/2 to 3/4 cup is generally sufficient; we’re aiming for a light, even coating, not a heavy layer that could lead to sogginess.
-
Shredded Mozzarella Cheese: For these chips, I recommend using low-moisture, part-skim shredded mozzarella. It melts beautifully, provides that classic pizza stretch, and browns to perfection without becoming overly greasy. While pre-shredded cheese is incredibly convenient, if you have a block of mozzarella, shredding it yourself can sometimes result in an even creamier melt. Be mindful not to overload the chips with cheese; a light, even sprinkle (about 1 to 1.5 cups for the whole batch) is all you need to get that delicious cheesy flavor without weighing them down.
-
Olive Oil or Cooking Spray: A light application of olive oil is essential. It helps the tortillas become beautifully golden and wonderfully crispy as they bake. If you’re looking for a lighter option or prefer less fat, cooking spray is a perfectly good alternative. Just a tablespoon or two of olive oil, or a few quick sprays, applied lightly, makes a significant difference in both texture and appearance.
-
Seasonings: This is where you can truly personalize your Crispy Pizza Chips! My essential seasonings for that authentic pizza parlor taste are dried oregano and a pinch of garlic powder. For those who appreciate a little warmth, red pepper flakes are a must-add. Other excellent additions include a good quality Italian seasoning blend, onion powder, or even a dash of smoked paprika for an extra layer of flavor. Don’t forget a touch of salt and freshly ground black pepper to enhance all the other flavors. Feel free to experiment with what you love!
-
Optional Toppings: While I advocate for keeping toppings minimal to ensure maximum crispiness, a very light scattering of finely chopped ingredients can elevate these chips. Think micro-diced bell peppers, extremely thinly sliced mushrooms (make sure to pat them very dry to remove moisture), or tiny bits of cooked, crumbled beef sausage or turkey pepperoni. If using any meat toppings, ensure they are fully cooked and thoroughly drained of any excess fat. The golden rule here is “less is more”; too many toppings will prevent your chips from becoming perfectly crisp.
Step-by-Step Instructions
-
Preheat Your Oven and Prep Baking Sheets: Let’s get started by preheating the oven! Set it to a nice hot 400°F (200°C). This higher temperature is crucial for quickly drying out the tortillas and ensuring they get wonderfully crispy. While the oven preheats, line two large baking sheets with parchment paper. This will prevent any sticking and make cleaning up afterward an absolute breeze. If you don’t have parchment paper, a light coating of cooking spray will work, but parchment definitely gives superior non-stick results.
-
Prepare the Tortillas: Lay your tortillas out flat on a clean, dry work surface. Using a sharp knife or a pizza cutter, carefully cut each tortilla into 8-12 “chip” shapes. I usually cut them into wedges, just like slicing a pizza, but squares or triangles are also perfectly fine. Aim for pieces that are roughly 2-3 inches in size. Try to keep them as uniform as possible; this helps them bake evenly, ensuring every chip comes out perfectly crispy.
-
Lightly Coat with Oil: Arrange the cut tortilla pieces in a single layer on your prepared baking sheets. It’s important not to overcrowd them; if they’re too close together, they’ll steam rather than crisp. You might need to use more than two baking sheets or bake them in batches. Lightly brush or spray the top side of each tortilla piece with olive oil. This step is key for achieving that beautiful golden color and a truly crunchy texture. Remember, a thin, even layer is all you need – we’re not deep-frying here!
-
Add Sauce and Cheese: Now for the delicious part! Take your pizza sauce and, using a small spoon or a pastry brush, spread a very thin, even layer over each oiled tortilla piece. Emphasize “thin” – too much sauce is the enemy of crispiness! Immediately after applying the sauce, sprinkle a small amount of shredded mozzarella evenly over each piece. Again, be light-handed; a gentle dusting of cheese is all that’s required for that perfect cheesy crunch without making the chips heavy.
-
Season and Optionally Top: This is the moment to add your chosen seasonings! Sprinkle dried oregano, garlic powder, red pepper flakes (if using), salt, and pepper over all the cheesy chips. If you’ve opted for any additional toppings like tiny bits of beef sausage or finely diced vegetables, distribute them very sparingly and evenly now. This layer of seasoning and minimal toppings enhances the overall pizza flavor without adding excessive moisture or weight that could hinder crisping.
-
Bake Until Golden and Crispy: Carefully place your baking sheets into the preheated oven. Bake for approximately 8-12 minutes. The goal is for the chips to become beautifully golden brown, the cheese to be bubbly and lightly browned, and most importantly, for the edges to be wonderfully crispy. Keep a very close eye on them, especially during the last few minutes, as they can go from perfectly crisp to burnt quite quickly. Since oven temperatures can vary, your exact baking time might differ slightly. If you’re baking multiple sheets, it’s a good idea to rotate them halfway through to ensure even cooking.
-
Cool and Serve: Once your pizza chips are baked to crispy perfection, remove the baking sheets from the oven. Let the chips cool on the baking sheets for a few minutes. As they cool, they will continue to firm up and become even crispier. Serve them warm with your favorite dipping sauce – extra pizza sauce, a creamy ranch dressing, or even a zesty garlic dip are all fantastic choices. Get ready to enjoy your incredibly addictive Crispy Pizza Chips!
Tips & Suggestions
-
Don’t Overcrowd the Pan: This is arguably the most crucial tip for achieving truly crispy chips! When your tortilla pieces are packed too closely together on the baking sheet, they tend to steam each other rather than baking to that perfect golden crisp. Always ensure each chip has a bit of breathing room around it.
-
Thin Layers are Key: Whether you’re applying olive oil, pizza sauce, or shredded cheese, a thin, even layer is absolutely paramount. Excess moisture or too much weight from toppings will prevent your chips from reaching their full, glorious crispy potential.
-
Experiment with Tortilla Types: While my personal favorite is flour tortillas, don’t hesitate to venture out and try corn tortillas for a distinctly different flavor and a more robust crunch. Another great option is pita bread; simply cut it into triangles and make sure to split the pita pockets horizontally first to create thinner pieces that will crisp up better.
-
Flavor Variations Galore:
- Pesto Pizza Chips: For a vibrant, herbaceous alternative, simply substitute the classic tomato pizza sauce with a thin layer of your favorite pesto.
- Garlic Parmesan: Skip the tomato sauce entirely! Instead, brush the chips lightly with olive oil, then sprinkle generously with garlic powder, your preferred dried Italian herbs, and plenty of grated Parmesan cheese.
- Spicy Sriracha: If you love a bit of heat, try mixing a tiny amount of Sriracha directly into your pizza sauce before spreading it, or drizzle a tiny bit over the chips before they go into the oven.
-
Serving Suggestions: These chips are utterly fantastic when enjoyed on their own, but they truly shine when paired with dips! Besides the obvious extra pizza sauce, consider serving them with a creamy ranch dip, a fresh, vibrant marinara, a warm, gooey queso, or even a sophisticated balsamic glaze for dipping. They also make a fantastic, crunchy accompaniment to a fresh, green salad or a comforting bowl of soup, adding a fun textural element to your meal.
-
Watch Like a Hawk: Every oven is a little different, and tortilla chips can go from perfectly golden to burnt in a flash! Stay close to your oven, especially during the last few minutes of baking. You’re aiming for deliciously golden-brown edges and beautifully bubbly, slightly browned cheese, not charred bits.
-
Cool Completely for Maximum Crisp: While the aroma is incredibly tempting, resist the urge to devour them straight from the oven. Allowing the pizza chips to cool for 5-10 minutes on the baking sheet will firm them up even more, locking in that ultimate, satisfying snap.
Storage
-
Initial Cooling: For the best results and to maintain their crispness, it is absolutely essential to allow your Crispy Pizza Chips to cool completely to room temperature before you even think about storing them. Storing them while they are still warm will trap moisture, which is the quickest way for them to become soggy and lose their crunch.
-
Airtight Container: Once they are fully cooled, transfer the pizza chips into an airtight container. This helps to protect them from both moisture in the air and direct air exposure, which are the primary enemies of crispiness. I find that a cookie tin or a sturdy, rigid plastic container works particularly well for this purpose.
-
Room Temperature Storage: These Crispy Pizza Chips are best kept stored at room temperature. An ideal spot would be in a cool, dry pantry or on your kitchen countertop, away from direct sunlight or heat. Refrigeration is generally not recommended for these chips, as the inherent humidity within a refrigerator environment can cause them to soften very quickly, regardless of how well they are sealed.
-
Longevity: When stored properly in an airtight container at room temperature, your Crispy Pizza Chips should retain most of their delightful crunch for approximately 1-2 days. After that period, while they will still be perfectly flavorful and edible, they may start to lose some of their initial crispness. In my experience, however, they rarely last that long in the house!
-
Re-crisping (Optional): If you find that your chips have lost a bit of their crunch the day after baking, you can easily revive them. Simply spread them out in a single layer on a baking sheet and bake them in a preheated 300°F (150°C) oven for about 3-5 minutes, or until they feel firm and crispy again. Just be sure to watch them very closely during this process to prevent them from burning.
Final Thoughts
And there you have it – your very own batch of Crispy Pizza Chips ready to devour! I truly believe this recipe is a game-changer for anyone craving that irresistible pizza flavor in a fun, dippable, and utterly crispy form. Forget soggy crusts or messy slices; these chips deliver all the cheesy, saucy goodness you love, perfectly portioned and satisfyingly crunchy. They’re ideal for movie night, a party appetizer, or just a quick, delicious snack when the craving strikes. Trust me, once you try these Crispy Pizza Chips, you’ll wonder how you ever lived without them. Go ahead, give them a try – I promise you won’t be disappointed!

Crispy Pizza Chips: The Ultimate Snack Sensation!
- Total Time: 27 minutes
- Yield: 4 servings 1x
Description
Transform your favorite pizza flavors into a light, crunchy snack with these Crispy Pizza Chips! Perfect for dipping and sharing, they are an addictive treat that will satisfy your pizza cravings.
Ingredients
- 8–12 large flour tortillas (or corn tortillas)
- 1/2 to 3/4 cup pizza sauce
- 1 to 1.5 cups shredded mozzarella cheese (low-moisture, part-skim)
- 1–2 tablespoons olive oil (or cooking spray)
- Dried oregano (to taste)
- Garlic powder (to taste)
- Red pepper flakes (optional, to taste)
- Salt (to taste)
- Freshly ground black pepper (to taste)
- Optional toppings: micro-diced bell peppers, extremely thinly sliced mushrooms, tiny bits of cooked, crumbled beef sausage or turkey pepperoni
Instructions
- Preheat your oven to 400°F (200°C) and line two large baking sheets with parchment paper.
- Lay your tortillas flat and cut each into 8-12 chip shapes, aiming for uniform pieces about 2-3 inches in size.
- Arrange the tortilla pieces in a single layer on the baking sheets and lightly brush or spray the top side with olive oil.
- Spread a very thin layer of pizza sauce over each oiled tortilla piece, then sprinkle a small amount of shredded mozzarella evenly on top.
- Sprinkle dried oregano, garlic powder, red pepper flakes, salt, and pepper over the cheesy chips. Add any optional toppings sparingly.
- Bake in the preheated oven for approximately 8-12 minutes until golden brown and crispy, keeping a close eye to prevent burning.
- Remove from the oven and let cool on the baking sheets for a few minutes before serving with your favorite dipping sauce.
- Prep Time: 15 mins
- Cook Time: 12 mins
- Category: Snack
- Method: Baking
- Cuisine: Italian
Nutrition
- Serving Size: 1 serving
- Calories: 150
- Sugar: 2 g
- Sodium: 300 mg
- Fat: 7 g
- Saturated Fat: 3 g
- Unsaturated Fat: 4 g
- Trans Fat: 0 g
- Carbohydrates: 18 g
- Fiber: 1 g
- Protein: 5 g
- Cholesterol: 15 mg
Keywords: Avoid overcrowding the baking sheets to ensure crispiness. Use thin layers of oil, sauce, and cheese for the best texture. Experiment with different tortilla types for varied flavors.


Leave a Comment