Creamy Classic Cheesecake With No Cracks
Oh, cheesecake! Just saying the word brings to mind dreams of a velvety smooth, rich dessert that melts in your mouth. But let’s be honest, for many home bakers, the thought of making a classic cheesecake can come with a secret fear: the dreaded cracks! We’ve all seen them, those unsightly fissures that mar an otherwise perfect dessert. Well, I’m here to tell you that those days are over. Prepare to fall head over heels for our Creamy Classic Cheesecake With No Cracks recipe!
What makes this recipe truly special, you ask? It’s all in the name – a perfectly smooth, beautifully intact top, every single time. Imagine presenting a cheesecake so flawless, so elegant, that it looks like it came straight from a gourmet bakery. This isn’t just about aesthetics; a cheesecake without cracks signifies a perfectly baked, incredibly tender, and unbelievably creamy texture throughout. We’re talking about a dense yet delicate consistency that truly lives up to its “classic” title.
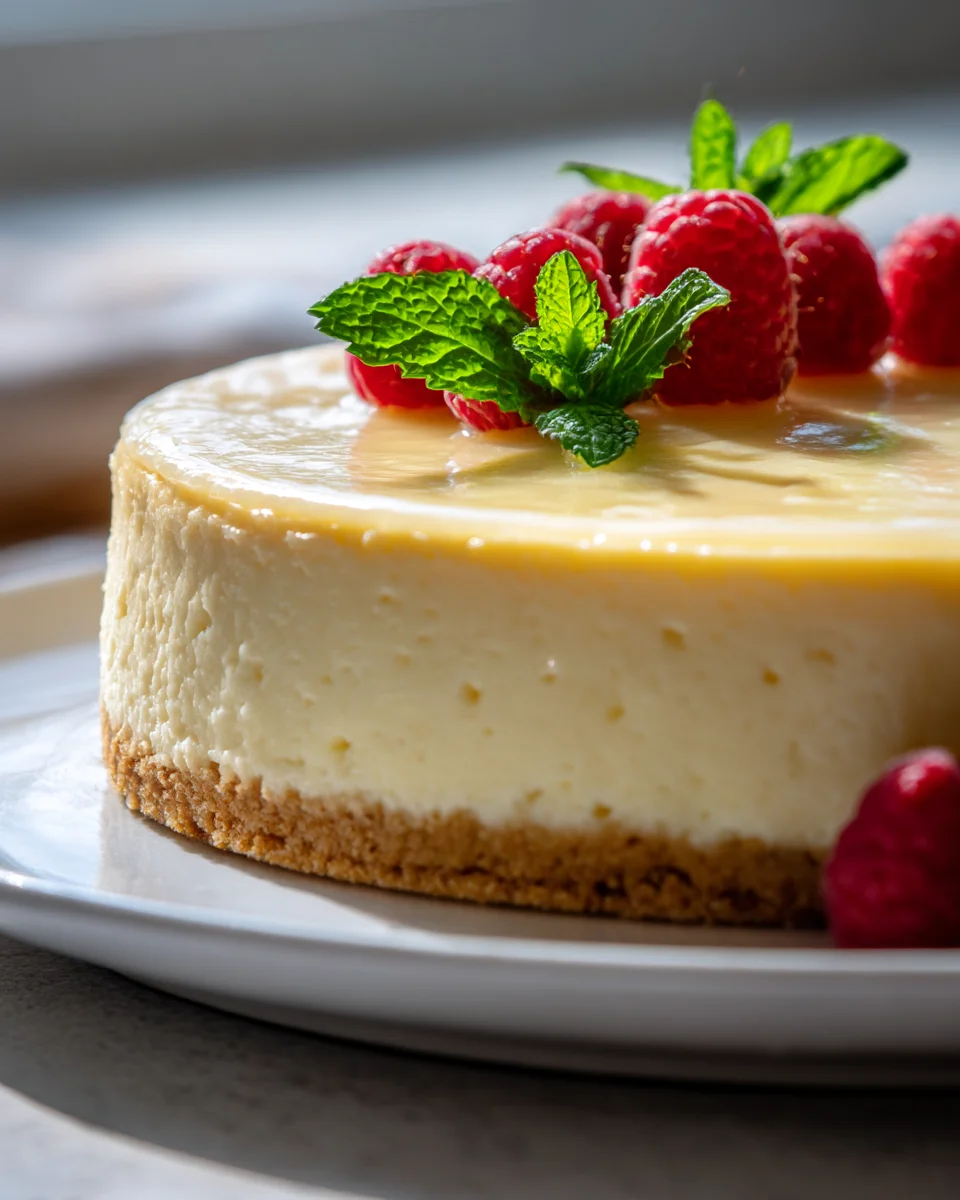
You, dear reader, are going to absolutely adore this recipe because it demystifies the art of baking a perfect cheesecake. No more stress, no more disappointment – just pure, unadulterated baking success. Get ready to impress your friends, family, or simply treat yourself to the ultimate dessert experience. This creamy classic cheesecake features a rich cream cheese filling, delicately sweet and tangy, all nestled atop a buttery graham cracker crust. It’s baked to absolute perfection, ensuring that iconic smooth texture without a single crack in sight. Get ready to conquer your cheesecake fears and create a masterpiece!

Ingredient Notes
Achieving that perfectly creamy, crack-free classic cheesecake starts with understanding your ingredients. I’ve spent years perfecting this recipe, and I can tell you, the quality and preparation of each component truly make all the difference. Think of these as the foundational pillars of your cheesecake success!
For the Crust:
- Graham Crackers: I always recommend using classic graham crackers for that quintessential cheesecake base. You’ll need about 1 ½ cups of finely crushed crumbs. While other plain cookies like digestive biscuits or vanilla wafers can be substituted, the graham cracker truly offers the best balance of flavor and texture for a classic.
- Unsalted Butter: Melted. This binds the crumbs together and gives the crust its rich flavor. Using unsalted butter allows you to control the overall saltiness. There’s no real substitute here for the best results.
- Granulated Sugar: A small amount is mixed with the crumbs to add a touch of sweetness and help with crispness.
For the Cheesecake Filling:
- Full-Fat Cream Cheese: This is your star ingredient, and its quality is paramount for a creamy cheesecake. I cannot stress enough the importance of using full-fat block cream cheese, not the spreadable kind from a tub. Philadelphia is my go-to for its consistent quality and rich flavor, but any high-quality full-fat brand will work. CRITICAL: Ensure your cream cheese is completely softened to room temperature. This is non-negotiable for a smooth, lump-free batter and helps prevent overmixing, which leads to cracks.
- Granulated Sugar: Fine granulated sugar dissolves beautifully, contributing to the smooth texture and perfect sweetness.
- Sour Cream: Full-fat sour cream is my secret weapon for an extra creamy, tangy, and incredibly smooth cheesecake texture. It also adds moisture, which is key to preventing cracks. Like the cream cheese, it should be at room temperature for seamless incorporation. If you absolutely must, full-fat plain Greek yogurt can be a substitute, but the texture and tang will be slightly different.
- Large Eggs: You’ll need four large eggs, and just like the dairy, they absolutely must be at room temperature. Cold eggs can curdle the batter or cause temperature shock when added, leading to an uneven bake and potential cracks. They provide structure and richness to the cheesecake.
- Pure Vanilla Extract: Use the best quality you can find. It enhances all the other flavors beautifully.
Step-by-Step Instructions
Alright, let’s make some magic happen! This process is all about gentle handling and precise temperatures to ensure that dreamy, crack-free finish. Follow these steps carefully, and you’ll be rewarded with cheesecake perfection.
1. Prepare Your Springform Pan:
- Preheat Oven & Water Bath: Preheat your oven to 325°F (160°C). Wrap the outside of a 9-inch springform pan securely with two layers of heavy-duty aluminum foil. Make sure the foil extends all the way up the sides, creating a watertight barrier. This is absolutely critical for the water bath.
- Line the Bottom: Cut a circle of parchment paper to fit the bottom of the springform pan. This makes it incredibly easy to remove the cheesecake later.
2. Make the Crust:
- Crush Crackers: In a food processor, pulse the graham crackers until very fine crumbs form. Alternatively, place them in a zip-top bag and crush with a rolling pin.
- Combine & Press: In a medium bowl, combine the graham cracker crumbs, melted butter, and granulated sugar. Mix until well combined and the crumbs resemble wet sand. Press the mixture firmly and evenly into the bottom of the prepared springform pan. You can use the bottom of a glass or your knuckles for this.
- Chill: Place the crust in the freezer for 10-15 minutes while you prepare the filling. This helps it set and prevents it from getting soggy.
3. Prepare the Filling – The “No Crack” Zone:
- Beat Cream Cheese (Low Speed): In the bowl of a stand mixer fitted with the paddle attachment (or using a hand mixer), beat the softened cream cheese on low speed for about 2-3 minutes until it’s incredibly smooth and creamy with no lumps. Scrape down the sides and bottom of the bowl frequently. This low-speed beating is crucial to avoid incorporating too much air, which leads to cracks.
- Add Sugar: Gradually add the granulated sugar to the cream cheese, continuing to beat on low speed until just combined and smooth. Scrape the bowl again.
- Incorporate Sour Cream & Vanilla: Add the room-temperature sour cream and vanilla extract. Beat on low speed until just incorporated. Do not overmix! The goal is a smooth, homogenous mixture, not a fluffy one.
- Add Eggs (One at a Time): Add the room-temperature eggs one at a time, beating on the lowest speed just until each egg is incorporated. Stop mixing as soon as the yolk disappears. Do not overbeat the eggs! Overmixing introduces air bubbles that expand during baking and collapse during cooling, causing those dreaded cracks. Scrape the bowl once more to ensure everything is evenly mixed.
4. Bake with a Water Bath:
- Pour Filling: Pour the cheesecake filling over the chilled crust in the springform pan. Gently tap the pan on the counter a few times to release any large air bubbles.
- Set Up Water Bath: Place the foil-wrapped springform pan into a larger roasting pan. Carefully pour hot water into the roasting pan until it reaches about halfway up the sides of the springform pan.
- Bake: Carefully transfer the roasting pan with the cheesecake to the preheated oven. Bake for 60-75 minutes. The cheesecake is done when the edges are set (they might look slightly puffed) but the center still has a slight wobble when gently shaken. It will continue to cook as it cools.
5. The Crucial Cooling Process:
- Gradual Oven Cooling: Once baked, turn off the oven, but leave the cheesecake inside with the oven door ajar (you can prop it open with a wooden spoon) for 1 hour. This slow, gradual cooling prevents sudden temperature changes that can cause cracks.
- Room Temperature Cooling: After an hour, carefully remove the roasting pan from the oven. Remove the springform pan from the water bath (remove the foil) and place it on a wire rack to cool completely at room temperature for another 1-2 hours.
- Chill Thoroughly: Once completely cool, cover the cheesecake loosely with plastic wrap and refrigerate for at least 8 hours, or preferably overnight. This chilling period is essential for the cheesecake to fully set, develop its creamy texture, and prevent cracks during cutting.
6. Unmold & Serve:
- Warm Knife Edge: Before unmolding, run a thin, sharp knife around the edge of the cheesecake to ensure it doesn’t stick to the pan sides as it contracts.
- Garnish (Optional): Serve chilled, plain, or with your favorite toppings like fresh berries, a simple fruit compote, or a dollop of whipped cream.
Tips & Suggestions
Achieving a truly creamy, crack-free classic cheesecake is a rewarding experience, and I’ve got a few extra tips that have helped me master it over the years. These aren’t just suggestions; they’re key insights into why your cheesecake turns out perfectly or falls short.
- Room Temperature Ingredients are Non-Negotiable: I’ve mentioned it in the ingredient notes and steps, but it bears repeating. Cold ingredients don’t emulsify properly, leading to lumps and requiring more mixing, which introduces air. Warm ingredients blend smoothly and evenly, creating a consistent batter that bakes without stress.
- Do NOT Overmix the Batter: This is arguably the single most important tip for preventing cracks. Overmixing, especially after adding the eggs, incorporates too much air into the batter. This air causes the cheesecake to puff up dramatically in the oven and then collapse as it cools, resulting in unsightly cracks. Beat on low speed, and stop as soon as ingredients are just combined.
- The Water Bath (Bain-Marie) is Your Best Friend: A water bath provides a moist, humid environment for the cheesecake to bake in. This gentle, even heat prevents the edges from baking faster than the center, promoting a uniform texture and significantly reducing the risk of cracking. It’s an extra step, but absolutely worth it for a perfect finish.
- Gradual Cooling is Key: Rapid temperature changes are a crack’s best friend. Leaving the cheesecake in the turned-off oven with the door ajar allows it to cool down slowly and gently, minimizing the stress on its delicate structure. Followed by room temperature cooling, it’s a patient process, but patience yields perfection.
- Don’t Open the Oven Door During Baking: Resist the urge to peek! Opening the oven door lets in a rush of cold air, which can cause the cheesecake to deflate and crack. Trust your oven and the timing.
- Double-Wrap Your Springform Pan: When preparing the water bath, use two layers of heavy-duty aluminum foil to wrap your springform pan. There’s nothing more frustrating than a leaky water bath that leaves you with a soggy crust. Better safe than sorry!
- Scrape Down the Bowl Frequently: As you mix, ingredients can stick to the sides and bottom of the bowl. Frequent scraping ensures that all ingredients are thoroughly incorporated, leading to a smooth, homogenous batter and an even bake.
- The “Jiggle” Test: The cheesecake is done when the outer 2-3 inches are set, but the very center (about a 3-inch circle) still has a slight, almost custardy jiggle. It shouldn’t be sloshy, but it shouldn’t be completely firm either. It will continue to set as it cools.
Storage
You’ve put in the effort to create a masterpiece, now let’s ensure it stays fresh and delicious!
- Refrigeration: A classic cheesecake is best enjoyed chilled. Once it has fully cooled (after its gradual cooling process), cover it loosely but securely with plastic wrap or aluminum foil. You can store it in the springform pan (with the sides removed) or transfer it to an airtight container. It will keep beautifully in the refrigerator for up to 5-7 days.
- Freezing Whole: For longer storage, cheesecake freezes exceptionally well. Once fully chilled, you can freeze the entire cheesecake. Remove it from the springform pan, place it on a cardboard cake round, and wrap it very tightly with several layers of plastic wrap, followed by a layer of aluminum foil. This protects it from freezer burn. It will keep in the freezer for up to 1-2 months.
- Freezing Slices: If you prefer to freeze individual portions, cut the chilled cheesecake into slices. Place the slices on a baking sheet lined with parchment paper and freeze until firm (about 1-2 hours). Once firm, wrap each slice individually in plastic wrap, then place them in an airtight freezer-safe container or freezer bag. This way, you can grab a single slice whenever a craving hits!
- Thawing: To thaw a frozen cheesecake (whole or slices), simply transfer it to the refrigerator and let it thaw slowly overnight. Do not thaw at room temperature, as this can affect the texture and creaminess.
- Preventing Odors: Always ensure your cheesecake is well-covered in the fridge. Cheesecake can easily absorb strong odors from other foods, which you definitely don’t want!
Final Thoughts
I genuinely believe you’re going to adore this recipe. After all our hard work and careful steps, you’re now equipped to create something truly spectacular. The beauty of this Creamy Classic Cheesecake With No Cracks isn’t just in its incredibly rich, velvety texture and timeless flavor; it’s also in its flawless presentation. Imagine pulling this masterpiece out of the oven, perfectly smooth and inviting, without a single blemish! That feeling of accomplishment, combined with the sheer delight of the first creamy bite, is what makes this dessert an absolute triumph.
This isn’t just another cheesecake recipe; it’s the definitive guide to a show-stopping dessert that will impress everyone fortunate enough to try it. I promise, once you experience the perfection of this Creamy Classic Cheesecake With No Cracks, you’ll never look back. Go ahead, bake it, share it, and revel in the compliments!

Perfect Creamy Classic Cheesecake – No Cracks Guaranteed!
- Total Time: 1 hour 45 minutes
- Yield: 12 servings 1x
Description
This creamy classic cheesecake features a rich cream cheese filling, delicately sweet and tangy, all nestled atop a buttery graham cracker crust. It’s baked to absolute perfection, ensuring that iconic smooth texture without a single crack in sight.
Ingredients
- 1 ½ cups finely crushed graham crackers
- ½ cup unsalted butter, melted
- 2 tablespoons granulated sugar
- 24 oz full-fat cream cheese, softened to room temperature
- 1 cup granulated sugar
- 1 cup full-fat sour cream, at room temperature
- 4 large eggs, at room temperature
- 1 teaspoon pure vanilla extract
Instructions
- Preheat your oven to 325°F (160°C). Wrap the outside of a 9-inch springform pan securely with two layers of heavy-duty aluminum foil, ensuring it creates a watertight barrier.
- Cut a circle of parchment paper to fit the bottom of the springform pan.
- In a food processor, pulse the graham crackers until very fine crumbs form. Alternatively, place them in a zip-top bag and crush with a rolling pin.
- In a medium bowl, combine the graham cracker crumbs, melted butter, and granulated sugar. Mix until well combined and press the mixture firmly into the bottom of the prepared springform pan. Chill in the freezer for 10-15 minutes.
- In the bowl of a stand mixer fitted with the paddle attachment, beat the softened cream cheese on low speed for about 2-3 minutes until smooth and creamy. Scrape down the sides and bottom of the bowl frequently.
- Gradually add the granulated sugar to the cream cheese, continuing to beat on low speed until just combined and smooth. Scrape the bowl again.
- Add the room-temperature sour cream and vanilla extract, beating on low speed until just incorporated. Do not overmix.
- Add the room-temperature eggs one at a time, beating on the lowest speed just until each egg is incorporated. Stop mixing as soon as the yolk disappears.
- Pour the cheesecake filling over the chilled crust in the springform pan and gently tap the pan on the counter to release any large air bubbles.
- Place the foil-wrapped springform pan into a larger roasting pan and carefully pour hot water into the roasting pan until it reaches about halfway up the sides of the springform pan.
- Transfer the roasting pan with the cheesecake to the preheated oven and bake for 60-75 minutes until the edges are set but the center still has a slight wobble.
- Once baked, turn off the oven and leave the cheesecake inside with the door ajar for 1 hour.
- Carefully remove the roasting pan from the oven and the springform pan from the water bath. Place it on a wire rack to cool completely at room temperature for another 1-2 hours.
- Once completely cool, cover the cheesecake loosely with plastic wrap and refrigerate for at least 8 hours, or preferably overnight.
- Before unmolding, run a thin, sharp knife around the edge of the cheesecake to ensure it doesn't stick to the pan sides.
- Serve chilled, plain, or with your favorite toppings like fresh berries or whipped cream.
- Prep Time: 30 mins
- Cook Time: 75 mins
- Category: Dessert
- Method: Baking
- Cuisine: American
Nutrition
- Serving Size: 1 slice
- Calories: 350
- Sugar: 25 g
- Sodium: 250 mg
- Fat: 25 g
- Saturated Fat: 15 g
- Unsaturated Fat: 5 g
- Trans Fat: 0 g
- Carbohydrates: 30 g
- Fiber: 1 g
- Protein: 6 g
- Cholesterol: 100 mg
Keywords: Ensure all ingredients are at room temperature to avoid lumps and prevent cracks. Do not overmix the batter, especially after adding the eggs, to keep air bubbles from forming.


Leave a Comment