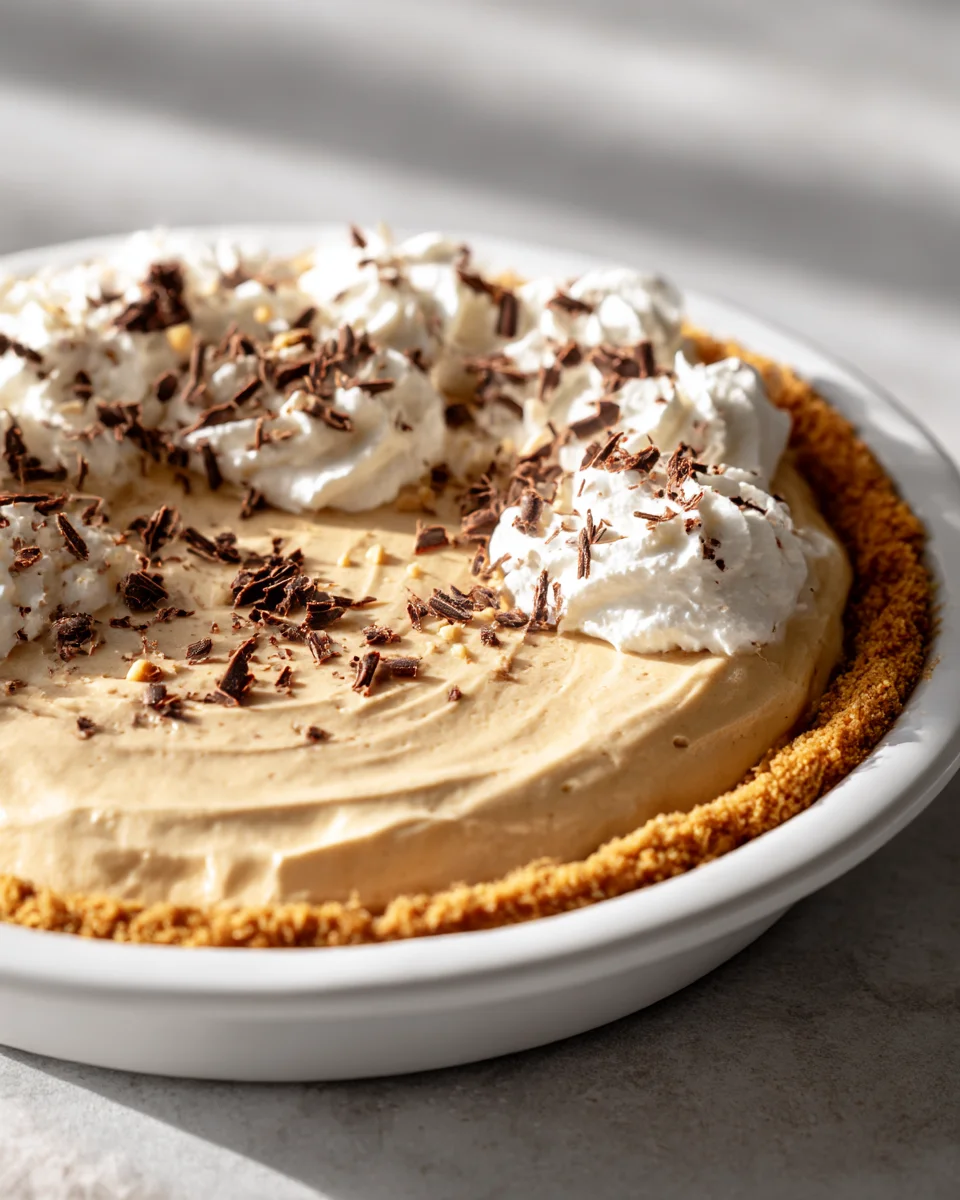
Creamy Peanut Butter Pie With Whipped Topping
Oh boy, do I have a treat for you today! When I think about ultimate comfort desserts, my mind immediately goes to something incredibly satisfying, creamy, and just a little bit nostalgic. That’s precisely what my Creamy Peanut Butter Pie With Whipped Topping delivers, and then some!
What makes this specific recipe so utterly special, you ask? It’s the sheer luxuriousness of the filling – a velvety smooth, intensely peanut buttery dream that’s perfectly balanced between sweet and salty. It’s not just a pie; it’s an experience. The filling, often nestled into a crisp, complementary crust, provides a richness that’s then beautifully contrasted and lightened by a generous, ethereal cloud of homemade whipped topping. It’s a sophisticated take on a classic flavor that truly showcases peanut butter in its most decadent form.
I know you are going to absolutely adore this recipe because it’s surprisingly simple to create, yet it tastes like a dessert from a five-star restaurant. It’s a guaranteed showstopper and crowd-pleaser, perfect for any gathering, holiday celebration, or simply when you’re craving an indulgent treat for yourself. Every forkful offers that delightful contrast of rich, nutty creaminess with light, airy sweetness, making each bite an absolute joy. Get ready to whip up a pie that will have everyone asking for the recipe!
Ingredient Notes
Creating a truly magnificent Creamy Peanut Butter Pie starts with understanding your ingredients. Each component plays a crucial role in achieving that perfect balance of rich, creamy texture and irresistible flavor. Here are the stars of our show:
- Peanut Butter: This is the heart of our pie! I always opt for creamy peanut butter for that smooth, melt-in-your-mouth texture that defines this pie. While natural peanut butter can work, I often find that processed, no-stir varieties (like Jif or Skippy) yield a more consistent and firm filling, as they contain stabilizers that prevent oil separation. If you do use natural peanut butter, make sure it’s well-stirred and doesn’t have excess oil on top, which could make your filling too soft.
- Cream Cheese: For ultimate creaminess and stability, full-fat cream cheese is non-negotiable in my kitchen. It provides the essential tang and structure that holds the pie together beautifully. Remember to let it soften to room temperature before you begin; this is critical for a smooth, lump-free filling. Trying to whip cold cream cheese results in frustrating lumps!
- Powdered Sugar (Confectioners’ Sugar): This fine sugar dissolves effortlessly, ensuring a silky-smooth peanut butter filling without any grainy texture. It’s also what we’ll use to sweeten our whipped topping.
- Heavy Cream (or Whipping Cream): We’ll use this twice! First, a portion will be whipped and gently folded into our peanut butter mixture, contributing to the “creamy” aspect and making the filling lighter and airier. The rest will be whipped into our luscious topping. Make sure it’s very cold for the best whipping results.
- Graham Cracker Crust: My go-to for this pie is a classic graham cracker crust. You can either use a store-bought pre-made crust for convenience or whip up your own with crushed graham crackers, melted butter, and a touch of sugar. For a delicious twist, a chocolate cookie crust (made with crushed Oreos or chocolate wafers) is also absolutely divine and complements the peanut butter beautifully.
- Vanilla Extract: A splash of good quality vanilla extract enhances all the flavors, adding a subtle warmth and complexity to both the filling and the whipped topping.
Substitutions & Variations: If you’re feeling adventurous, you could try substituting the graham cracker crust with a shortbread crust for a buttery base. For dietary needs, non-dairy whipped toppings are readily available and can be used for the topping, though I recommend sticking with full-fat dairy cream cheese and peanut butter for the filling’s texture. While other nut butters can be used, keep in mind they will significantly alter the flavor profile of this classic.
Step-by-Step Instructions
Let’s get down to business and create this irresistible Creamy Peanut Butter Pie! Follow these steps for a dessert that’s guaranteed to impress.
- Prepare Your Crust: If you’re using a store-bought graham cracker crust, great! If you’re making your own, combine about 1½ cups of graham cracker crumbs with ¼ cup granulated sugar and ½ cup melted unsalted butter. Press this mixture firmly into the bottom and up the sides of a 9-inch pie plate. You can bake it for 8-10 minutes at 350°F (175°C) for a sturdier, crispier crust, or just chill it for at least 30 minutes if you prefer a no-bake option. Let it cool completely if baked.
- Whip the Cream (Part 1): In a large, chilled mixing bowl with chilled beaters, pour 1 cup of very cold heavy cream. Beat on medium-high speed until soft peaks form. Do not over-whip at this stage; we want it fluffy, not stiff. Set this aside in the refrigerator.
- Make the Peanut Butter Filling: In a separate large mixing bowl, beat the softened full-fat cream cheese with an electric mixer on medium speed until smooth and creamy, about 1-2 minutes. Scrape down the sides of the bowl.
- Combine Wet Ingredients: Add 1 cup of creamy peanut butter to the cream cheese. Beat on medium speed until well combined and smooth, scraping the bowl as needed.
- Sweeten and Flavor: Gradually add 1¼ cups of powdered sugar, beating on low speed until incorporated, then increase to medium until the mixture is light and fluffy. Stir in 1 teaspoon of vanilla extract until just combined.
- Lighten the Filling: Gently fold about half of your previously whipped cream (from Step 2) into the peanut butter mixture using a spatula. This step is key to making the filling extra creamy and light! Be careful not to deflate the cream too much.
- Fill the Crust: Spoon the creamy peanut butter filling into your prepared and cooled pie crust. Use an offset spatula or the back of a spoon to spread it evenly.
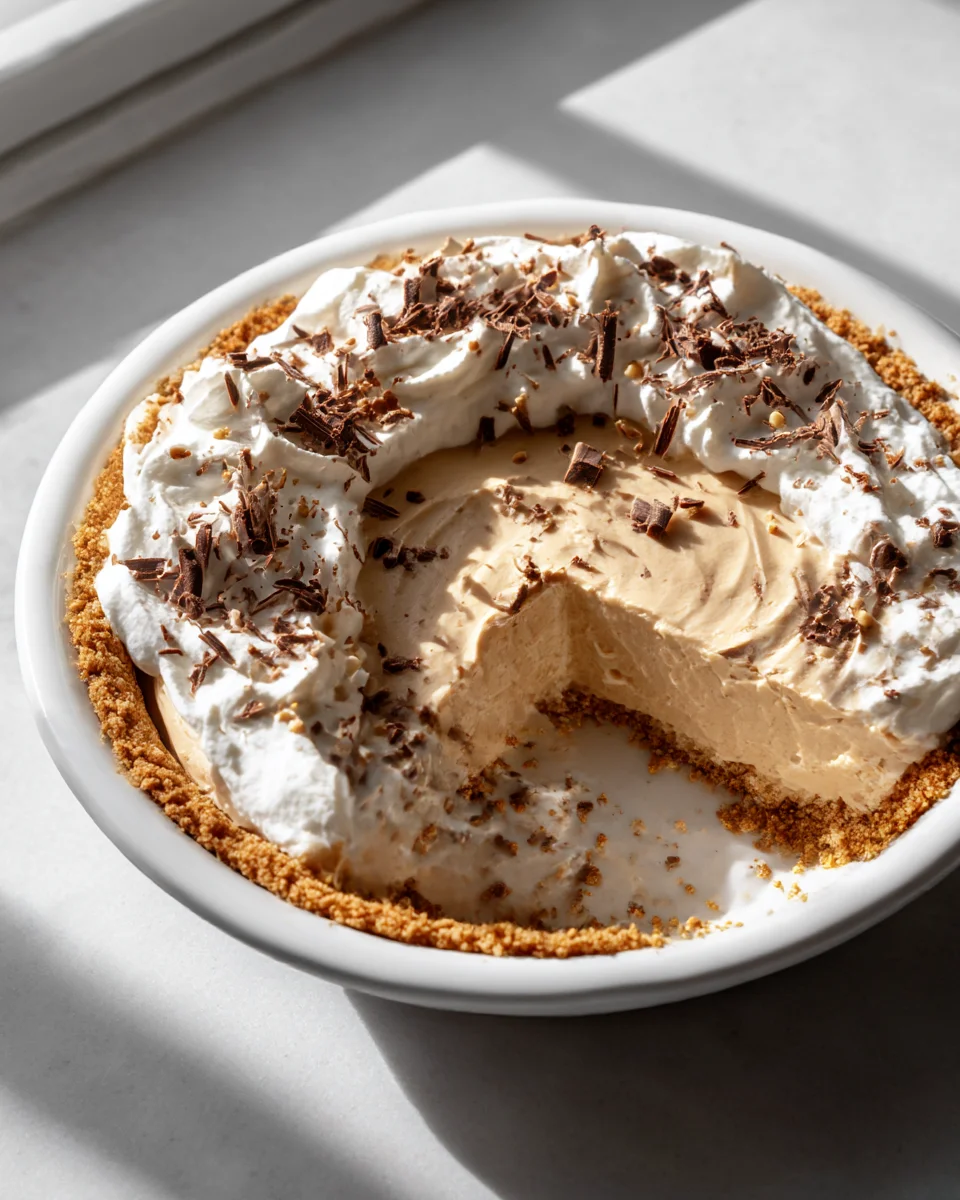
- Chill Thoroughly: Cover the pie loosely with plastic wrap and refrigerate for at least 4-6 hours, or ideally overnight, until it is completely set. This is crucial for clean slices!
- Prepare the Whipped Topping: Just before serving, take out the remaining 1 cup of cold heavy cream. In a clean, chilled mixing bowl with chilled beaters, whip the cream on medium-high speed until it begins to thicken. Add ½ cup powdered sugar and ½ teaspoon vanilla extract. Continue beating until stiff peaks form. Be careful not to over-whip, or you’ll end up with butter!
- Assemble and Serve: Spoon or pipe the freshly whipped topping over the chilled pie. For extra flair, you can sprinkle with chopped peanuts, chocolate shavings, or a drizzle of chocolate syrup. Slice and serve immediately. Enjoy your incredibly creamy creation!
Tips & Suggestions
Making a Creamy Peanut Butter Pie is a joyous process, but a few insider tips can elevate your dessert from great to absolutely unforgettable. Here are some of my go-to suggestions:
- Room Temperature Cream Cheese is a Must: I cannot stress this enough! Cold cream cheese will inevitably lead to lumps in your filling, no matter how much you beat it. Take it out of the fridge at least an hour before you plan to start, or even better, two hours.
- Don’t Over-Mix the Filling: Once you’ve folded in the whipped cream, mix just until combined. Over-mixing can deflate the cream, making your pie filling denser than desired. We’re aiming for light and airy creaminess!
- Quality Peanut Butter Matters: While I prefer processed, no-stir peanut butter for its consistency, choose a brand you genuinely love the taste of. The peanut butter flavor will be the star, so make it a good one.
- Chill Everything for Whipped Topping: For the fluffiest, most stable whipped cream, make sure your heavy cream, mixing bowl, and beaters are all thoroughly chilled. I like to pop my bowl and beaters in the freezer for 10-15 minutes before whipping. This helps the cream whip up faster and hold its volume longer.
- For a Sturdier Whipped Topping: If you’re concerned about your whipped topping deflating, especially if serving outdoors or in a warm environment, you can add a stabilizer. A teaspoon of instant vanilla pudding mix (dry) or unflavored gelatin (dissolved as per package directions) can be added to the heavy cream before whipping for extra insurance.
- Consider Your Crust: While a graham cracker crust is classic, don’t be afraid to experiment! A chocolate wafer crust made from crushed Oreo-style cookies (filling removed or included, your choice) provides a wonderful counterpoint to the rich peanut butter and adds a beautiful color contrast.
- Garnish for Impact: Presentation makes a difference! Before serving, consider garnishing your pie with a sprinkle of mini chocolate chips, chopped roasted peanuts, a drizzle of melted chocolate, or even some mini peanut butter cups. These not only add visual appeal but also extra texture and flavor.
- Make Ahead Advantage: This pie is an excellent make-ahead dessert. The filling needs ample time to set, so preparing it the day before you plan to serve means less stress and a perfectly firm pie. Just add the fresh whipped topping right before serving.
Storage
Once you’ve indulged in the first slice of your delicious Creamy Peanut Butter Pie, proper storage is key to keeping it fresh, delicious, and safe to eat. Here’s what I recommend:
- Refrigeration is Essential: Due to the dairy components (cream cheese and heavy cream) in both the filling and the topping, this pie must be stored in the refrigerator at all times. Leaving it out at room temperature for extended periods can compromise its safety and texture.
- How to Cover: To prevent the pie from drying out, absorbing refrigerator odors, or developing a film, cover it tightly. If you have a pie carrier with a dome lid, that’s ideal. Otherwise, gently place plastic wrap directly over the surface of the pie, ensuring it doesn’t stick too much to the whipped topping, or tent aluminum foil over it. If the pie is already sliced, you can place individual slices in airtight containers.
- Shelf Life: Stored correctly in the refrigerator, your Creamy Peanut Butter Pie will typically remain fresh and delicious for 3 to 4 days. After this time, while it might still be safe to eat, the quality of the whipped topping and the overall texture of the pie may begin to decline.
- Freezing for Longer Storage: This pie freezes beautifully, making it a fantastic make-ahead option!
- To Freeze: I recommend freezing the pie without the whipped topping for best results. Once the pie filling is fully set and chilled, cover the pie securely with several layers of plastic wrap, followed by a layer of aluminum foil. This double layer helps prevent freezer burn.
- Freezer Duration: The pie can be stored in the freezer for up to 1 month.
- To Thaw: When you’re ready to enjoy it, transfer the frozen pie to the refrigerator and let it thaw overnight (8-12 hours). Do not try to thaw it at room temperature, as this can affect the texture.
- Add Topping After Thawing: Once thawed, prepare fresh whipped topping and spread or pipe it over the pie just before serving. The texture of frozen and thawed whipped cream isn’t always ideal, so fresh is always best for the topping.
Proper storage ensures that every slice of your Creamy Peanut Butter Pie is as delightful as the first!
Final Thoughts
There you have it! I truly believe this Creamy Peanut Butter Pie With Whipped Topping isn’t just a dessert; it’s an experience. From its incredibly smooth, rich peanut butter filling that melts in your mouth, to the cloud-like fluffiness of the homemade whipped topping, every single bite is pure bliss. It’s that perfect balance of sweet and savory that makes it utterly irresistible, whether you’re serving it at a special gathering or simply treating yourself after a long day. I promise you, once you taste the delightful combination of textures and flavors in this Creamy Peanut Butter Pie With Whipped Topping, you’ll understand why it’s destined to become a staple in your dessert repertoire. Go on, give it a try – your taste buds will thank you!

Craveable Creamy Peanut Butter Pie – Easy No-Bake Recipe
- Total Time: 40 minutes
- Yield: 8 servings 1x
Description
Indulge in this luxurious Creamy Peanut Butter Pie, featuring a velvety filling and a light whipped topping. Perfect for any occasion, this no-bake dessert is sure to impress your guests!
Ingredients
- 1½ cups graham cracker crumbs
- ¼ cup granulated sugar
- ½ cup melted unsalted butter
- 1 cup creamy peanut butter
- 8 oz full-fat cream cheese, softened
- 1¼ cups powdered sugar (Confectioners' Sugar)
- 1 teaspoon vanilla extract
- 1 cup heavy cream (or Whipping Cream)
- ½ cup powdered sugar (for whipped topping)
- ½ teaspoon vanilla extract (for whipped topping)
Instructions
- Prepare Your Crust: If you’re using a store-bought graham cracker crust, great! If you're making your own, combine about 1½ cups of graham cracker crumbs with ¼ cup granulated sugar and ½ cup melted unsalted butter. Press this mixture firmly into the bottom and up the sides of a 9-inch pie plate. You can bake it for 8-10 minutes at 350°F (175°C) for a sturdier, crispier crust, or just chill it for at least 30 minutes if you prefer a no-bake option. Let it cool completely if baked.
- Whip the Cream (Part 1): In a large, chilled mixing bowl with chilled beaters, pour 1 cup of very cold heavy cream. Beat on medium-high speed until soft peaks form. Do not over-whip at this stage; we want it fluffy, not stiff. Set this aside in the refrigerator.
- Make the Peanut Butter Filling: In a separate large mixing bowl, beat the softened full-fat cream cheese with an electric mixer on medium speed until smooth and creamy, about 1-2 minutes. Scrape down the sides of the bowl.
- Combine Wet Ingredients: Add 1 cup of creamy peanut butter to the cream cheese. Beat on medium speed until well combined and smooth, scraping the bowl as needed.
- Sweeten and Flavor: Gradually add 1¼ cups of powdered sugar, beating on low speed until incorporated, then increase to medium until the mixture is light and fluffy. Stir in 1 teaspoon of vanilla extract until just combined.
- Lighten the Filling: Gently fold about half of your previously whipped cream (from Step 2) into the peanut butter mixture using a spatula. This step is key to making the filling extra creamy and light! Be careful not to deflate the cream too much.
- Fill the Crust: Spoon the creamy peanut butter filling into your prepared and cooled pie crust. Use an offset spatula or the back of a spoon to spread it evenly.
- Chill Thoroughly: Cover the pie loosely with plastic wrap and refrigerate for at least 4-6 hours, or ideally overnight, until it is completely set. This is crucial for clean slices!
- Prepare the Whipped Topping: Just before serving, take out the remaining 1 cup of cold heavy cream. In a clean, chilled mixing bowl with chilled beaters, whip the cream on medium-high speed until it begins to thicken. Add ½ cup powdered sugar and ½ teaspoon vanilla extract. Continue beating until stiff peaks form. Be careful not to over-whip, or you’ll end up with butter!
- Assemble and Serve: Spoon or pipe the freshly whipped topping over the chilled pie. For extra flair, you can sprinkle with chopped peanuts, chocolate shavings, or a drizzle of chocolate syrup. Slice and serve immediately. Enjoy your incredibly creamy creation!
- Prep Time: 30 mins
- Cook Time: 10 mins
- Category: Dessert
- Method: No-Bake
- Cuisine: American
Nutrition
- Serving Size: 1 slice
- Calories: 350
- Sugar: 25 g
- Sodium: 200 mg
- Fat: 24 g
- Saturated Fat: 12 g
- Unsaturated Fat: 10 g
- Trans Fat: 0 g
- Carbohydrates: 30 g
- Fiber: 2 g
- Protein: 6 g
- Cholesterol: 40 mg
Keywords: Room temperature cream cheese is a must to avoid lumps. Don't over-mix the filling after folding in the whipped cream. Quality peanut butter matters for flavor. Chill everything for the whipped topping for the best results. Consider using a chocolate wafer crust for a twist.


Leave a Comment