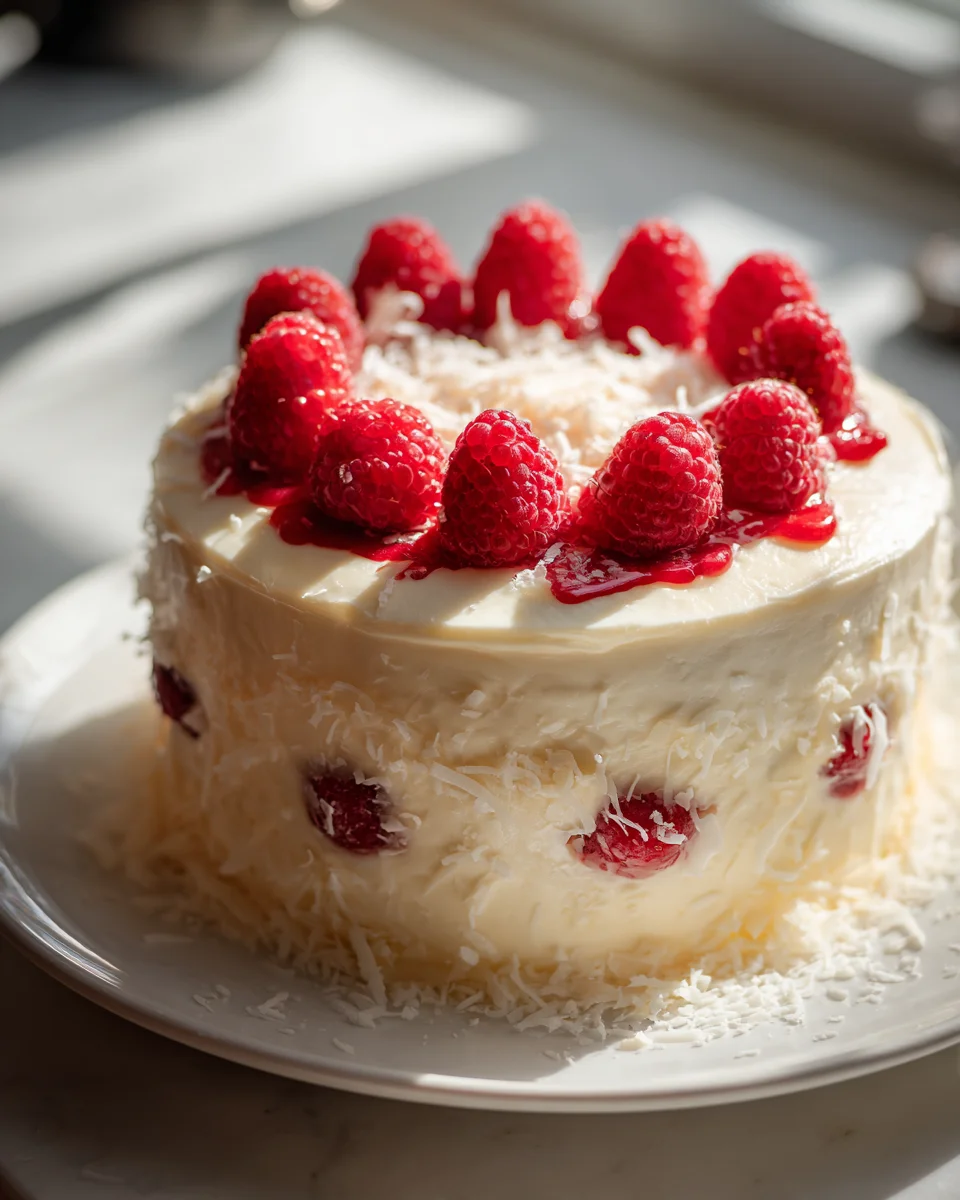
Milky Girl Cake
Milky Girl Cake. Oh, prepare yourselves, because you’re about to fall head over heels for a dessert that is pure, unadulterated comfort! I’m so excited to share my absolute favorite recipe for what I affectionately call ‘Milky Girl Cake.’ What makes this cake so incredibly special, you ask? It’s the kind of cake that doesn’t just taste good; it feels like a warm hug in every single bite. We’re talking about a spectacularly moist, tender crumb that practically melts on your tongue, infused with a dreamy milky sweetness that’s utterly irresistible.
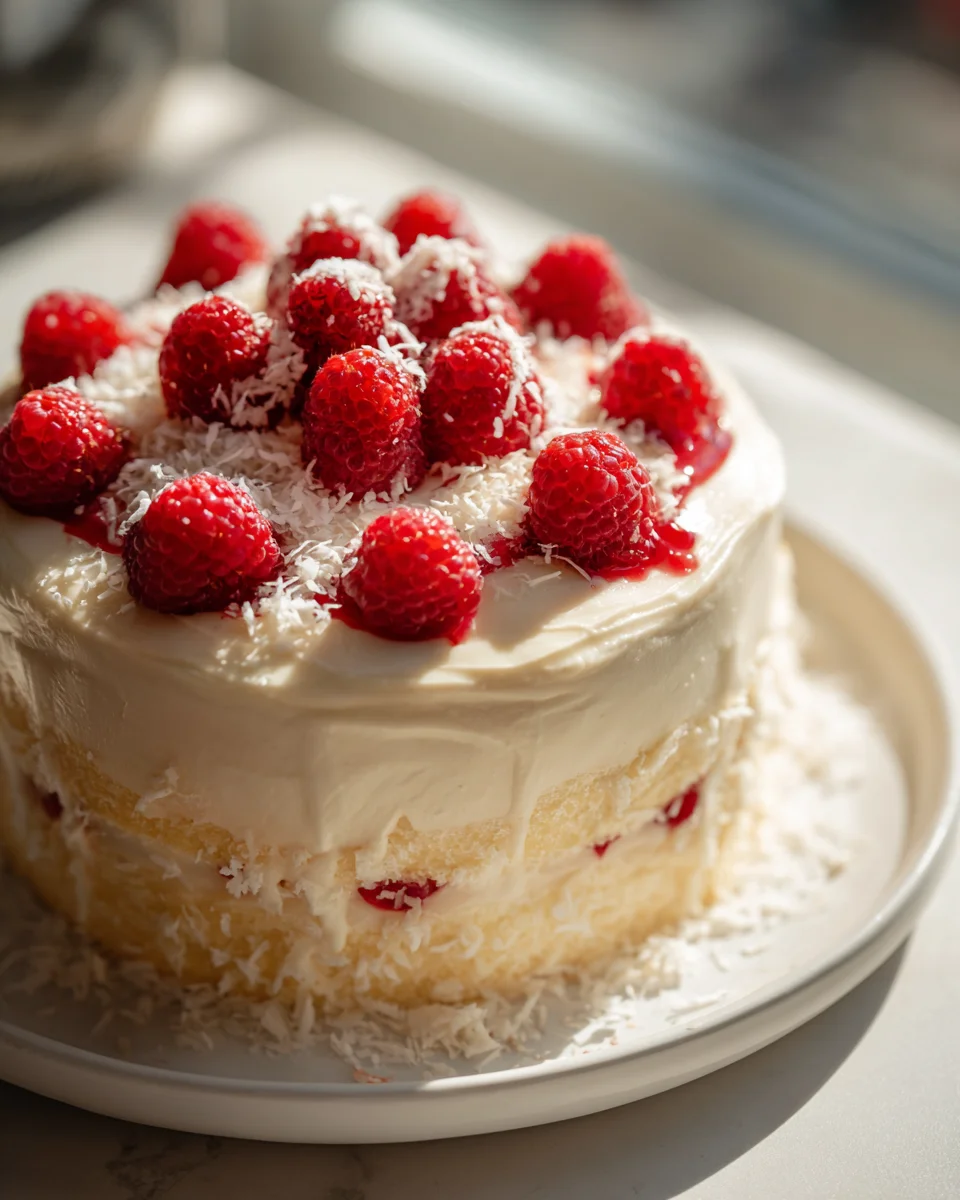
You, my friend, are going to absolutely love this cake because it strikes that perfect balance: it’s incredibly luxurious and decadent, yet surprisingly simple to make. It’s the showstopper dessert that will have everyone asking for the recipe, but it won’t keep you slaving away in the kitchen all day. Imagine a fluffy, cloud-like cake drenched in a rich, sweet milk mixture, often topped with a delicate, creamy frosting that just enhances all that milky goodness. It’s a symphony of textures and flavors – creamy, light, and wonderfully satisfying.
In short, the Milky Girl Cake is a delightful, super moist milk-soaked cake, truly a celebration of all things milky and sweet. It’s a perfect treat for any occasion, or just when you need a little slice of heaven. Trust me, once you try this, it’s going to become a staple in your baking repertoire!
Ingredient Notes
When I set out to bake my ‘Milky Girl Cake’, I always focus on a few key ingredients that truly make this dessert shine. It’s a cake where the quality of your dairy makes a noticeable difference, creating that wonderfully rich, moist, and utterly comforting experience.
The Cake Base
- All-Purpose Flour: This is my go-to for the cake base. It provides just the right structure without being too dense. If you’re looking for an even more tender, delicate crumb, you could opt for cake flour. Just remember that cake flour absorbs liquid differently, so if you switch, you might need a tiny adjustment in the liquid components to maintain the perfect batter consistency.
- Granulated Sugar: Essential for sweetness, of course! It also helps with the cake’s tenderness and moisture. I find a good quality, fine granulated sugar dissolves beautifully into the batter.
- Eggs: These are the workhorses of the cake, providing structure, richness, and helping with leavening. Always use large eggs, and for the best results, have them at room temperature. This helps them emulsify better with other ingredients, leading to a smoother, more uniform batter.
- Baking Powder and Baking Soda: My chosen leavening agents. Baking powder gives the cake its initial lift and airiness, while a touch of baking soda, especially if there’s any buttermilk or a slightly acidic component (though not typical for the sponge itself), ensures a tender crumb and helps with browning.
- Whole Milk: For the cake batter itself, whole milk adds moisture and richness. It contributes to the cake’s overall softness and helps create a beautiful, light texture that’s perfect for soaking up all the milky goodness later.
- Pure Vanilla Extract: This is a must for any great cake! I love a generous splash of pure vanilla extract, making sure it’s a non-alcohol variety if that’s your preference. It truly brightens all the milky flavors and adds that comforting bakery aroma that makes everyone eager for a slice.
The Milky Soak
This is where the ‘Milky Girl’ truly comes to life! The combination of milks creates that signature luscious texture.
- Sweetened Condensed Milk: This is the heart of the soak, providing intense sweetness and a thick, creamy consistency. There’s really no direct substitute for its unique flavor and texture profile in this cake.
- Evaporated Milk: It brings a wonderfully creamy, slightly savory depth that balances the sweetness of the condensed milk. It’s less sweet than condensed milk and contributes significantly to the characteristic richness of the milky mixture.
- Whole Milk (again!): I like to add a bit more whole milk to the soaking mixture to thin it just slightly, ensuring it penetrates every nook and cranny of the cake without making it overly heavy. It also helps to mellow the intensity of the other milks just a touch.
The Topping
- Heavy Cream: For a classic, airy whipped cream topping, heavy cream (or whipping cream) is ideal. Make sure it’s very cold for the best whipping results.
- Powdered Sugar: To sweeten the whipped cream and give it a silky smooth texture.
- Pure Vanilla Extract (for topping): Just a touch here enhances the creaminess and ties all the flavors together beautifully. Again, a non-alcohol option works perfectly.
I don’t typically use ingredients like beef in my cakes, so that substitution isn’t applicable here. For alcohol, as mentioned, I always lean towards non-alcohol vanilla extract for a pure flavor that everyone can enjoy.
Step-by-Step Instructions
Making ‘Milky Girl Cake’ is a delightful process, and I’m going to walk you through how I achieve that perfectly moist and flavorful result every time. It’s all about building layers of texture and taste.
Step 1: Prepare Your Cake Base
- Preheat and Prepare: First things first, I preheat my oven to 175°C (350°F). Then, I lightly grease and flour a 9×13 inch baking pan. This ensures my cake releases perfectly without sticking.
- Combine Dry Ingredients: In a medium bowl, I whisk together my all-purpose flour, granulated sugar, baking powder, and a pinch of salt. Whisking ensures everything is evenly distributed, which is key for a consistent crumb.
- Mix Wet Ingredients: In a separate, larger bowl, I combine the room temperature eggs, whole milk, and my pure non-alcohol vanilla extract. I give these a good whisk until they’re well blended and frothy.
- Combine Wet and Dry: Now, I gradually add the dry ingredients to the wet ingredients, mixing on low speed with an electric mixer, or by hand with a whisk, until just combined. It’s really important not to overmix here; overmixing develops the gluten too much, leading to a tough cake. A few small lumps are perfectly fine!
- Bake the Cake: I pour the batter evenly into my prepared baking pan. Then, I bake it for about 25-30 minutes, or until a wooden skewer inserted into the center comes out clean. The cake should be lightly golden brown and spring back when gently pressed.
- Cool the Cake: Once baked, I let the cake cool in the pan on a wire rack for at least 30 minutes. This is crucial before the next step, as a warm cake might crumble when poked or absorb the milk mixture unevenly.
Step 2: Prepare the Milky Soak
- Whisk the Milks: While the cake is cooling, I whisk together the sweetened condensed milk, evaporated milk, and the additional whole milk in a large bowl. I like to add another splash of non-alcohol vanilla extract here too, just to enhance that beautiful aroma. I whisk until the mixture is completely smooth and well combined.
Step 3: Soak the Cake
- Poke Holes: Once the cake has cooled sufficiently, but is still slightly warm, I use a fork or a wooden skewer to poke holes all over the top surface. I make sure to go all the way to the bottom of the cake, but not so vigorously that it tears apart. Plenty of holes ensure even absorption of the milky goodness.
- Pour the Soak: Slowly and evenly, I pour the milky mixture over the entire surface of the poked cake. I try to ensure every part gets drenched. It might look like a lot of liquid, but trust me, the cake will drink it all up!
- Chill for Absorption: This is perhaps the most important step for developing the ‘Milky Girl’ flavor and texture. I cover the pan tightly with plastic wrap and refrigerate the cake for at least 4 hours, but ideally overnight. The longer it chills, the more the cake absorbs the milk, becoming incredibly moist and tender.
Step 4: Prepare the Topping
- Whip the Cream: When I’m ready to serve, I pour my very cold heavy cream into a mixing bowl. Using an electric mixer, I whip it on medium-high speed until it starts to thicken.
- Sweeten and Flavor: I gradually add the powdered sugar and a touch of non-alcohol vanilla extract. I continue to whip until the cream forms soft peaks. Be careful not to over-whip, or you’ll end up with butter!
- Top the Cake: I generously spread the whipped cream over the chilled, milk-soaked cake. I often use an offset spatula to create pretty swirls and peaks.
Tips & Suggestions
Over the years of perfecting my ‘Milky Girl Cake’, I’ve picked up a few tricks and tips that I absolutely love to share. These little details can really elevate your cake from good to truly unforgettable!
- Don’t Overmix the Batter: I can’t stress this enough! When combining your wet and dry ingredients for the cake base, mix until just combined. A few small lumps are perfectly fine. Overmixing develops the gluten, which leads to a tough, dense cake – and we want a light, airy crumb that’s perfect for soaking up all that wonderful milk.
- Room Temperature Ingredients for the Cake: For the best emulsion and a smooth, uniform batter, make sure your eggs and milk for the cake base are at room temperature. This helps them incorporate better and results in a lighter cake texture.
- Poking Holes is Key: When it comes to soaking the cake, be generous with your holes! I use a fork or a wooden skewer and poke holes all the way through to the bottom. This ensures that the milky mixture penetrates every single part of the cake, making it uniformly moist and flavorful. Don’t be shy here!
- Chill, Chill, Chill!: This is perhaps the most crucial step for a ‘Milky Girl Cake’. After pouring on the milk mixture, you absolutely must give it ample time to chill and absorb. I always recommend at least 4 hours, but honestly, leaving it in the refrigerator overnight yields the most spectacular results. The cake transforms, becoming incredibly moist, flavorful, and perfectly set. Patience truly is a virtue here.
- Quality of Dairy Matters: Since dairy is the star of this cake, using good quality sweetened condensed milk, evaporated milk, and whole milk will make a noticeable difference in the final flavor and richness. It’s worth splurging a little on these components.
- Serving Temperature: My ‘Milky Girl Cake’ is always best served cold, straight from the refrigerator. The chilling process not only allows for absorption but also enhances the refreshing and creamy flavors.
- Flavor Variations: Don’t be afraid to experiment a little! I sometimes add a pinch of ground cinnamon or a teaspoon of almond extract to the milk mixture for a different twist. A sprinkle of cinnamon or a dusting of cocoa powder on top of the whipped cream can also be a lovely addition. For a fruity touch, you could even add a layer of fresh berries (like sliced strawberries or raspberries) just before serving.
- Whipped Cream Peaks: When making your whipped cream topping, watch it carefully. You want soft, billowy peaks, not stiff ones that look dry. Over-whipping can quickly turn it grainy or even into butter!
Storage
Because my ‘Milky Girl Cake’ is so deliciously moist and loaded with dairy, proper storage is absolutely essential to keep it fresh and safe to eat. This isn’t a cake you want to leave out on the counter!
- Refrigeration is a Must: Due to the generous amount of milk and the whipped cream topping, this cake absolutely needs to be stored in the refrigerator at all times. I always make sure it’s placed in the coldest part of my fridge.
- Keep it Covered: To prevent the cake from drying out and absorbing any unwanted odors from other foods in your refrigerator, I always cover it tightly. An airtight container specifically designed for cakes is ideal, or you can simply cover the baking pan very well with plastic wrap, ensuring no air can get in. This also helps maintain its wonderful moisture.
- Shelf Life: When stored properly in the refrigerator, my ‘Milky Girl Cake’ will stay fresh and delicious for about 3 to 4 days. Beyond that, the texture might start to change, and the freshness of the dairy components will begin to diminish.
- Serving: Always serve the cake cold, directly from the refrigerator. This ensures the best texture and flavor experience.
- Freezing is Not Recommended: While many cakes can be frozen, I generally do not recommend freezing a ‘Milky Girl Cake’. The high moisture content from the milk soak, combined with the delicate texture of the whipped cream, can lead to an undesirable change in texture once thawed. It might become watery or grainy, losing that signature lusciousness that makes it so special. It’s best enjoyed fresh within its refrigerated shelf life.
Final Thoughts
And there you have it – the incredibly delightful and simply irresistible Milky Girl Cake! I hope you found as much joy in preparing this recipe as you will in sharing (or secretly devouring!) its creamy goodness. This isn’t just any dessert; it’s a testament to how simple ingredients can come together to create something truly magical and comforting.
The delicate balance of milky sweetness and the incredibly tender texture makes this Milky Girl Cake an absolute standout. It’s light, it’s luscious, and it has that unforgettable quality that makes everyone ask for the recipe. Trust me, once you experience the sheer pleasure of this cake, you’ll understand why it’s a must-try. Go on, treat yourself and your loved ones to this sweet masterpiece!

Milky Girl Cake Recipe: Easy & Delicious Dessert!
- Total Time: 1 hour
- Yield: 12 servings 1x
Description
Indulge in the delightful Milky Girl Cake, a moist and creamy dessert that feels like a warm hug in every bite. This easy-to-make cake is perfect for any occasion and will leave everyone asking for the recipe!
Ingredients
- 2 cups All-Purpose Flour
- 1 cup Granulated Sugar
- 3 large Eggs
- 2 tsp Baking Powder
- 1/2 tsp Baking Soda
- 1 cup Whole Milk
- 2 tsp Pure Vanilla Extract
- 1 cup Sweetened Condensed Milk
- 1 cup Evaporated Milk
- 1 cup Whole Milk (for soaking)
- 1 cup Heavy Cream
- 1/4 cup Powdered Sugar
- 1 tsp Pure Vanilla Extract (for topping)
Instructions
- Preheat and Prepare: Preheat the oven to 175°C (350°F) and lightly grease and flour a 9×13 inch baking pan.
- Combine Dry Ingredients: In a medium bowl, whisk together all-purpose flour, granulated sugar, baking powder, and a pinch of salt.
- Mix Wet Ingredients: In a separate bowl, combine room temperature eggs, whole milk, and pure vanilla extract. Whisk until well blended.
- Combine Wet and Dry: Gradually add the dry ingredients to the wet ingredients, mixing on low speed until just combined.
- Bake the Cake: Pour the batter into the prepared baking pan and bake for about 25-30 minutes, or until a skewer comes out clean.
- Cool the Cake: Let the cake cool in the pan on a wire rack for at least 30 minutes.
- Whisk the Milks: While the cake cools, whisk together sweetened condensed milk, evaporated milk, and additional whole milk in a large bowl until smooth.
- Poke Holes: Once the cake has cooled, poke holes all over the top surface using a fork or wooden skewer.
- Pour the Soak: Slowly pour the milky mixture over the entire surface of the poked cake.
- Chill for Absorption: Cover the pan tightly with plastic wrap and refrigerate for at least 4 hours, ideally overnight.
- Whip the Cream: When ready to serve, pour very cold heavy cream into a mixing bowl and whip until it starts to thicken.
- Sweeten and Flavor: Gradually add powdered sugar and a touch of vanilla extract, continuing to whip until soft peaks form.
- Top the Cake: Spread the whipped cream over the chilled, milk-soaked cake, creating swirls and peaks.
- Prep Time: 30 mins
- Cook Time: 30 mins
- Category: Dessert
- Method: Baking
- Cuisine: American
Nutrition
- Serving Size: 1 slice
- Calories: 350
- Sugar: 30 g
- Sodium: 150 mg
- Fat: 18 g
- Saturated Fat: 10 g
- Unsaturated Fat: 8 g
- Trans Fat: 0 g
- Carbohydrates: 40 g
- Fiber: 1 g
- Protein: 6 g
- Cholesterol: 80 mg
Keywords: Don't overmix the batter to ensure a light, airy crumb. Use room temperature ingredients for better emulsion, and be generous with poking holes in the cake for even soaking. Chill the cake for optimal flavor and texture.
Leave a Comment