Cut Out Sugar Cookies
Oh, Cut Out Sugar Cookies! There’s just something so wonderfully nostalgic and utterly joyful about these classic treats. For me, they instantly bring back memories of festive holidays, cozy kitchen baking sessions, and the pure delight of creating edible art. They aren’t just cookies; they’re canvases for creativity and a vehicle for spreading cheer, and I’m so excited to share my go-to recipe with you!
What makes this Cut Out Sugar Cookies recipe truly special, you ask? Well, it’s all about perfection in every bite and every shape. This dough is specifically designed to hold its form beautifully in the oven, meaning your carefully cut stars, hearts, or even intricate holiday shapes will come out looking exactly as you intended – no spreading! Beyond their perfect structure, these cookies boast an incredible buttery richness and just the right amount of sweetness, making them absolutely delicious even before a single sprinkle or dollop of frosting is added.
You are absolutely going to love making these. Whether you’re whipping up a batch for a holiday gathering, a birthday party, or just a fun afternoon project with family, the process is as rewarding as the final taste. Imagine the smiles when everyone sees a tray of perfectly shaped, beautifully decorated cookies! They’re endlessly customizable, making them perfect for any occasion, and a fantastic way to start a new baking tradition or continue a beloved one. This recipe is your ticket to creating cherished memories and truly delightful treats.
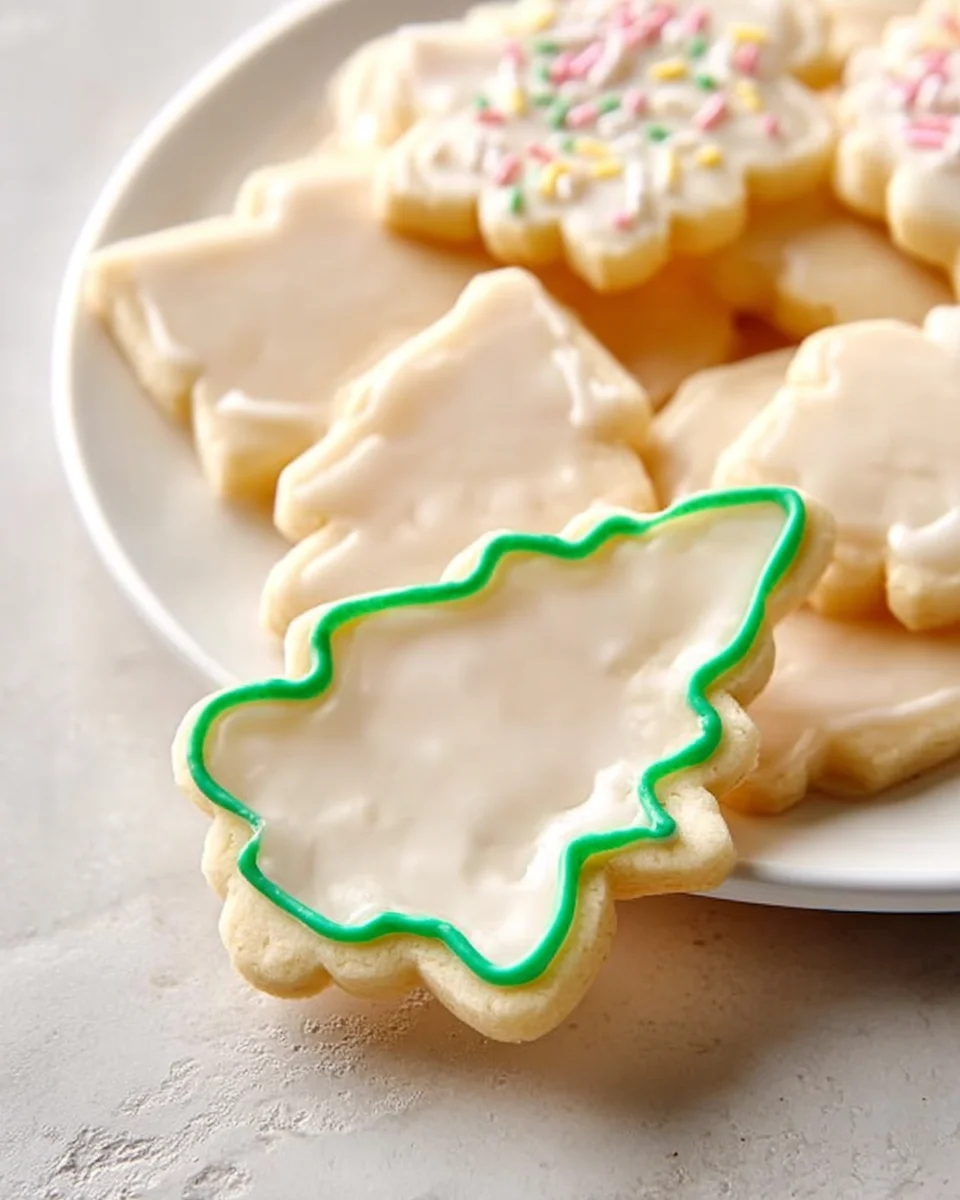
At its heart, a Cut Out Sugar Cookie is a simple yet elegant treat: a sweet, tender, buttery cookie dough that’s rolled thin, shaped with cookie cutters, and baked until lightly golden and just set. Once cooled, they become the ideal base for all sorts of decorations, from simple glazes to elaborate royal icing designs. Get ready to roll up your sleeves, unleash your inner artist, and bake some pure joy!
Ingredient Notes
Crafting the perfect batch of cut-out sugar cookies starts with understanding the role each ingredient plays. While the list might seem simple, paying attention to quality and temperature makes all the difference in achieving that delightfully tender, yet sturdy, cookie base that holds its shape beautifully and is perfect for decorating.
All-Purpose Flour
This is the backbone of our cookies. I always recommend using a good quality, unbleached all-purpose flour. For the best results, remember to measure your flour correctly. Don’t scoop directly from the bag with your measuring cup, as this can pack too much flour in. Instead, gently spoon the flour into your measuring cup until it’s overflowing, then level it off with the back of a knife. This method ensures you get the right amount, preventing dry, crumbly dough or tough cookies.
Unsalted Butter
Butter brings richness and flavor. Using unsalted butter allows us to control the exact amount of salt in the recipe. The most crucial tip here is to make sure your butter is at true room temperature. I’m talking soft enough to make a slight indentation with your finger, but not melted or greasy. If it’s too cold, it won’t cream properly with the sugar, leading to a denser cookie. If it’s too warm, your dough might become greasy and harder to work with.
Granulated Sugar
Beyond sweetness, granulated sugar contributes to the cookies’ tenderness and helps with that lovely crisp edge. When creamed with butter, it creates tiny air pockets that give our cookies a lighter texture.
Large Egg
Our egg acts as a binder, holding all the ingredients together and adding a touch of richness. Just like the butter, having your egg at room temperature is important. A room temperature egg emulsifies more easily with the butter and sugar mixture, resulting in a smoother, more uniform dough.
Vanilla Extract
Vanilla is the signature flavor of a classic sugar cookie. Don’t skimp on a good quality pure vanilla extract; it really shines through. For a little twist, you could try adding a touch of almond extract (start with half the amount of vanilla) or even a lemon zest for a bright, citrusy note. It’s truly amazing how these little additions can elevate the flavor profile!
Baking Powder
I use just a touch of baking powder to give the cookies a slight lift without causing them to spread too much. For cut-out cookies, minimal spread is key to maintaining those crisp edges and defined shapes. Too much leavening will cause your perfectly cut shapes to puff up and lose their definition.
Salt
A pinch of salt might seem small, but it’s mighty! It balances the sweetness and enhances all the other flavors in the cookie, preventing them from tasting bland. Always use fine sea salt or table salt for even distribution.
Step-by-Step Instructions
Making cut-out sugar cookies is a fun process that yields delicious results, especially when you follow these steps carefully. Precision is your friend here to ensure perfectly shaped, delightful cookies every time.
1. Cream Butter and Sugar
In a large mixing bowl, either with an electric mixer or a stand mixer fitted with the paddle attachment, beat the room temperature unsalted butter on medium speed until it’s smooth and creamy, about 1 minute. Gradually add the granulated sugar and continue to beat on medium-high speed for 3-5 minutes, or until the mixture is light in color and fluffy. This creaming step is vital for incorporating air, which contributes to the cookies’ tender texture.
2. Add Egg and Vanilla
Reduce the mixer speed to low. Add the room temperature egg and vanilla extract to the creamed butter and sugar mixture. Beat until just combined, scraping down the sides of the bowl as needed. Be careful not to overmix at this stage; we just want everything incorporated.
3. Combine Dry Ingredients
In a separate medium bowl, whisk together the all-purpose flour, baking powder, and salt. Whisking ensures these dry ingredients are evenly distributed, so you don’t end up with pockets of salt or leavener in your cookies.
4. Gradually Add Dry to Wet
With the mixer on low speed, gradually add the dry ingredient mixture to the wet ingredients, a third at a time. Mix only until the flour is just incorporated and the dough comes together. Stop mixing as soon as you see no more streaks of dry flour. Overmixing will develop the gluten in the flour, leading to tough, chewy cookies – and we want tender ones!
5. Chill the Dough
Divide the dough into two equal portions. Gently flatten each portion into a disk, wrap tightly in plastic wrap, and refrigerate for at least 1-2 hours, or preferably overnight. Chilling is critical for cut-out cookies! It allows the butter to firm up, preventing the cookies from spreading excessively in the oven, and makes the dough much easier to handle and roll without sticking.
6. Roll Out and Cut Shapes
When you’re ready to bake, preheat your oven to 375°F (190°C). Line several baking sheets with parchment paper. Remove one disk of chilled dough from the refrigerator. Lightly flour your work surface and your rolling pin. Roll out the dough to an even 1/4-inch thickness. Using your favorite cookie cutters, cut out shapes and carefully transfer them to the prepared baking sheets, leaving about 1 inch between cookies. Try to get as many cookies as you can from the first roll to minimize re-rolling scraps.
7. Bake the Cookies
Bake for 7-10 minutes, depending on the size of your cookies and your oven, or until the edges are lightly golden and the centers still look pale. Keep a close eye on them, as baking times can vary. For perfectly shaped cookies, I sometimes even pop the cut-out dough back into the fridge for 10-15 minutes before baking if my kitchen is particularly warm.
8. Cool
Once baked, let the cookies cool on the baking sheet for 5 minutes before carefully transferring them to a wire rack to cool completely. They firm up as they cool, making them easier to handle and ready for any decorating you might have planned!
Tips & Suggestions
Achieving bakery-worthy cut-out sugar cookies is a blend of following the recipe and understanding a few key techniques. Here are my go-to tips for making your cookie-baking experience as smooth and successful as possible:
Don’t Overmix!
This is probably the most important tip for tender sugar cookies. Once you add the flour, mix only until the dry ingredients are just incorporated. Overmixing develops gluten, which leads to tough, chewy cookies, and we want melt-in-your-mouth tenderness.
Chill Thoroughly
I cannot stress enough the importance of chilling your dough. It’s the secret weapon against cookie spread! A well-chilled dough is firm, easy to roll, and will hold its shape beautifully in the oven. If your dough starts to get sticky or warm while you’re rolling and cutting, pop it back in the fridge for 10-15 minutes.
Roll to Even Thickness
Consistency is key for even baking. If your cookies are different thicknesses, some will burn while others are still raw. I often use rolling pin guides or rulers on either side of my dough to ensure a perfectly uniform 1/4-inch thickness.
Flour Sparingly
While a little flour on your work surface and rolling pin prevents sticking, resist the urge to use too much. Excess flour can make your dough dry and lead to crumbly, tough cookies. Brush off any visible excess flour from your cut-out shapes before baking.
Handle Re-rolled Scraps Carefully
When you re-roll dough scraps, you’re working the gluten more. To minimize toughness, gather scraps gently, press them together into a disk, and re-chill briefly before rolling out again. The cookies made from re-rolled dough might be slightly tougher, so try to get as many cookies as possible from your first roll.
Parchment Paper is Your Best Friend
Always line your baking sheets with parchment paper. It prevents sticking, ensures even baking, and makes clean-up a breeze. Plus, it’s easier to transfer delicate cut-out shapes to a parchment-lined sheet.
Watch for Doneness, Not Just Time
Ovens vary, so the baking time is just a guideline. Look for cookies where the edges are just barely golden and the centers still appear pale. Overbaked sugar cookies will be dry and hard. If you’re baking different sized cookies, bake similar sizes together to ensure even cooking.
Decorating Options
Once your cookies are completely cool, they’re ready for their grand finale! You can decorate them with royal icing for intricate designs, a simple glaze for a quick finish, or even just a sprinkle of colored sugar before baking for a sparkling touch. The sturdy nature of these cut-out cookies makes them perfect canvases for all sorts of creative decorations.
Storage
You’ve put in the effort to bake these beautiful cut-out sugar cookies, so knowing how to store them properly is crucial to keeping them fresh and delicious for as long as possible. Nobody wants a stale cookie!
Unbaked Dough
If you’ve prepared the dough ahead of time or have extra, you can store it in the refrigerator. Tightly wrap the dough disks in plastic wrap, then place them in an airtight container or a freezer-safe bag. It will keep well in the refrigerator for up to 3-4 days. For longer storage, you can freeze the unbaked dough for up to 3 months. When you’re ready to use it, transfer the frozen dough to the refrigerator overnight to thaw before rolling and baking as usual.
Baked Cookies (Un-decorated)
Once your cut-out sugar cookies are completely cooled, they can be stored at room temperature. Place them in an airtight container, preferably with a piece of parchment paper between layers to prevent them from sticking together. They will stay fresh for up to 5-7 days. To maintain their tenderness, some people like to add a slice of plain bread to the container, which helps absorb any excess moisture and keeps the cookies soft.
Decorated Cookies
If your cookies are decorated with royal icing, they can also be stored at room temperature in an airtight container. The royal icing acts as a seal, helping to keep the cookies fresh. Once the icing is completely dry (which can take several hours, or even overnight for thicker icing), stack them gently in layers separated by parchment paper. They will keep well for about a week. Avoid refrigerating royal-iced cookies, as condensation can affect the icing’s texture and appearance.
Freezing Baked Cookies
Cut-out sugar cookies freeze exceptionally well, which is great if you want to get a head start on holiday baking or just have extras. Once the cookies are completely cool (and any icing is fully set and dry), arrange them in a single layer on a baking sheet and flash freeze for about 30 minutes, or until solid. This prevents them from sticking together. Then, transfer the frozen cookies to a freezer-safe airtight container or heavy-duty freezer bag, layering them with parchment paper. They will maintain their quality in the freezer for up to 3 months. To thaw, simply take them out of the freezer and let them come to room temperature on the counter before serving.

Final Thoughts
There’s something truly magical about homemade Cut Out Sugar Cookies. I find myself coming back to this recipe time and time again, not just for the incredibly delicious result, but for the pure joy of the process itself. From rolling out the dough to carefully selecting cookie cutters, and then the delightful anticipation as they bake, it’s an experience that brings smiles to faces of all ages.
What makes these Cut Out Sugar Cookies a definite must-try is their perfect balance: a cookie that holds its shape beautifully for intricate designs, yet remains wonderfully tender and buttery with every single bite. They’re the ideal canvas for your creative decorating ideas, whether you’re celebrating holidays, birthdays, or just a simple afternoon craving. This recipe ensures a consistent, dependable, and utterly delightful outcome every single time, making them truly special.
So, gather your ingredients, unleash your inner artist, and get ready to create some unforgettable memories (and incredibly tasty treats!) with these fantastic Cut Out Sugar Cookies. I promise, you won’t be disappointed!

Classic Cut Out Sugar Cookies: Perfect for Any Occasion!
- Total Time: 25 minutes
- Yield: 24 cookies 1x
Description
These classic Cut Out Sugar Cookies are a delightful treat that brings joy and nostalgia to any occasion. With their perfect structure and buttery richness, they’re the ideal canvas for your creative decorating ideas.
Ingredients
- 2 3/4 cups all-purpose flour
- 1 teaspoon baking powder
- 1/2 teaspoon salt
- 1 cup unsalted butter, at room temperature
- 1 1/2 cups granulated sugar
- 1 large egg, at room temperature
- 2 teaspoons vanilla extract
Instructions
- In a large mixing bowl, beat the room temperature unsalted butter on medium speed until smooth and creamy, about 1 minute.
- Gradually add the granulated sugar and continue to beat on medium-high speed for 3-5 minutes, until light in color and fluffy.
- Reduce the mixer speed to low. Add the room temperature egg and vanilla extract to the creamed mixture and beat until just combined.
- In a separate medium bowl, whisk together the all-purpose flour, baking powder, and salt.
- With the mixer on low speed, gradually add the dry ingredient mixture to the wet ingredients, mixing only until the flour is just incorporated.
- Divide the dough into two equal portions, flatten each into a disk, wrap tightly in plastic wrap, and refrigerate for at least 1-2 hours, preferably overnight.
- Preheat your oven to 375°F (190°C) and line several baking sheets with parchment paper.
- Remove one disk of chilled dough from the refrigerator, lightly flour your work surface and rolling pin, and roll out the dough to 1/4-inch thickness.
- Using cookie cutters, cut out shapes and transfer them to the prepared baking sheets, leaving about 1 inch between cookies.
- Bake for 7-10 minutes, or until the edges are lightly golden and the centers still look pale.
- Let the cookies cool on the baking sheet for 5 minutes before transferring them to a wire rack to cool completely.
- Prep Time: 15 mins
- Cook Time: 10 mins
- Category: Dessert
- Method: Baking
- Cuisine: American
Nutrition
- Serving Size: 1 cookie
- Calories: 150
- Sugar: 10 g
- Sodium: 50 mg
- Fat: 8 g
- Saturated Fat: 5 g
- Unsaturated Fat: 2 g
- Trans Fat: 0 g
- Carbohydrates: 18 g
- Fiber: 0 g
- Protein: 1 g
- Cholesterol: 30 mg
Keywords: Make sure to chill the dough thoroughly to prevent spreading. Use parchment paper for easy transfer and even baking.


Leave a Comment