Christmas Cookie Lasagna Recipe
Hello, fellow food lovers! Are you ready for a holiday dessert that will absolutely wow your guests and become an instant Christmas classic in your home? Because I sure am excited to share my Christmas Cookie Lasagna Recipe with you!
What makes this recipe so special, you ask? Well, it’s the ultimate mash-up of everything we adore about holiday treats, presented in a dazzling, layered dessert that’s as fun to look at as it is to eat. You see, while traditional Christmas cookies are wonderful, sometimes you want something that offers a little more “oomph” with less individual fuss. This isn’t just a dessert; it’s a festive masterpiece!
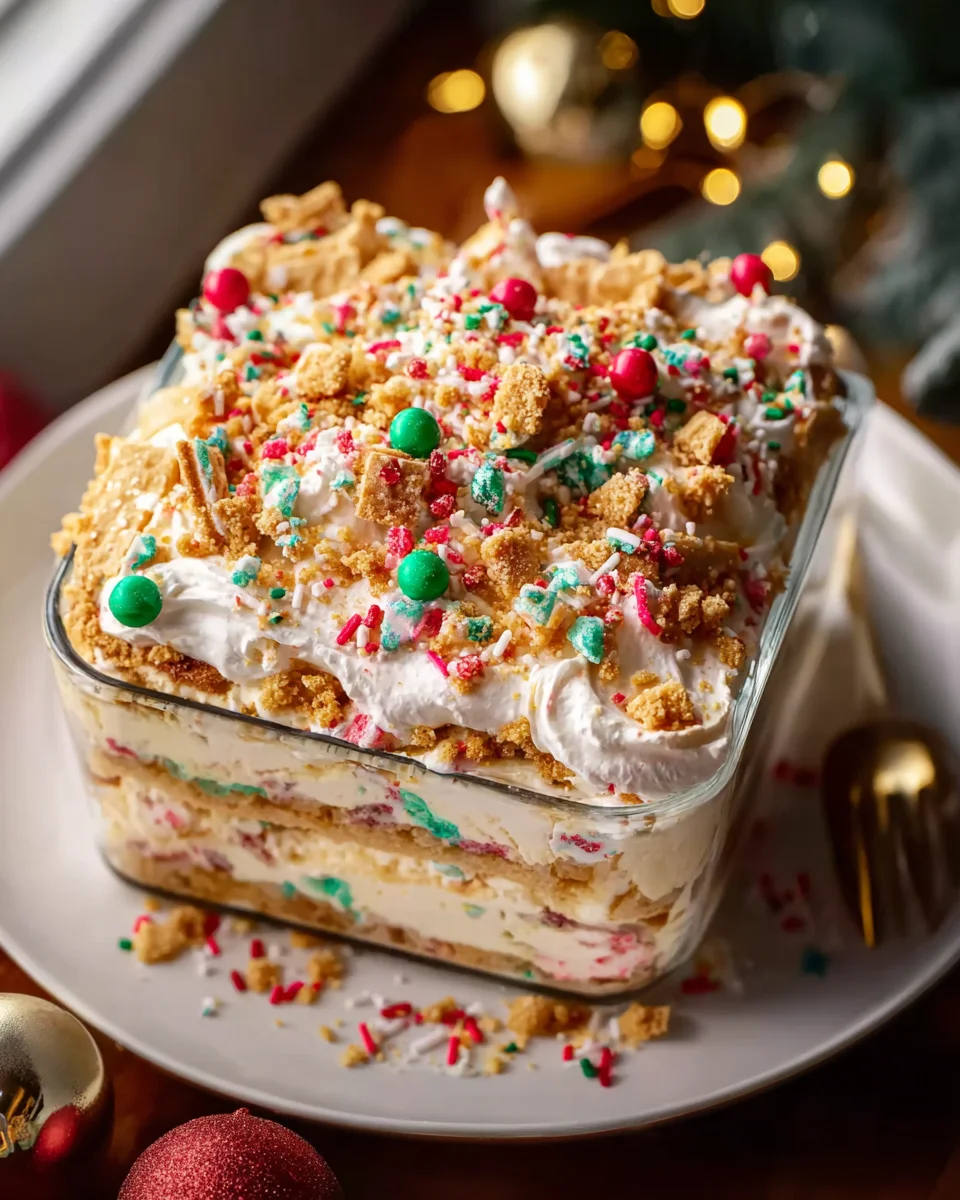
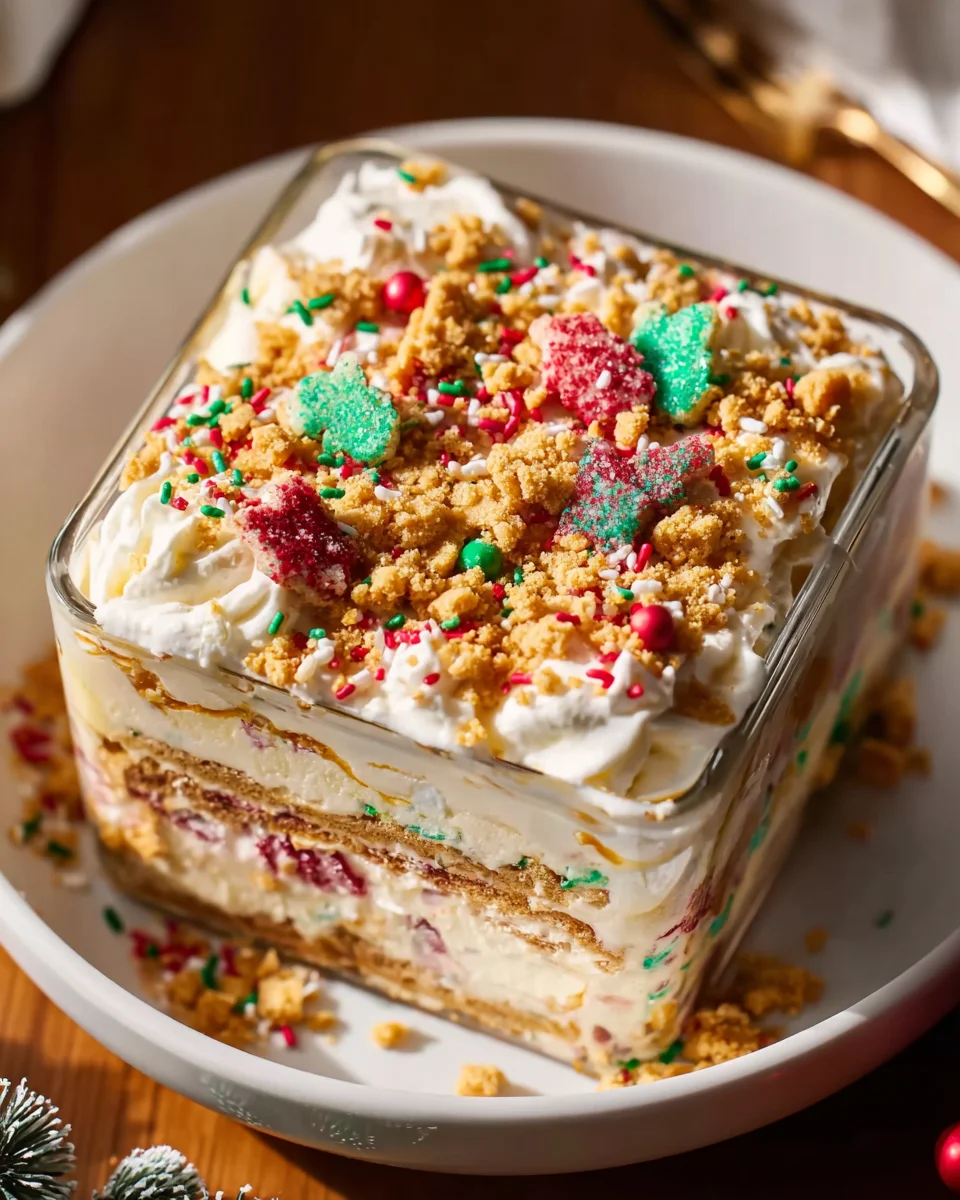
I know you’re going to love it because it takes the beloved concept of a creamy, layered lasagna and transforms it into a no-bake, utterly decadent Christmas dream. Imagine this: a delightful base of crushed festive cookies, followed by a light and airy cream cheese layer, then more delicious holiday cookies nestled in, all topped with a dreamy whipped topping and a scattering of joyful sprinkles. It’s rich, it’s creamy, it’s crunchy, and it brings all those beloved holiday flavors together in one incredible slice. Perfect for your holiday party spread or a cozy family gathering, it’s a showstopper that requires no oven time – just chilling! Get ready to impress everyone with this brilliant holiday creation.
Ingredient Notes
Creating a truly delightful Christmas Cookie Lasagna starts with understanding its core components. This isn’t your savory pasta dish; it’s a luscious, layered dessert that brings together the best of holiday cookies and creamy fillings. Here’s a rundown of the key ingredients I use and some helpful substitutions to make this recipe your own.
- Christmas Cookies: This is the foundation of our lasagna, and where the “cookie” truly shines! I love to use a mix of festive cookies for the base. Think gingerbread snaps, crisp shortbread cookies, or even classic sugar cookies. You’ll need about 10-12 ounces (roughly 25-30 cookies, depending on size and thickness) to create a nice, crumbly base. I usually buy a variety of high-quality store-bought Christmas cookies to save time, but homemade ones work wonderfully if you have them on hand.
- Unsalted Butter: This is essential for binding our cookie crumb base. Melted butter helps the crumbs set firmly. If you only have salted butter, that’s perfectly fine; just omit any extra pinch of salt you might be tempted to add elsewhere.
- Cream Cheese: For that signature rich and tangy filling, full-fat cream cheese is my go-to. It gives the best texture and flavor. Make sure it’s softened to room temperature before mixing – this is crucial for a smooth, lump-free filling. If you’re looking for a slightly lighter version, you can use a reduced-fat cream cheese, but be aware it might alter the texture slightly.
- Powdered Sugar: Also known as confectioners’ sugar, this provides the perfect sweetness and a silky-smooth texture to our cream cheese layer. Sifting it isn’t always necessary if your cream cheese is well-softened, but it certainly helps prevent lumps.
- Milk: A splash of milk, usually 2% or whole milk, helps loosen the cream cheese mixture to a spreadable consistency.
- Non-Alcohol Vanilla Extract: Vanilla is a classic flavor enhancer. I always opt for a good quality non-alcohol vanilla extract to ensure that pure, sweet aroma without any alcoholic undertones, keeping it family-friendly.
- Whipped Topping: A good quality frozen whipped topping, like Cool Whip, is incredibly convenient for this recipe. Just make sure it’s thawed in the refrigerator before use. If you prefer to make your own, a batch of freshly whipped heavy cream sweetened with a little powdered sugar and non-alcohol vanilla extract works beautifully, but it can be a bit more delicate.
- Festive Toppings: This is where you can truly let your Christmas spirit shine! I love using a mix of holiday sprinkles, chocolate shavings or mini chocolate chips, and sometimes even a sprinkle of crushed peppermint candies (check labels to ensure they are free of alcohol-based flavorings if this is a concern).
Substitutions & Flavor Variations:
- Cookie Base: Feel free to experiment! Graham crackers, vanilla wafers, or even chocolate cookies can be used if you’re not strictly adhering to Christmas cookie flavors.
- Cream Cheese Flavorings: Get creative with non-alcohol extracts! A touch of non-alcohol peppermint extract can give it a minty twist, non-alcohol almond extract adds a delightful nutty note, or even a dash of non-alcohol rum flavoring for a festive “eggnog” vibe.
- Toppings: Drizzle with melted white chocolate, a sprinkle of toasted coconut, or even finely chopped pecans (ensure no beef fat is used in roasting processes if that’s a dietary concern, though rare for nuts).
Step-by-Step Instructions
Making this Christmas Cookie Lasagna is incredibly fun and surprisingly straightforward. The key is in the layering and allowing ample chilling time. Here’s how I put it all together:
- Prepare the Cookie Crust:
- First, I grab my chosen Christmas cookies and place them in a food processor. I pulse them until they form fine crumbs. If you don’t have a food processor, no worries! You can place the cookies in a large zip-top bag and crush them with a rolling pin until they’re finely ground.
- Next, I melt the unsalted butter and pour it over the cookie crumbs in a medium bowl. I stir everything together until the crumbs are evenly moistened.
- I then press this mixture firmly into the bottom of a 9×13 inch baking dish. I use the bottom of a glass or my knuckles to ensure it’s a compact, even layer. Once pressed, I pop it into the refrigerator for at least 15-20 minutes to chill and set while I prepare the next layer.
- Make the Cream Cheese Layer:
- In a large mixing bowl, I beat the softened cream cheese with an electric mixer until it’s smooth and creamy. This usually takes about 2-3 minutes.
- Then, I gradually add the powdered sugar, beating until it’s fully incorporated and the mixture is light and fluffy. This is important for a smooth texture.
- I mix in the non-alcohol vanilla extract and the milk until the mixture is well combined and has a spreadable consistency. If it seems too thick, I might add another teaspoon of milk, but sparingly, as you don’t want it too thin.
- Assemble the First Layers:
- I retrieve the chilled cookie crust from the refrigerator.
- Carefully, I spread the entire cream cheese mixture evenly over the cookie crust. I use an offset spatula or the back of a spoon to ensure it’s smooth right to the edges of the pan.
- Add the Whipped Topping Layer:
- Once the cream cheese layer is smooth, I gently spread the thawed whipped topping over the cream cheese layer. Again, I take my time to make sure it’s an even, cloud-like layer covering the entire surface.
- Chill Thoroughly:
- This is arguably the most critical step! I cover the baking dish loosely with plastic wrap and refrigerate the Christmas Cookie Lasagna for at least 4-6 hours, but ideally overnight. This allows the layers to set properly, and for the cookie crust to soften slightly, making it much easier to slice and enjoy.
- Decorate and Serve:
- Just before serving, I remove the lasagna from the fridge. Now’s the fun part – decorating! I sprinkle generously with festive holiday sprinkles, chocolate shavings, or any other festive toppings I’ve chosen.
- To serve, I use a sharp knife (dipped in hot water and wiped clean between slices for extra neatness) to cut the lasagna into squares. Enjoy your beautiful and delicious Christmas Cookie Lasagna!
Tips & Suggestions
I’ve made this Christmas Cookie Lasagna many times, and over the years, I’ve picked up a few tricks and tips that help make it even more successful and delicious. Here are my best suggestions:
- Soften Cookies for Easier Eating: While the chilling time helps soften the cookie crust, if you’re using very hard cookies (like ginger snaps), you might want to slightly dampen the cookie crumbs with a tablespoon or two of milk before pressing them into the pan. This helps them absorb moisture from the cream cheese layer more readily, preventing a rock-hard bottom layer when you slice it.
- Achieve Clean Slices: For presentation-perfect squares, use a large, sharp knife. Dip the knife in hot water and wipe it clean with a paper towel before each cut. This prevents the layers from sticking and smearing, giving you beautifully defined slices.
- Personalize Your Flavors: Don’t be afraid to experiment with the cream cheese layer! Beyond non-alcohol vanilla, consider folding in a teaspoon of non-alcohol peppermint extract for a minty twist, or a hint of non-alcohol almond extract. For a little zest, you could even add finely grated orange or lemon zest – just make sure it complements your chosen cookies.
- Layering Techniques: For extra fancy presentation, you could divide the cream cheese mixture and add different non-alcohol flavorings or food colorings to each part, creating an additional colorful layer. You could also create a double cookie layer – a cookie base, then cream cheese, then another thinner layer of crushed cookies, then whipped topping.
- Make Ahead Mastery: This dessert is an absolute superstar for making ahead! It truly needs that overnight chill to set properly and allow the flavors to meld. Preparing it the day before your gathering means one less thing to worry about on the day of, and it often tastes even better!
- Cookie Combinations: While a single type of cookie works, I find that a blend offers more depth. For instance, a mix of gingersnaps and shortbread creates a lovely balance of spice and buttery richness. Think about complementary flavors.
- Topping Variations: Beyond sprinkles and chocolate, consider toasted coconut flakes, finely chopped candied pecans (again, checking for beef products in processing if that is a concern), a drizzle of white chocolate or caramel sauce (ensure non-alcohol flavoring), or even a scattering of edible glitter for extra holiday sparkle!
Storage
Proper storage is essential to keep your Christmas Cookie Lasagna fresh, delicious, and safe to eat. Here’s what I recommend:
- Refrigeration: This dessert must be stored in the refrigerator due to its dairy-based layers (cream cheese and whipped topping). Once assembled and chilled, cover the baking dish tightly with plastic wrap or aluminum foil. This prevents it from absorbing any odors from other foods in the fridge and keeps the layers from drying out. It will stay fresh and delicious for up to 3-4 days in the refrigerator.
- Serving Best Practice: I find it tastes best when served chilled directly from the refrigerator. Don’t let it sit out at room temperature for more than 2 hours, especially in a warm environment, as the whipped topping and cream cheese can start to soften and potentially spoil.
- Freezing (with caution): While you can freeze Christmas Cookie Lasagna, I generally don’t recommend it for optimal texture, especially if you’re using a store-bought whipped topping like Cool Whip. Freezing can sometimes alter the texture of the whipped topping, making it a bit watery or icy upon thawing. However, if you must freeze it, wrap the entire dish very tightly in multiple layers of plastic wrap and then a layer of aluminum foil. It can be stored in the freezer for up to 1 month.
- Thawing from Frozen: If you do freeze it, thaw the lasagna slowly in the refrigerator overnight. Do not attempt to thaw it at room temperature. Once thawed, give it a quick check for texture, and you might find it beneficial to add fresh festive toppings if the original ones look a bit lackluster after freezing.
Final Thoughts
And there you have it! Our journey through creating the spectacular Christmas Cookie Lasagna Recipe comes to a sweet, satisfying end. I truly hope you’re as excited as I am about bringing this unique dessert to your holiday table. Forget the usual suspects; this dish is a total game-changer, blending the comforting familiarity of your favorite Christmas cookies with a presentation that’s undeniably show-stopping.
I find that what makes the Christmas Cookie Lasagna Recipe a true must-try is its incredible ability to delight everyone. It’s surprisingly simple to assemble, yet yields a dessert that looks like you spent hours crafting a masterpiece. The layers of festive flavors and delightful textures are just heavenly, making it the perfect sweet treat for any gathering, big or small. Imagine the smiles when you present this beautiful creation!
So, this festive season, I heartily encourage you to give the Christmas Cookie Lasagna Recipe a try. It’s more than just a dessert; it’s a memorable experience waiting to happen, a new tradition in the making. Get ready to impress your loved ones and spread some serious holiday cheer with every delicious, layered slice. Happy baking!

Best Christmas Cookie Lasagna Recipe – Easy No-Bake Dessert
- Total Time: 30 minutes
- Yield: 12 servings 1x
Description
This Christmas Cookie Lasagna is a delightful no-bake dessert that combines festive cookies with creamy layers for a show-stopping treat. Perfect for holiday gatherings, it’s easy to make and sure to impress your guests!
Ingredients
- 10–12 ounces of Christmas cookies (roughly 25–30 cookies, depending on size and thickness)
- 1/2 cup unsalted butter, melted
- 8 ounces full-fat cream cheese, softened
- 1 cup powdered sugar
- 1/4 cup milk (2% or whole)
- 1 teaspoon non-alcohol vanilla extract
- 2 cups whipped topping (like Cool Whip, thawed)
- Festive toppings (holiday sprinkles, chocolate shavings, mini chocolate chips, crushed peppermint candies)
Instructions
- Prepare the Cookie Crust: First, grab your chosen Christmas cookies and place them in a food processor. Pulse them until they form fine crumbs. If you don't have a food processor, place the cookies in a large zip-top bag and crush them with a rolling pin until they're finely ground.
- Melt the unsalted butter and pour it over the cookie crumbs in a medium bowl. Stir everything together until the crumbs are evenly moistened.
- Press this mixture firmly into the bottom of a 9×13 inch baking dish. Use the bottom of a glass or your knuckles to ensure it's a compact, even layer. Once pressed, pop it into the refrigerator for at least 15-20 minutes to chill and set while preparing the next layer.
- Make the Cream Cheese Layer: In a large mixing bowl, beat the softened cream cheese with an electric mixer until it's smooth and creamy, about 2-3 minutes.
- Gradually add the powdered sugar, beating until it's fully incorporated and the mixture is light and fluffy.
- Mix in the non-alcohol vanilla extract and the milk until the mixture is well combined and has a spreadable consistency. If it seems too thick, add another teaspoon of milk sparingly.
- Assemble the First Layers: Retrieve the chilled cookie crust from the refrigerator. Carefully spread the entire cream cheese mixture evenly over the cookie crust using an offset spatula or the back of a spoon.
- Add the Whipped Topping Layer: Gently spread the thawed whipped topping over the cream cheese layer, ensuring it's an even layer covering the entire surface.
- Chill Thoroughly: Cover the baking dish loosely with plastic wrap and refrigerate the Christmas Cookie Lasagna for at least 4-6 hours, ideally overnight.
- Decorate and Serve: Just before serving, remove the lasagna from the fridge and decorate with festive holiday sprinkles, chocolate shavings, or other toppings. Use a sharp knife dipped in hot water and wiped clean between slices to cut the lasagna into squares.
- Prep Time: 30 mins
- Cook Time: 0 mins
- Category: Dessert
- Method: No-Bake
- Cuisine: American
Nutrition
- Serving Size: 1 square
- Calories: 250
- Sugar: 20 g
- Sodium: 150 mg
- Fat: 12 g
- Saturated Fat: 7 g
- Unsaturated Fat: 3 g
- Trans Fat: 0 g
- Carbohydrates: 32 g
- Fiber: 1 g
- Protein: 3 g
- Cholesterol: 30 mg
Keywords: For easier eating, slightly dampen hard cookie crumbs with milk before pressing them into the pan. For clean slices, use a sharp knife dipped in hot water before each cut. Feel free to personalize flavors with different extracts or toppings.


Leave a Comment