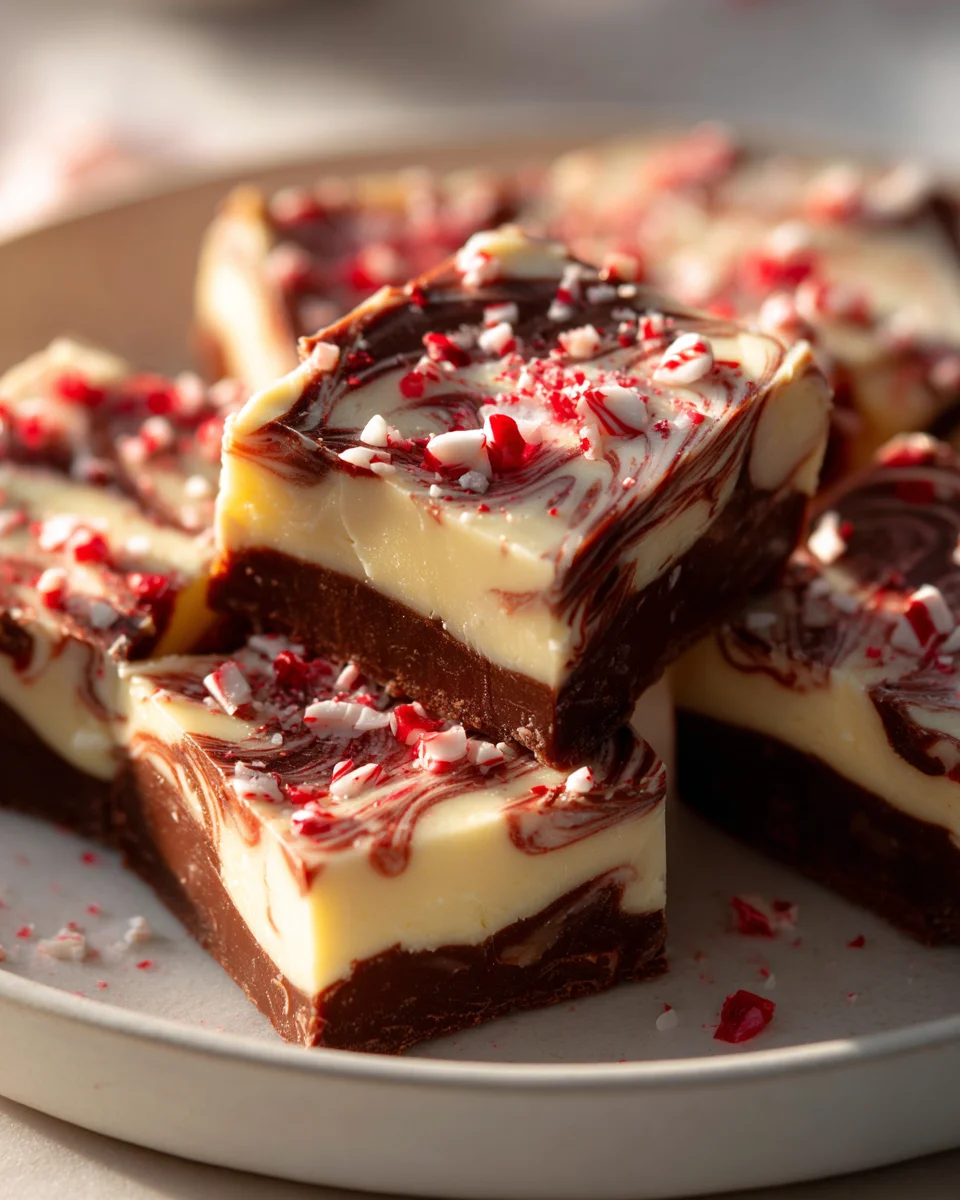
Peppermint Bark Fudge With Creamy Texture
Oh my goodness, get ready to experience a holiday miracle in dessert form! I’m so excited to share my absolute favorite recipe for Peppermint Bark Fudge With Creamy Texture. This isn’t just any ordinary fudge; it’s a magnificent fusion that captures the best of two beloved festive treats: the refreshing crunch of peppermint bark and the unbelievably smooth, melt-in-your-mouth richness of homemade fudge.
What makes this particular recipe so special, you ask? Well, it’s all in that incredible texture! We’re talking about a fudge so creamy it practically dissolves on your tongue, perfectly complemented by the delightful snap and cool burst of peppermint from the bark topping. I promise you, once you taste that first bite – the rich chocolate, the cool peppermint, and the satisfying crunch, all wrapped in a dreamily creamy package – you’ll understand why this dish is an instant holiday classic. It’s perfect for gifting, dazzling your guests, or simply treating yourself to a little slice of festive heaven. Get ready to impress everyone with this incredibly easy, yet utterly luxurious, confection!
Ingredient Notes
Crafting the perfect Peppermint Bark Fudge with that irresistibly creamy texture truly begins with selecting the right ingredients. Each component plays a vital role in achieving that decadent, smooth consistency and classic peppermint bark flavor we’re aiming for.
- Sweetened Condensed Milk: This is the superstar ingredient for our fudge’s creaminess. It’s not just for sweetness; the high sugar content and thick consistency are what give the fudge its characteristic smooth, dense, and non-grainy texture when combined with chocolate. There’s really no direct substitute for sweetened condensed milk in this type of fudge – evaporated milk or regular milk simply won’t yield the same firm yet creamy results, so make sure you pick up the right can!
- Quality Chocolate: For the best flavor and melt, opt for good quality chocolate. You’ll need both dark or semi-sweet chocolate and white chocolate to create the “bark” effect. I usually go for good quality chocolate chips or chopped baking bars. For the dark chocolate, a 60-70% cacao works beautifully without being too bitter. For the white chocolate, make sure it’s actual white chocolate, not “white baking chips” that can sometimes contain less cocoa butter and more vegetable fats, which can affect the melt and creaminess. The higher the quality, the smoother the final fudge will be.
- Unsalted Butter: A touch of unsalted butter adds richness, a beautiful gloss, and contributes to that melt-in-your-mouth creamy texture. It also helps prevent the chocolate from seizing and makes the fudge easier to cut. Always use unsalted so you can control the salt level yourself.
- Peppermint Extract: This is where the “peppermint” comes in! Use pure peppermint extract for the most authentic flavor. Start with a smaller amount and add more to taste, as extracts can vary in strength. Too much and your fudge can taste like toothpaste! For those who prefer non-alcohol alternatives, there are alcohol-free peppermint extracts available, which work just as well for flavor without any unwanted alcohol content.
- Crushed Peppermint Candies/Candy Canes: These provide the iconic peppermint bark crunch and a beautiful visual appeal. You can use pre-crushed candies or crush your own candy canes. Make sure they are crushed into varying sizes for visual interest and texture.
- Optional: Vanilla Extract and Pinch of Salt: A splash of vanilla extract can enhance the overall flavor profile, complementing the chocolate and peppermint. A tiny pinch of fine sea salt can also balance the sweetness and deepen the chocolate flavor without making the fudge taste salty.
Step-by-Step Instructions
Creating this Peppermint Bark Fudge with a dreamy, creamy texture is surprisingly simple, even for novice bakers. Follow these steps, and you’ll have a delightful treat in no time!
- Prepare Your Pan: First things first, line an 8×8 or 9×9-inch baking pan with parchment paper or foil, leaving an overhang on the sides. This overhang will act as handles, making it incredibly easy to lift the set fudge out of the pan later. Lightly grease the paper or foil if you’re feeling extra cautious, though with parchment, it’s usually not necessary.
- Melt the Dark/Semi-Sweet Chocolate Base: In a medium microwave-safe bowl, combine your dark or semi-sweet chocolate chips (or chopped chocolate) with half of the sweetened condensed milk and half of the butter. I find the microwave method easiest here: heat in 30-second intervals, stirring well after each, until the mixture is completely smooth and melted. Alternatively, you can use a double boiler over simmering water, stirring until smooth. Make sure not to overheat the chocolate, as this can make it seize or become grainy. Once melted, stir in half of the peppermint extract (about 1/2 teaspoon, or to your taste for the dark layer) and the optional pinch of salt.
- Press and Chill the Dark Layer: Pour the dark chocolate fudge mixture into your prepared pan. Use an offset spatula or the back of a spoon to spread it evenly into a smooth layer. Tap the pan gently on the counter a few times to release any air bubbles. Place the pan in the refrigerator for about 10-15 minutes, or until the layer is just set enough to hold the next layer without mixing, but not completely hard. This is key for distinct layers.
- Melt the White Chocolate Layer: While the dark layer is chilling, prepare your white chocolate layer. In a separate microwave-safe bowl, combine the white chocolate chips (or chopped white chocolate) with the remaining sweetened condensed milk and the remaining butter. Again, heat in 30-second intervals in the microwave, stirring well after each, until completely smooth. Stir in the remaining peppermint extract (1/2 teaspoon, or to your taste for the white layer) and the optional vanilla extract, if using.
- Layer and Decorate: Once the dark chocolate layer is just set, carefully pour the warm white chocolate fudge mixture over it. Gently spread it evenly to cover the dark layer. Immediately sprinkle the crushed peppermint candies or candy canes evenly over the top of the white chocolate layer. Gently press the candies into the fudge slightly with the back of a spoon or your hand to ensure they adhere well.
- Set and Cut: Return the pan to the refrigerator and chill for at least 2-4 hours, or preferably overnight, until the fudge is completely firm. Once fully set, use the parchment paper overhang to lift the entire slab of fudge out of the pan. Place it on a cutting board and use a large, sharp knife to cut it into squares. For extra clean cuts, wipe your knife with a warm, damp cloth between each slice.
Tips & Suggestions
Achieving that signature creamy texture and perfect peppermint bark flavor requires a few key insights. Here are my best tips to ensure your fudge turns out absolutely perfect every time:
- For the Ultimate Creamy Texture:
- Don’t Overheat the Chocolate: This is crucial. Overheating chocolate, especially white chocolate, can cause it to seize, become grainy, or even burn. Melt it slowly, whether in the microwave (short bursts, stir well) or a double boiler (gentle heat, don’t let water touch the bowl). Patience is key for a silky-smooth melt.
- Use Quality Ingredients: As mentioned in the ingredient notes, good quality chocolate and sweetened condensed milk make a noticeable difference in the final texture and taste. Cheaper chocolates with more fillers can result in a waxier or less smooth fudge.
- Proper Chilling is Essential: While the fudge feels set after a couple of hours, allowing it to chill for at least 4 hours or, even better, overnight, ensures it firm-sets completely and develops its full creamy density. Don’t rush this step!
- Adjusting Peppermint Intensity: Peppermint extract can be quite potent. I recommend starting with the specified amount (about 1/2 teaspoon per layer) and then tasting a tiny bit of the melted fudge mixture before pouring it. If you prefer a stronger peppermint kick, add just a drop or two more at a time, stirring well after each addition. It’s easier to add more than to fix an overly strong peppermint flavor!
- Crushing Candy Canes Like a Pro: If you’re crushing your own candy canes, place them in a sturdy freezer bag (or two bags for extra security) and seal tightly, removing excess air. Then, use a rolling pin or the flat side of a meat tenderizer to smash them into varying sized pieces. Avoid a food processor unless you want a very fine powder, as some larger chunks add to the “bark” feel.
- Achieving Clean Cuts: Fudge can be sticky! For perfectly neat squares, use a large, sharp chef’s knife. Before each cut, warm the knife by running it under hot water, then wipe it completely dry. The warm, clean blade will glide through the fudge without dragging or sticking, giving you beautiful, clean edges.
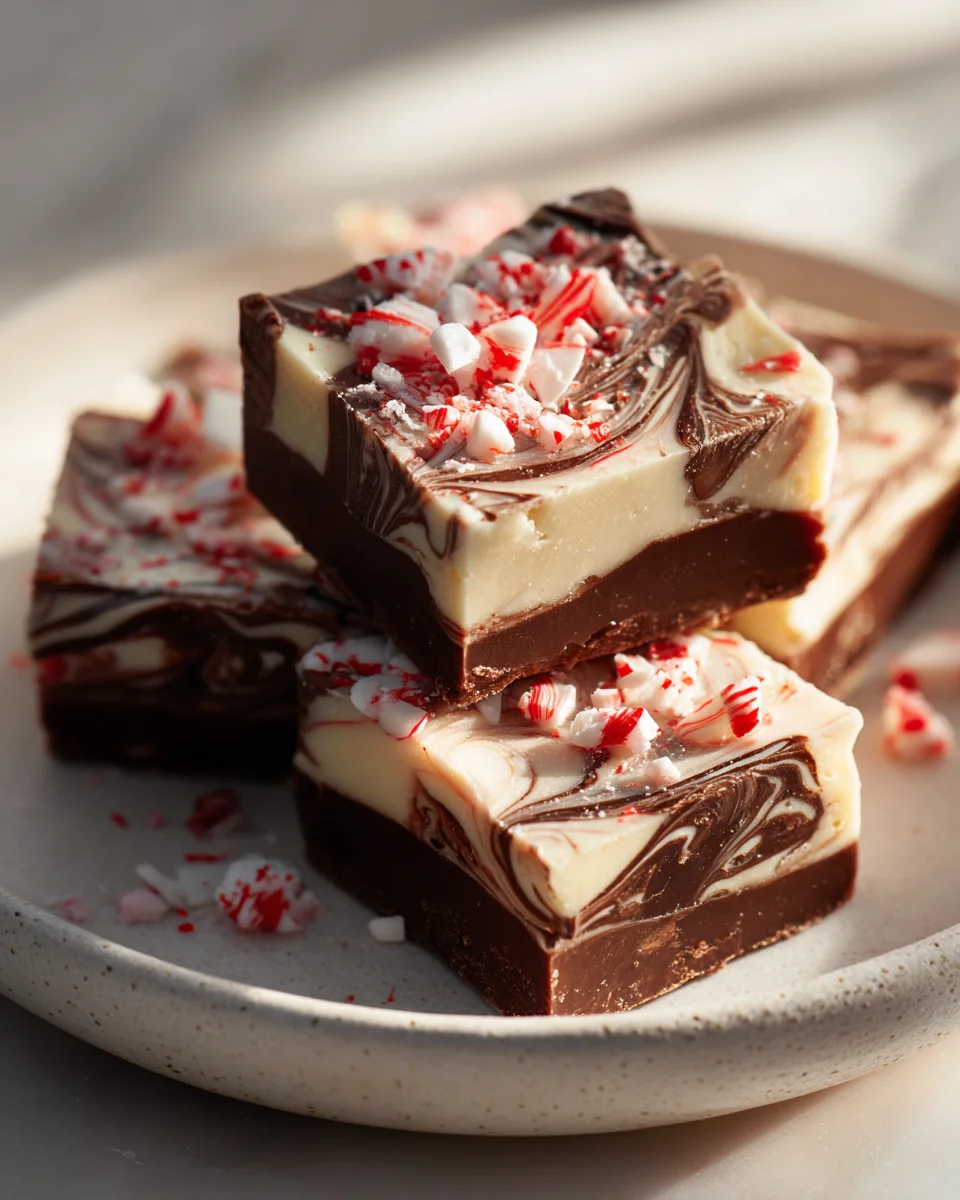
- Swirled vs. Layered Fudge: While I’ve given instructions for a distinct layered fudge, you can easily create a swirled effect. After pouring the white chocolate layer over the dark, take a skewer or a butter knife and gently swirl through the two layers a few times to create a marbleized pattern before adding the crushed peppermints.
Storage
Once you’ve gone to the effort of making this incredibly creamy Peppermint Bark Fudge, you’ll want to make sure it stays fresh and delicious for as long as possible. Proper storage is key!
- Room Temperature Storage: For short-term enjoyment (a few days), you can store the fudge at cool room temperature, provided your kitchen isn’t overly warm or humid. Place the fudge in an airtight container. If you stack the pieces, place a piece of parchment paper between the layers to prevent them from sticking together. This is especially important for fudge with a creamy texture, as it can be softer.
- Refrigeration for Optimal Freshness: For longer storage and to maintain that firm, creamy texture, I highly recommend storing your Peppermint Bark Fudge in the refrigerator. Again, an airtight container is essential to prevent it from drying out or absorbing any odors from other foods in your fridge. Stored this way, the fudge will typically last for up to 2-3 weeks. When you’re ready to enjoy a piece, you can eat it straight from the fridge for a firmer chew, or let it sit out for 10-15 minutes to soften slightly and become even creamier.
- Freezing for Extended Shelf Life: Yes, you can freeze this fudge! This is a fantastic option if you’ve made a large batch or want to prepare it ahead of time for holidays or gifts.
- First, cut the fudge into individual squares.
- Wrap each square tightly in plastic wrap, or place them in an airtight freezer-safe container, separating layers with parchment paper.
- Label the container with the date.
Frozen fudge can last beautifully for up to 3 months. To thaw, simply transfer the desired amount of fudge to the refrigerator overnight, or let it sit at room temperature for an hour or two until softened to your preferred consistency.
- Preventing Sticking: Regardless of where you store it, always separate layers of fudge with parchment paper. This prevents the pieces from fusing together, especially important for our deliciously creamy and slightly softer fudge texture.
Final Thoughts
And there you have it! I truly hope you’ve enjoyed this journey to creating something truly magical in your kitchen. This Peppermint Bark Fudge With Creamy Texture isn’t just another dessert; it’s an experience that I’m incredibly excited for you to try. I believe it’s a must-try because it perfectly marries the refreshing, festive crunch of peppermint bark with an incredibly smooth, melt-in-your-mouth fudge consistency that is simply irresistible. It’s the kind of treat that brightens any holiday gathering, makes for a thoughtful homemade gift, or simply becomes your new favorite indulgent escape on a cozy evening. Once you taste the rich chocolate, the cool peppermint, and that signature creamy texture, you’ll understand why I’m so passionate about this particular recipe. Go on, give this delightful Peppermint Bark Fudge With Creamy Texture a try – I promise, your taste buds will thank you!

Smooth & Creamy Peppermint Bark Fudge: A Holiday Treat!
- Total Time: 45 minutes
- Yield: 16 servings 1x
Description
Experience a holiday miracle with this Peppermint Bark Fudge that combines the refreshing crunch of peppermint bark with the smooth richness of homemade fudge. Perfect for gifting or treating yourself, this easy recipe will impress everyone at your holiday gatherings.
Ingredients
- 1 can Sweetened Condensed Milk
- 8 oz Dark or Semi-Sweet Chocolate (chips or chopped)
- 8 oz White Chocolate (chips or chopped)
- 4 tbsp Unsalted Butter
- 1 tsp Pure Peppermint Extract
- Crushed Peppermint Candies/Candy Canes
- Optional: 1 tsp Vanilla Extract
- Optional: Pinch of Fine Sea Salt
Instructions
- Prepare Your Pan: Line an 8×8 or 9×9-inch baking pan with parchment paper or foil, leaving an overhang on the sides. Lightly grease the paper or foil if desired.
- Melt the Dark/Semi-Sweet Chocolate Base: In a medium microwave-safe bowl, combine dark or semi-sweet chocolate with half of the sweetened condensed milk and half of the butter. Heat in 30-second intervals, stirring well after each, until smooth. Stir in half of the peppermint extract and the optional pinch of salt.
- Press and Chill the Dark Layer: Pour the dark chocolate mixture into the prepared pan and spread it evenly. Tap the pan gently on the counter to release air bubbles. Chill in the refrigerator for 10-15 minutes until just set.
- Melt the White Chocolate Layer: In a separate bowl, combine white chocolate with the remaining sweetened condensed milk and butter. Heat in 30-second intervals until smooth. Stir in the remaining peppermint extract and optional vanilla extract.
- Layer and Decorate: Once the dark layer is set, pour the white chocolate mixture over it and spread evenly. Sprinkle crushed peppermint candies on top and gently press them into the fudge.
- Set and Cut: Chill the pan in the refrigerator for at least 2-4 hours or overnight until firm. Use the parchment overhang to lift the fudge out and cut into squares.
- Prep Time: 15 mins
- Cook Time: 30 mins
- Category: Dessert
- Method: No-Bake
- Cuisine: American
Nutrition
- Serving Size: 1 square
- Calories: 150
- Sugar: 20 g
- Sodium: 30 mg
- Fat: 7 g
- Saturated Fat: 4 g
- Unsaturated Fat: 2 g
- Trans Fat: 0 g
- Carbohydrates: 20 g
- Fiber: 1 g
- Protein: 2 g
- Cholesterol: 10 mg
Keywords: For the best creamy texture, avoid overheating the chocolate and use high-quality ingredients. Adjust the peppermint intensity to your taste, and ensure to separate layers of fudge with parchment paper when storing.

Leave a Comment