Bubblegum Cloud Slice Dessert A Sweet Indulgence
Hey everyone! Are you ready for a dessert that’s pure magic, a whimsical dream come true, and seriously delicious? I know I am! Today, I’m thrilled to introduce you to something truly extraordinary that will bring a smile to your face and a burst of joyful flavor to your palate. We’re diving headfirst into the incredible world of Bubblegum Cloud Slice Dessert A Sweet Indulgence!
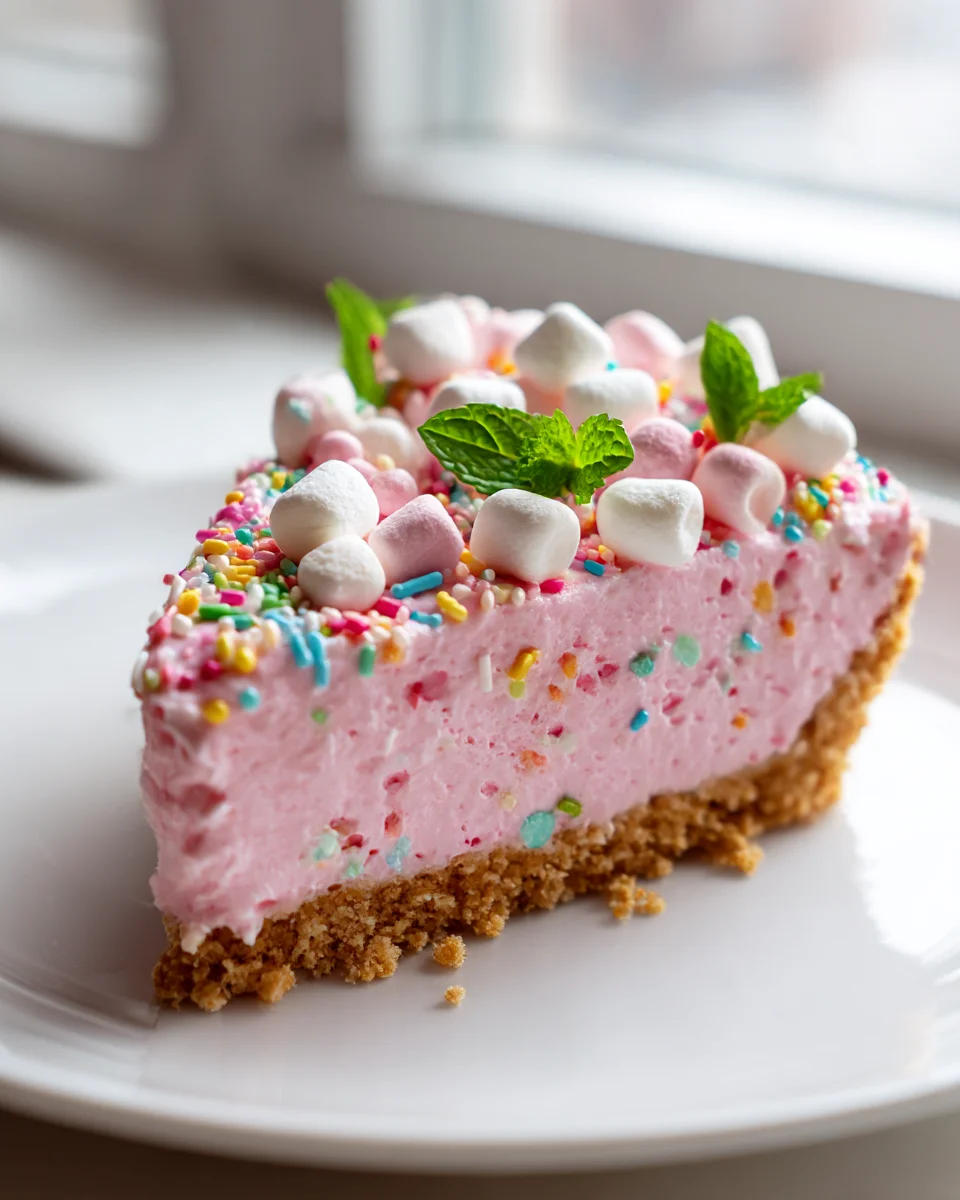
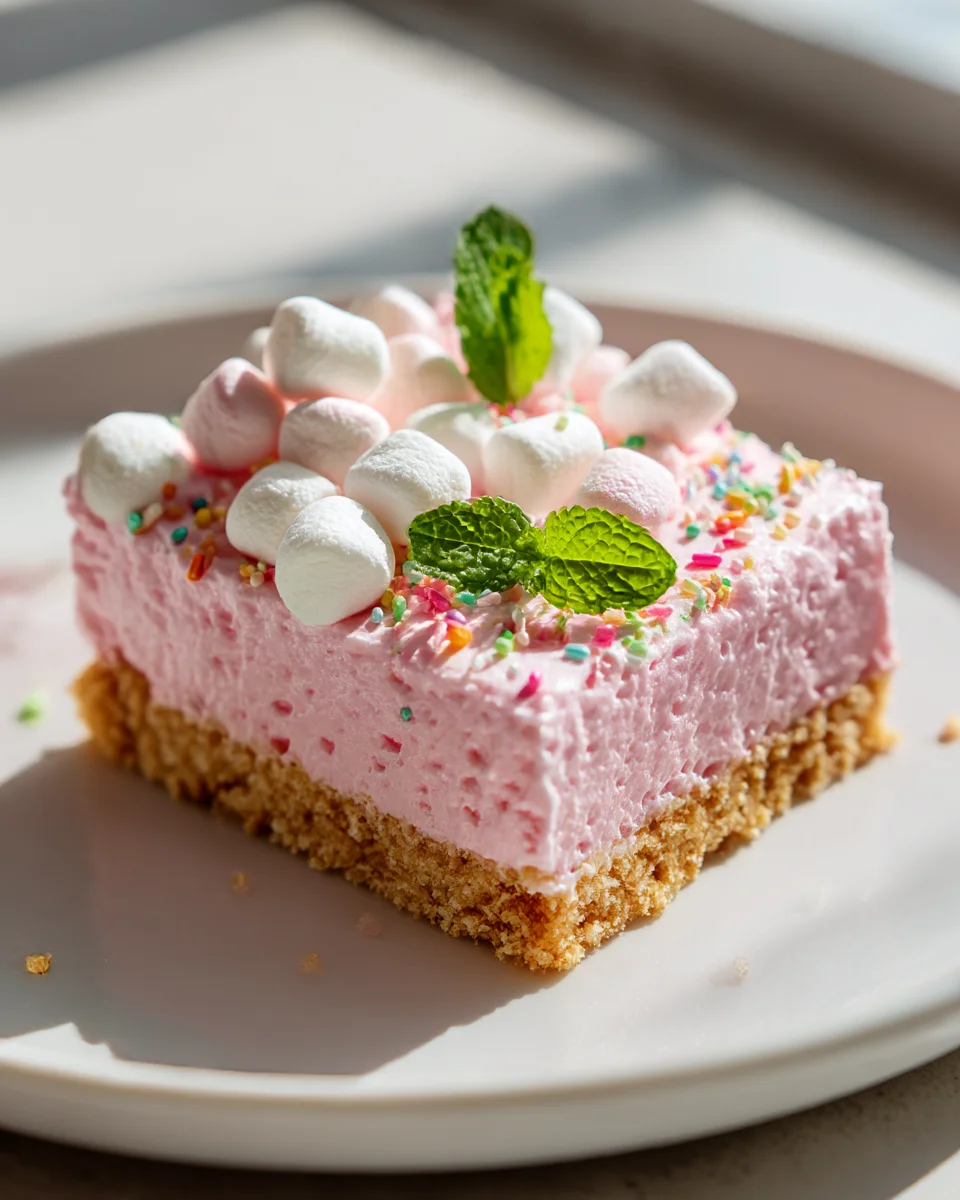
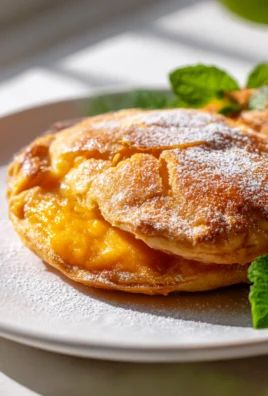
What makes this creation so incredibly special, you ask? Well, imagine the nostalgic, playful sweetness of bubblegum transformed into an ethereal, cloud-like dessert that practically melts in your mouth. This isn’t just any slice; it’s a vibrant, dreamy pink confection with an unbelievably light and fluffy texture that truly lives up to its “cloud” name. It’s a feast for the eyes as much as it is for your taste buds, promising a delightful escape from the ordinary.
You are absolutely going to adore this recipe because it’s a showstopper that’s surprisingly simple to create, making it perfect for impressing guests at a party, delighting the kids (and adults!) with its unique charm, or simply treating yourself to a joyful, sweet moment. Get ready for a buttery biscuit base, topped with a towering, airy layer of bubblegum-infused deliciousness, often crowned with even more cloud-like fluff and colourful sprinkles. It’s vibrant, fun, and utterly irresistible – a sweet indulgence in every single bite that will transport you straight back to the carefree days of childhood!
Welcome, fellow dessert lovers! Get ready to embark on a truly whimsical culinary adventure with my delightful Bubblegum Cloud Slice Dessert. This isn’t just any sweet treat; it’s a vibrant, airy, and utterly indulgent experience that promises to bring a smile to everyone’s face. Imagine a dreamy, cloud-like texture bursting with nostalgic bubblegum flavor, all nestled on a perfectly crisp biscuit base. It’s a feast for both the eyes and the palate, designed to be a showstopper at any gathering or a magical indulgence for yourself. Let’s dive into creating this sweet masterpiece!
Ingredient Notes
To create the ethereal Bubblegum Cloud Slice Dessert, we’ll need a carefully selected list of ingredients that work in harmony to achieve that unique texture and flavor. I’ve also included some handy substitutions if you need them!
- For the Biscuit Base:
- Vanilla Wafers or Shortbread Biscuits: These are my top picks for a delicate, buttery base that complements the light cloud layer without overpowering it. They crush easily and hold their shape beautifully.
- Unsalted Butter: Essential for binding the biscuit crumbs and adding richness. Make sure it’s melted before mixing.
- Substitution Tip: Feel free to use digestive biscuits, Graham crackers, or even gingernut biscuits if you prefer a different subtle flavor profile. For a dairy-free option, use a high-quality vegan butter alternative.
- For the Bubblegum Cloud Layer:
- Full-Fat Cream Cheese: This forms the creamy backbone of our cloud, providing richness and structure. Ensure it’s softened at room temperature for a smooth, lump-free mixture.
- Powdered Sugar (Icing Sugar): It dissolves effortlessly into the cream cheese, ensuring a silky-smooth texture without any grittiness, and sweetens our cloud perfectly.
- Heavy Cream (Whipping Cream): Crucial for achieving that airy, cloud-like consistency. It needs to be very cold to whip up properly, so keep it in the fridge until just before use.
- Bubblegum Extract: This is the star of the show! It’s what gives our dessert its signature, playful flavor. The quality of your extract can really make a difference, so choose a good one. You can usually find it in baking specialty stores or online.
- Unflavored Gelatin Powder: Our secret weapon for setting the cloud layer to perfection. It ensures a stable, sliceable dessert that still melts in your mouth.
- Milk (or Water): Used to “bloom” the gelatin, allowing it to hydrate properly before it’s dissolved and incorporated into the mixture.
- Gel Food Coloring (Pink and/or Blue): For that iconic bubblegum look! Gel colors are concentrated and won’t thin out your mixture like liquid dyes. I often use both pink and blue for a swirled, dreamy effect.
- Optional: A handful of mini marshmallows can be gently folded in for an extra “cloudy” texture and visual appeal, adding another layer of sweetness and chewiness.
- For Garnish:
- Rainbow Sprinkles or Bubblegum-Themed Sprinkles: These add a festive, playful finish and a delightful crunch. My favorite are the long, skinny ‘jimmie’ sprinkles!
Step-by-Step Instructions
Creating this Bubblegum Cloud Slice Dessert is a joyful process, and I’ve broken it down into clear, manageable steps to ensure your success. Patience is key, especially during the chilling phases!
- Prepare the Biscuit Base:
- First, take an 8×8 inch (20×20 cm) square baking pan and line it with parchment paper, leaving an overhang on two sides to help you lift the slice out later.
- Crush your vanilla wafers or shortbread biscuits into fine crumbs. You can use a food processor for speed or place them in a zip-top bag and crush with a rolling pin for a bit of stress relief!
- Melt the unsalted butter and pour it over the biscuit crumbs. Mix thoroughly until all the crumbs are moistened.
- Press the buttery crumbs firmly and evenly into the bottom of your prepared pan. Use the back of a spoon or a flat-bottomed glass to ensure it’s compact.
- Place the pan in the refrigerator for at least 30 minutes to chill and set while you prepare the cloud layer.
- Bloom the Gelatin:
- In a small, microwave-safe bowl, sprinkle the gelatin powder over 1/4 cup of milk (or water). Let it sit for 5-10 minutes. This process, called blooming, allows the gelatin granules to absorb liquid and swell, which is essential for proper dissolving later.
- Whip the Cream Cheese Mixture:
- In a large mixing bowl, beat the softened full-fat cream cheese with an electric mixer until it’s light and fluffy, with no lumps. This usually takes 2-3 minutes.
- Gradually add the powdered sugar to the cream cheese, beating until fully incorporated and smooth.
- Now, beat in the bubblegum extract. Start with a smaller amount (e.g., 1 teaspoon) and taste, adding more if you desire a stronger flavor. Remember, extracts can be potent!
- If you’re using food coloring, add it now. If you want a single color, mix it in until evenly distributed. If you’re going for a swirled effect, you might divide the mixture and color each portion separately later, or add drops of color at the end of this step and gently swirl.
- Prepare and Fold the Whipped Cream:
- In a separate, very cold bowl (I like to chill my bowl and beaters in the freezer for 10-15 minutes prior), pour the cold heavy cream.
- Whip the heavy cream on high speed until stiff peaks form. Be careful not to over-whip, as it can turn grainy.
- Gently fold about one-third of the whipped cream into the cream cheese mixture using a spatula, lightening it. Then, fold in the remaining whipped cream until just combined. The goal is to keep as much air in the mixture as possible, creating that “cloud” texture. If adding mini marshmallows, fold them in now.
- Dissolve and Incorporate Gelatin:
- Microwave the bloomed gelatin mixture for 10-15 seconds, or until it’s completely dissolved and clear (it should not boil). Stir well.
- Take about 1/4 cup of your whipped cream cheese mixture and whisk it into the warm, dissolved gelatin. This step, called tempering, prevents the gelatin from seizing when it hits the cold cream cheese mixture.
- Pour the tempered gelatin mixture back into the main bubblegum cloud mixture. Fold it in quickly and gently until fully incorporated.
- Assemble and Chill:
- Pour the bubblegum cloud mixture evenly over the chilled biscuit base in your pan.
- Gently tap the pan on the counter a few times to release any air bubbles and settle the mixture.
- Cover the pan loosely with plastic wrap and refrigerate for at least 4-6 hours, or preferably overnight, to allow the slice to set completely. This is crucial for a firm, sliceable dessert.
- Slice and Serve:
- Once fully set, use the parchment paper overhangs to carefully lift the entire slice out of the pan and onto a cutting board.
- For clean slices, heat a sharp knife under hot water, wipe it clean, and make your cuts. Repeat this process for each slice.
- Garnish each piece generously with rainbow sprinkles or bubblegum-themed sprinkles just before serving. Enjoy your magical Bubblegum Cloud Slice Dessert!
Tips & Suggestions
To ensure your Bubblegum Cloud Slice Dessert is nothing short of perfection, I’ve gathered some of my favorite tips and tricks:
- For the Perfect Base: When pressing the biscuit crumbs into the pan, make sure they are really compacted. This prevents a crumbly base and ensures your slice holds together beautifully when cut. I like to use the bottom of a drinking glass for even pressure.
- Chill Everything for the Cloud: For the best results when whipping cream, ensure your heavy cream, mixing bowl, and even your beaters are very cold. This helps the cream whip up faster and achieve a more stable, airy texture, essential for that “cloud” consistency.
- Don’t Overmix: When folding the whipped cream into the cream cheese mixture, be gentle! Overmixing can deflate the air you’ve worked so hard to incorporate, leading to a denser cloud. Stop as soon as everything is just combined.
- Adjust Bubblegum Flavor: Bubblegum extract strength can vary between brands. I always recommend adding it gradually, tasting as you go, until you achieve your desired intensity. You want that nostalgic flavor without it being overwhelming.
- Vibrant Colors with Gel: For that truly eye-catching bubblegum look, opt for gel food coloring over liquid. Gel colors are more concentrated, so you need less, and they won’t add unwanted liquid to your delicate cloud mixture. Don’t be shy with the pinks and blues!
- Patience is a Virtue (Especially for Setting): I know it’s hard to wait when a delicious dessert is chilling, but trust me, giving your Bubblegum Cloud Slice Dessert ample time in the refrigerator (at least 4-6 hours, but overnight is ideal) is crucial. A fully set slice will be easier to cut and have the perfect cloud-like texture.
- Clean Cuts: For perfectly neat slices, run your knife under hot water and wipe it clean before each cut. This trick prevents the cloud mixture from sticking and makes for a beautifully presented dessert.
- Creative Garnishes: While sprinkles are classic, feel free to get creative! A drizzle of white chocolate, a few fresh berries (though not very “bubblegum,” they add freshness), or even a few real mini bubblegums placed artfully can elevate the presentation.
Storage
Once you’ve indulged in a slice (or two!) of your incredible Bubblegum Cloud Slice Dessert, you’ll want to store the leftovers properly to keep them fresh and delicious.
- Refrigeration: This dessert must be stored in the refrigerator due to its dairy content. Place any leftover slices in an airtight container.
- Duration: When stored correctly, your Bubblegum Cloud Slice Dessert will remain fresh and delightful for up to 3-4 days in the fridge. The texture will maintain its integrity best in the first couple of days.
- Freezing: I generally do not recommend freezing this particular dessert. The delicate, airy texture of the “cloud” layer, which relies on whipped cream and gelatin, can change significantly upon thawing. It may become watery or lose its creamy consistency, so it’s best enjoyed fresh from the fridge.
- Serving: For the best experience, serve the slices chilled directly from the refrigerator.
Final Thoughts
Well, there you have it! I hope you’re as excited as I am about creating this delightful treat. Bubblegum Cloud Slice Dessert A Sweet Indulgence isn’t just a dessert; it’s a vibrant journey back to childhood, wrapped in a fluffy, sweet cloud. Its stunning pastel hues and unique bubblegum flavor make it an absolute showstopper, perfect for any occasion where you want to bring a smile to everyone’s face. Trust me, once you taste that light, airy texture combined with the nostalgic sweetness, you’ll understand why I can’t stop raving about it. It’s surprisingly simple to put together, yet yields results that look and taste incredibly impressive. So go ahead, treat yourself and your loved ones to the pure joy that is Bubblegum Cloud Slice Dessert A Sweet Indulgence. I promise, it’s a sweet indulgence you won’t regret!

Bubblegum Cloud Slice: Easy, Sweet & Indulgent Dessert
- Total Time: 30 minutes
- Yield: 16 servings
Description
Indulge in the whimsical delight of Bubblegum Cloud Slice, a dessert that combines nostalgic bubblegum flavor with a light, airy texture. This vibrant treat is perfect for impressing guests or enjoying a sweet moment at home.
Ingredients
- Vanilla Wafers or Shortbread Biscuits
- Unsalted Butter
- Full-Fat Cream Cheese
- Powdered Sugar (Icing Sugar)
- Heavy Cream (Whipping Cream)
- Bubblegum Extract
- Unflavored Gelatin Powder
- Milk (or Water)
- Gel Food Coloring (Pink and/or Blue)
- Mini Marshmallows (optional)
- Rainbow Sprinkles or Bubblegum-Themed Sprinkles
Instructions
- Prepare the Biscuit Base: First, take an 8×8 inch (20×20 cm) square baking pan and line it with parchment paper, leaving an overhang on two sides to help you lift the slice out later.
- Crush your vanilla wafers or shortbread biscuits into fine crumbs. You can use a food processor for speed or place them in a zip-top bag and crush with a rolling pin for a bit of stress relief!
- Melt the unsalted butter and pour it over the biscuit crumbs. Mix thoroughly until all the crumbs are moistened.
- Press the buttery crumbs firmly and evenly into the bottom of your prepared pan. Use the back of a spoon or a flat-bottomed glass to ensure it's compact.
- Place the pan in the refrigerator for at least 30 minutes to chill and set while you prepare the cloud layer.
- Bloom the Gelatin: In a small, microwave-safe bowl, sprinkle the gelatin powder over 1/4 cup of milk (or water). Let it sit for 5-10 minutes.
- Whip the Cream Cheese Mixture: In a large mixing bowl, beat the softened full-fat cream cheese with an electric mixer until it's light and fluffy, with no lumps. Gradually add the powdered sugar to the cream cheese, beating until fully incorporated and smooth.
- Now, beat in the bubblegum extract. Start with a smaller amount (e.g., 1 teaspoon) and taste, adding more if you desire a stronger flavor.
- If you’re using food coloring, add it now. If you want a single color, mix it in until evenly distributed.
- Prepare and Fold the Whipped Cream: In a separate, very cold bowl, pour the cold heavy cream. Whip the heavy cream on high speed until stiff peaks form.
- Gently fold about one-third of the whipped cream into the cream cheese mixture using a spatula, then fold in the remaining whipped cream until just combined.
- Dissolve and Incorporate Gelatin: Microwave the bloomed gelatin mixture for 10-15 seconds, or until it's completely dissolved and clear. Take about 1/4 cup of your whipped cream cheese mixture and whisk it into the warm, dissolved gelatin.
- Pour the tempered gelatin mixture back into the main bubblegum cloud mixture. Fold it in quickly and gently until fully incorporated.
- Assemble and Chill: Pour the bubblegum cloud mixture evenly over the chilled biscuit base in your pan. Gently tap the pan on the counter a few times to release any air bubbles and settle the mixture.
- Cover the pan loosely with plastic wrap and refrigerate for at least 4-6 hours, or preferably overnight, to allow the slice to set completely.
- Slice and Serve: Once fully set, use the parchment paper overhangs to carefully lift the entire slice out of the pan and onto a cutting board. For clean slices, heat a sharp knife under hot water, wipe it clean, and make your cuts.
- Garnish each piece generously with rainbow sprinkles or bubblegum-themed sprinkles just before serving.
- Prep Time: 30 mins
- Cook Time: 0 mins
- Category: Dessert
- Method: No-bake
- Cuisine: American
Nutrition
- Serving Size: 1 slice
- Calories: 250
- Sugar: 20 g
- Sodium: 150 mg
- Fat: 15 g
- Saturated Fat: 9 g
- Unsaturated Fat: 3 g
- Trans Fat: 0 g
- Carbohydrates: 30 g
- Fiber: 1 g
- Protein: 2 g
- Cholesterol: 30 mg
Keywords: For the perfect base, ensure the biscuit crumbs are compacted to prevent a crumbly base. Chill everything for the cloud layer to achieve a stable, airy texture. Adjust bubblegum flavor gradually, tasting as you go.
Leave a Comment